In ancient times, when people did not yet know about metal, tiles, corrugated sheets and other roofing materials, the roofs of houses were covered with straw or reeds. It would seem that in our age of advanced technology, the use of such material makes absolutely no sense, unless someone wants to decorate their home, guided by the principles of unity with nature.
However, recently, reed roofing has gained immense popularity literally all over the world. It turns out that reed as a type of finishing material has a lot of interesting advantages, and today “Dream House” will tell its readers in detail about them.
Reed - properties of finishing material
To produce reed roofing, experts use plant stems that are about a year old. The process of collecting, drying and storing reeds is quite lengthy and energy-consuming, but the unique properties of the plant fully justify the effort. From the point of view of construction and operation, reed as a type of finishing material has the following positive characteristics:
- Environmental friendliness . The stems of this plant, which belongs to the sedge family, have a unique structure. In properties and strength they resemble wood, however, unlike other natural products, lake reed stems do not absorb the negative influence of the environment. That is, even if the reed grows in an unfavorable ecological area, it remains clean. In addition, during preparation for roofing, reeds are practically not treated with additional carcinogens and chemicals.

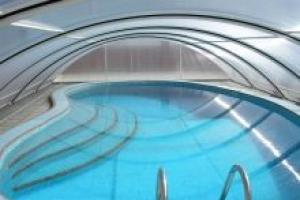
Reed roofing

- High resistance to weather conditions . Reed grows best near bodies of water and in swampy areas. But this plant is also not afraid of the scorching sun or frost. Consequently, reeds can be classified as the most weather-resistant coatings. If any other organic material inevitably deforms due to exposure to precipitation, then for reeds conditions of high humidity are natural.


Reed roof technology
- Unique microclimate . The reed roof creates a unique microclimate in the room. Firstly, the stems of the plant fill the air with beneficial molecules and essential oils, which have a beneficial effect on the human respiratory tract and nervous system. And, secondly, they ensure stability of the temperature in the room in all weather conditions. A house with a reed roof is cool in summer and warm in winter. In addition, the special structure of the reed stems gives this material high noise insulation.


Beautiful reed roof photo
- Flexibility and strength . Reed stems are very strong and durable. If installed correctly, a roof made from this plant can last more than 50 years. But, despite its strength, reeds are incredibly flexible, which opens up enormous scope for construction and architectural experiments.


However, the main advantage of reed roofing is manifested in aesthetics and extensive design possibilities. This material is excellent for decorating residential buildings and for decorating garden buildings, etc.
Buildings with a reed roof always look original and stylish, but most importantly, they are in perfect harmony with the environment, turning into an authentic landscape design object.

Large house with a reed roof


How to make a reed roof with your own hands

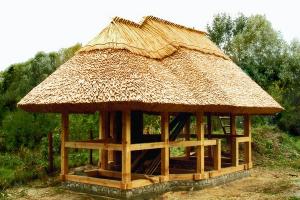
A simple reed roof for a gazebo
Reed roof and fire resistance
Listing the advantages of a reed roof, one cannot help but clarify that this organic material has one very significant drawback - low fire resistance. It's no secret that dry reeds can catch fire literally from one spark. To reduce the possible danger when using reed stems to decorate the roofs of residential buildings and gardens, experts often coat the material with fire retardants.
But here another problem arises: since the fire retardant is a rather harmful component, it completely destroys the ecological purity of the reeds.
Fortunately, builders from Western Europe managed to find a compromise between safety and environmental friendliness. To increase the fire resistance of a reed roof without treating the material with chemical components, they use a special installation method that blocks the flow of air to the roof, thereby reducing the risk of accidental fire. For this purpose, before installation, the roof structure in the lower part is sheathed with plywood sheets.

How to make a reed roof

Reed roofs photo
Principles of installing a reed roof
Another advantage of a reed roof is that you can make it yourself. In order for reed stems to be suitable for use as flooring, they must first be collected, dried, trimmed and tied into sheaves or bundles. Of course, it is easier to purchase already connected blocks that can be mounted directly on the roof.


Harvesting reeds for roofing
The reeds are installed on pre-prepared plywood sheets and sheathing. To hold the roofing material at an angle, fasteners and wire are screwed into the sheathing before it is laid. Reed blocks are laid from bottom to top, overlapping. After laying each layer, wire or hemp is pulled through the blocks rope, which give the structure additional strength.

Wave-shaped method of roofing with reeds

How to cover a roof with reeds with your own hands
When laying a reed roof, it is important to ensure the uniformity of the covering. Ideally, the places where the blocks are fixed should not be visible on the roof. For greater aesthetics, after laying the reed roof, its stems are trimmed and leveled, so that the roof takes on a solid, complete look.
The construction market offers a huge number of roofing materials that are excellent in price, quality and installation method. But recently, more natural and natural materials - tiles, wood, clay, reeds - have been preferred to iron and plastic products. The latter will be discussed in our article. Reeds were used to make roofs long before the invention of modern methods for creating roofing pie. Of course, the work has its own specifics, but anyone can do it if they want.
Reed roofs are becoming more and more popular every year, this trend is especially noticeable in Europe and the USA. In Russia, this method of laying roofs is not so widespread, and the reason for this may be a historical predisposition. The fact is that previously reed roofs were an attribute of the poor, and the houses of noble rich people were decorated with tiles. Despite the fact that the technology for creating reed roofs can be considered primordially Russian, in the West they have learned to handle this material so skillfully that today domestic craftsmen are adopting experience from foreigners. There are even special schools for laying reed roofs, but we will talk about this a little later. Be that as it may, reed as a roofing material is experiencing a rebirth, and there are many reasons for this. More than 300 of its types are known, but only 5 of them can be used for roofing. At the same time, only those reeds that have grown on the shore of a fresh water body are suitable for construction - plants from the coasts of estuaries and salt lakes do not have the same strength, durability and insulating characteristics as their freshwater counterparts. As practice shows, the highest quality reed, also known as common reed, grows in the Krasnodar region, the Volga region and along the shores of lakes and swamps in the Astrakhan region. Before making a roof out of it, the reeds are carefully sorted, impregnated with antiseptics that prevent rotting, and fire retardants (prevent the material from catching fire).
Interesting: It is known that each person has his own biofield, which extends to a distance of 1.5 to 3 m or more from the body. Scientists have experimentally found that metal reduces this biofield by 30%, ordinary baked brick - by 15%, and wood has no effect. Straw and reed that have undergone chemical treatment, on the contrary, increase the biofield by 5%, and “raw” untreated grass – by 15% or more. What does this give? A person in a house made of adobe bricks or with a reed roof feels better, more energetic, happier, gets sick less often and gets tired less. Advantages of a reed roofIn addition to improving your well-being, a thatched roof has more tangible benefits. So, the appearance of a house with such a roof will be very original and extravagant. A thick layer of reeds does not allow water to pass through, retains heat perfectly and does not require additional protection (waterproofing and insulation). In winter the room is very warm, and in summer it is cool. Since the stems of reeds are quite flexible, they can be woven into fancy shapes and create interesting architectural objects on the roof. Natural material provides natural ventilation of the room and does not require vapor barrier. After treatment with antiseptics, reeds become immune to mold and mildew. The durability of a reed roof is also encouraging - it can last at least 50 years without repair.
Today, reed roofs are often found on bathhouses, gazebos, and in restaurants designed in a traditional style - in general, they play a decorative rather than functional role. And if in the West they are already building residential buildings entirely from reeds, then in Russia for some reason they are not particularly trusting of this material. And if you also have doubts, then after reading this article there will be no trace of them left. So, let’s summarize and clarify why reeds are so good for roofing:
Disadvantages of a reed roofReed also has a couple of disadvantages, otherwise it would be used without any fear. The main enemy of dry stems is high temperature and open fire. Of course, they are treated with fire retardants, but in order to reduce the risk of fire to a minimum, it is better to carry out the treatment once every few years. The fact is that it is not the reeds themselves that are coated with the fire-fighting compound, but the already connected roof, and it penetrates the surface only 5-7 cm. Over time, the chemicals are washed away by rain and cease to perform their protective function. Therefore, if you live in a climate zone with very hot and dry summers, this issue should be taken seriously.
The second enemy of a reed roof is birds. Hollow, dry stems are ideal for making nests, so birds can destroy a flat surface. But this problem is completely solvable - so that the bird cannot pull out the straw, the reeds must be laid very tightly and efficiently without protruding ends. As for rodents, they are attracted not so much by dry grass as by cracks, and since no cracks are formed when laying a reed roof, the answer suggests itself. In densely packed reeds there is simply no place to build a nest and raise offspring, so mice would rather prefer thin bitumen slabs than 35 cm thick reeds. Harvesting reedsA good half of success depends on the correct preparation of reeds. This is usually done in late autumn or early winter. At this time, all vital processes in the stems stop, the reeds stop growing and “fall asleep.” It acquires a characteristic bronze-golden color with a hard surface and a cavity inside. A few months after installation, under the influence of precipitation and ultraviolet radiation, the reed roof will change color to grayish-brown, but this is completely normal and does not affect the quality in any way.
The reeds are mowed using special equipment or by hand, after which they are knitted into sheaves, dried and tied into shocks. When the moisture content of the stems is 18%, they are collected into cone-shaped piles with the tassels up and left to dry in this position for several months. Harvesting reeds for laying a roof is called a stack. Before laying, it is processed in a special way - the panicles are cut off (the reed begins to rot from them), leaves and other plants that accidentally fell into the sheaves are removed. Roofing deviceDespite the fact that laying a reed roof does not require the use of heavy machinery or special equipment, it is a very responsible task and has its own specifics. Since you will be working at heights, it is recommended that you purchase safety equipment.
Before installation, it is necessary to prepare the roof structure properly. This coating looks most beautiful on simple roofs - single-pitched, gable or domed. For beginners, it is better not to start with complex configurations, since installation in this case becomes more complicated. But in principle, even the most intricate roof can be covered with reeds - because of its flexibility, it is suitable for work of any complexity. To fix the reeds, you should prepare a rafter system and make a wooden sheathing, taking into account that the load is about 35 kg per 1 m². It is recommended to make the lathing from timber with a square section of 50x50 or rectangular - 40x60; leave the distance between elements at 30-35 cm. Naturally, before starting work, you need to create a detailed plan, which should include not only rafters and sheathing, but also the location of the chimney, ventilation pipes, location of windows and other elements. A video about a reed roof describes in detail all the subtleties of the organizational process: Laying features:
Installation technologiesThe time has come to talk about various European schools, each of which practices its own technology for laying and tying roofing reeds. But before going into details, it should be clarified that in all cases, the piles of reeds are laid overlapping; stainless steel wire is used for fixation, installing a clamp approximately in the center of the pile. The main differences between the technologies are not so much in the specifics of knitting, but in the use of reeds of different lengths. Thus, in the Dutch school, roofs are made from bunches 110-180 cm long, and the thickness of each stem does not exceed 6 mm (this is strictly monitored and stems that are too thick are selected). If you build a roof using Danish technology, you will need short stems up to 100 cm long and 5 mm thick.
As you can already guess, the thinner and more uniform the stems are, the more neat and high-quality the roof will be. Therefore, stems thicker than 5 mm are almost never used for work. There are also slight differences in the technology of reed tamping. Thus, a “Polish” roof will be more loose and “disheveled” than a smooth “Dutch” one. Also, the Polish school involves making a ridge from the same reeds, while the Dutch school uses wood or tiles for this purpose. It would also be a good idea to learn about such concepts as open and closed roofing. This means that bundles of reeds can be laid on the sheathing in such a way that their back side will serve as the ceiling of the attic space (open roof). In the second case, they are covered with plasterboard or plywood to make a flat ceiling. Open roofing is usually used for decorative purposes in the construction of mini-hotels, bungalows or restaurants. In ordinary residential buildings, a ceiling made of reeds can cause inconvenience - it will gradually crumble, and it is impossible to hang a chandelier on it. In addition, an open roof is a little more difficult to make than a closed one. Everything is simpler there - reed sheaves are laid on a solid wooden covering, which acts as additional waterproofing. Work takes less time and effort.
Before laying, divide all the reeds into three batches: rough stems, short stems and long stems. Use long and medium stems to cover the widest part of the roof, and short stems along the fronts, ridges and corners. Use rough reeds with bends as a substrate for more beautiful and even ones. Select bunches so that they contain stems of the same diameter and length. Make the first layer from stems with a diameter of up to 5 mm. Consumption per 1 sq. m of base is about 8 bunches of reeds. Roof installationWe will look at laying reed roofing using Dutch technology, since it is chosen more often than others due to its neat appearance and high strength. To create a closed roof, sheaves are attached to a solid base with screws. The base can be made of multilayer moisture-resistant plywood, moisture-resistant plasterboard, fiberboard or chipboard. The main thing is that it is clean, smooth, not afraid of moisture and ensures tightness. If roof windows are installed on the roof or a chimney is installed, care should be taken to insulate the openings under them.
Laying specifics:
One of the indicators of a well-installed reed roof is its smooth surface. It can be quite difficult to achieve this, since natural material has different lengths, colors and thickness of the stems. Laying a reed roof takes place in several stages:  Reed roofing is an excellent option for a country house. It will last for decades, so the burden of spot repairs will fall on the shoulders of the grandchildren or the next owners. We looked at the installation in general terms, and, despite the fact that previously such roofs were built independently without the use of modern materials and fasteners, this work is quite unique and requires certain skills. Therefore, before you start laying reeds on the rafters of a residential building, it makes sense to “practice” on a gazebo or shed. |


0
One of the first coverings used to cover a home were natural materials in the form of leaves of suitable plants or thick branches that did not allow moisture to pass through. Nowadays, with the presence of many roofing products on the building materials market, including reed roofing, this is an exclusive curiosity, the purpose of which is to surprise yourself and others.
In many countries, such coverage enjoys some popularity, and the trend is gradually reaching our latitudes. In order to make such a roof, carefully study the rules for working with it.
Properties

Before choosing an unusual roof arrangement option for our latitudes, you should know the properties and advantages of reed roofing:
- Not afraid of heavy rainfall, heat, gusts of wind and winter frost.
- Unlike other materials of organic origin, it is not susceptible to the formation of fungus at high humidity, is very resistant to this kind of damage, and is anti-hygroscopic.
- Excellent breathable coating, natural ventilation.
- When arranging an attic roof from this material, there is no need for hydro- and thermal insulation.
- The presence of voids in the reed stems contributes to noise absorption and excellent thermal insulation.
Note! The durability of such a roof exceeds 60 years; during operation there is no need to tint it, clean it or insulate it.
A roof with reed covering is elegant and original. In the first, fairly long period, the natural material has the color of gold, becoming more saturated over time. This ennobles the residential façade and the garden plot.

A reed roof, in addition to its advantages, also has disadvantages, which can be dealt with using different methods:
- Burns well. To protect against such a disadvantage, there are various processing technologies, including impregnation with compounds with fire-resistant properties. The material must be processed both from the outside and from the inside. The impregnation has a composition that cannot be removed by various types of sediment.
- For obvious reasons, it is a favorite place for birds. The stems are used by birds as an excellent building material for arranging nests. To prevent birds from dragging stems from the roof, they need to be well compacted, and protruding ends should be excluded from the planned and dense roof.
A mansard-type reed roof, thanks to the high performance qualities of the material, can last a long time without creating problems. The main thing during installation is to comply with all technical conditions and to prepare the base structure from the lathing well.
Note! There is a misconception at the everyday level that reeds are a cozy place for rodents to live. In fact, they prefer old shingles, and stems treated with fire retardants do not seem like a possible hiding place for them.

There are no architectural requirements, that is, requirements for the creation of a special supporting structure. Before making such a roof, you must adhere to certain rules:
- the recommended slope should be at least 35º;
- the type of cornice and windows is decisive for choosing the type and depth of coverage;
- a break in the structure is allowed no more than 20º;
- Since the thickness of the coating determines the specific approach for arranging drainage trays, before installing them you need to study the instructions for the practical implementation of the work.

This wonderful natural raw material for roofing does not require the use of special tools, much less equipment. The main thing in such work is the knowledge, practical skills and skill of a roofer who understands all the nuances of the work. If the structural elements are equipped according to all the rules and are ready to be covered with reeds, this material after installation will provide effective protection of the building from any weather. Architectural benefits are more pronounced on roofs that have a simple structure.
For configurations with complex transitions, angles and differences, laying exotic material will be much more difficult. The flexible properties of reeds allow you to cover surfaces of any complexity. The basis for such a roof is a rafter system with lathing, which is designed for a load of 35 kg/m².
At the design stage, such structural elements of the roof should be provided as: ventilation and chimneys, windows, openings and others.

When installing a reed roof, you need to follow certain rules:
- Sheaves are divided into parts: short, long and coarse stems. Medium ones are used to design the main component of the roof. Short elements are used on skates, corners and frontal areas. Rough - for the bottom layer as a substrate.
- Bunches are formed based on the length and size of the stems. Small ones in diameter are used for the initial layer. On average, 1 m of sheathing requires about 8 bundles to cover.
- If the gazebos are covered, the base may be exposed. When covering residential buildings, the base should be a closed type structure.
Installation

Before installing the stems, metal screws are screwed into the sheathing. They are needed to secure a curved stainless steel wire in the middle part.
Rules for laying a reed roof:
- Installation begins from the bottom of the sheathing. Sheaves of tied stems are laid on the base.
- The wire, attached to the screws, is pulled through the stacked sheaves. At the first stage, a part of the covering is obtained, attached to the sheathing with rods and steel wire. These metal parts are coated with a second layer.
- Before laying the initial layer, long ladders and scaffolding are installed. The platform should extend half a meter from the cornice. The roofers can then move on to the roof.
- The thickness should increase simultaneously with the compaction of the layer. To make the surface look even and smooth, use a spatula.
- A small part of the bundles is installed in the upper part, simplifying the alignment of the material of the upper layers and rows. The top is adjusted with a spatula, which allows you to make the connection of laying the next sheaves invisible.
- During installation, hooks are used to secure the ends of each row while simultaneously attaching to the previous layer. The hooks are pulled out and re-fixed with each subsequent layer.
- To avoid the formation of visually noticeable lines and grooves that can impair water flow, it is necessary to increase the indentation when moving towards the ridge of the installation. The ridge beam must protect the roof from seepage of precipitation and be directed steeply for laying the last layer.
- The sheaf is pre-wetted and placed to dry on the ridge to fix the proper shape.
- After this, the ridge strip is covered with ceramic or copper material for beauty and practicality.
- The protruding parts of the stems are trimmed evenly.
- All roofing reeds are treated with fire and bioprotective agents.
Roofing specialists guarantee their work. If the installation of the roof was carried out on your own with strict adherence to technological requirements, and a responsible approach to the work was practiced, you can be sure that you are guaranteed to enjoy the internal microclimate in the house and its attractive exterior! You can watch how professionals install a reed roof in the video below.
Video
Photo


Last revision: 05/11/2017
Reed is environmentally friendly and beautiful, so a roof made of this natural material will add individuality and charm to the appearance of any building. But in its application in our time there are a lot of pitfalls and difficulties. Of course, you can overcome all of them and achieve the perfect result with your own hands.
Properties of reeds as a finishing material
First, let's define what exactly we mean by the word “reed”.
Difficulties of terminology
The fact is that there are three very similar types of lake and water plants: reeds, cattails and reeds.
Reed (Scirpus), a genus of perennial, rarely annual plants of the sedge family. Over 250 species around the globe. In the USSR there are about 20 species growing in humid places and in water. K. lake, or kuga (S. lacustris), often forms extensive thickets, is a peat former; its stems (up to 2.5 m high) are used for weaving various products and as packaging, heat-insulating and building material. Reed is often incorrectly called reed, a plant of the grass family.
http://bse.sci-lib.com/article058385.html
Lake reed looks like small inflorescences on a thin long stem
Cattail (Typha), a genus of monocotyledonous plants of the cattail family. There are broad-leaved and narrow-leaved. Monoecious perennial aquatic or marsh herbs, 3 to 4 m high, with a long and thick creeping rhizome. About 20 species found almost throughout the globe. The inflorescences are used to produce cellulose, film, and mixed with animal hair to produce felt. Stems are used as packaging, thermal insulation and building material.
Great Soviet Encyclopedia
http://bse.sci-lib.com/article097278.html
Cattail is a stem with long sharp leaves-ribbons, topped with an inflorescence-cone.
Reed (Phragmites), a genus of plants in the grass family. Large perennial herbs 0.5-5 m high, with long creeping rhizomes. The leaf blades are linear-lanceolate, up to 5 cm wide. They usually form thickets, especially extensive in the floodplains, lower reaches and deltas of southern rivers. Young plants (long before flowering) are eaten by cattle and horses. It is used to produce thermal insulation and building material - reed, suitable for covering roofs, making fences, wickerwork, and coarse paper. Often incorrectly called reed.
Great Soviet Encyclopedia
http://bse.sci-lib.com/article112431.html
Reed is very easy to confuse with reeds, but its inflorescences are more spiky and larger
I discovered that most of my friends don't even know the difference between reeds, reeds and cattails - even though they look quite different. The funny thing is that all these varieties can be used for roofing - wherever they grow. For example, cattail predominates in Central Asia, and reed predominates in southern countries. In terms of performance, they are almost identical. But for some reason people call all such roofs reed roofs. Let's follow this example, especially since in Russia roofs are often made from reeds.
Unique qualities of reeds
For many millennia, people have used reeds as roofing material. And not only in cases where there was nothing else in the area where the house was built. This material was valued everywhere because of its unique qualities, low cost and durability. This is confirmed by thousands of documents - for example, a drawing of a “Cossack hut” from Vadim Shcherbakovsky’s book “Ukrainian Folk Mystery. Ornamentation of the Ukrainian house”, published in Rome in 1980.
The drawing of the “Cossack hut” from the book by Vadim Shcherbakovsky proves the long history of the use of reeds
In Central Asia, reeds were used not only for roofs; sometimes they were added to clay instead of straw to make building bricks and plaster. Such clay was called “adobe”, and houses made of such bricks were called adobe.
Reed roofs and adobe shopping arcades can be seen in many Central Asian markets in the mid-19th century
The tradition of covering the roof with reeds and using it for other purposes in Central Asia has been preserved to this day. At the market, private owners from riverine villages sell reed boards of various thicknesses - for roofs and fences. In my Tashkent house, the beds and plantings were fenced off from dogs by low reed fences. In the first few years they are very beautiful - golden and glossy, then they darken, but still create an inexpressibly beautiful color. And on the plot with the house where I grew up, we had outbuildings covered with reeds - apples and grapes were stored there all winter, because dampness and mold would never develop in a room covered with reeds.
Many of the sheds of my childhood were covered with homemade reed roofs
Reed is used not only as a roofing material and an additive to clay for adobe. Mats are also made from reeds for wall cladding for sound and heat insulation.
Houses are sometimes lined with reeds for thermal insulation.
In the modern technogenic world, people have become increasingly striving for a clean environment, so reeds have returned to construction after a long break. And now many Russian companies are engaged in the preparation of sheaves for reed roofs, specifically growing a special variety of this natural material.
Advantages and disadvantages of a reed roof
As a roofing material, reed (or its varieties) is absolutely unique.
Its undoubted advantages:

If suddenly repairs to the reed roof are needed, it is quite simple to perform, and the “patch” will soon blend in color with the main coating.
Its non-critical disadvantages:
- color change over time - from golden to grayish-earthy, but this will further emphasize its environmental friendliness and nobility;
- if it is not laid tightly, birds can become its enemies - either by making nests, or by taking the stems to nests in another place;
- rodents can settle in the reed covering, which is eliminated by appropriate pre-treatment of the material;
- In our conditions and in our time, the construction of such a roof is quite an expensive pleasure. A square meter of material alone will cost from five hundred to two thousand rubles, and together with the work of highly paid (due to the rarity of the profession) craftsmen - from 6 to 8 thousand;
- quite complex installation, which requires either thoughtful study of the technology or the involvement of craftsmen.
Photo gallery: reed roofs
Such a log house is made of environmentally friendly materials from the basement to the roof. Special technology allows you to lay reeds without beating and combing, which looks very beautiful. Even very complex roofs can be made from reeds. This is a very old Ukrainian hut, the reeds have even turned green, but are perfectly preserved. a beautiful roof in the “pagoda” style. In a gazebo with an interesting ridge, two laying technologies are used. To make the roof even, it is compacted with a special tool. This also happens - a reed roof is lowered to the entrance. If you want to have a complex roof, the main difficulty lies not in laying the reeds, but in the device battens A reed roof can have the shape of a sculpture. When working on a roof, you need to have devices to protect workers - the reeds are very slippery.
Do-it-yourself reed roof for a gazebo
Despite the obvious advantages of reeds, we don’t see many roofs made of this material around. The main reason is obviously the difficulty of performing them. It all starts with the preparation of reed material. In principle, you can purchase ready-made sheaves, collected and tied professionally.
Harvesting reeds using a combine is used on an industrial scale.
“Industrial” sheaves are more or less the same and are convenient to use.
A sheaf of reeds harvested industrially has a certain thickness and length
But it will be much cheaper to do it yourself.
Preparation of material for the future roof
The first step is harvesting reeds.
Cutting the stems
Traditionally, stems 5–8 millimeters thick and one and a half to two meters long are used for roofs. The stems should be cut in winter, when there is ice - it is more convenient and safe.
Reed stems need to be cut in winter when the water is frozen
You can cut the stems with a sickle, a scythe, a brush cutter - even a sharpened shovel. The shovel is especially suitable for working directly above the ice, from its surface.
Harvesting reeds is done using a sickle, scythe or even a shovel.
You need a lot of material - even a small gazebo will require a thick reed roof. Therefore, we are preparing for a long cutting job. On the spot, we tie the reeds into thick sheaves only roughly - later at home we either carefully tie them into the right size, or scatter them to make mats.
We knit cut reeds into sheaves without thinking about their uniformity and size.
For ease of tying, you can use small folding sawhorses.
Tying reeds is very convenient on special sawhorses
Not only the appearance of the roof, but also its durability directly depends on the quality of the stems.
Creating the right sheaves
We tie the reeds brought home into identical sheaves of the required diameter. For the construction of roofs, traditionally (and this is most convenient) they are made with a circumference of about 600 mm. If you plan to make mats, then the diameter of the blanks should be equal to the thickness of the future mat. The sheaves are tied twice - at a distance of about ten centimeters from the sawn-off edge and half a meter from it.
The finished sheaf is tied in two places
Fixing the sheaf (knitting) is done with flexible wire, twine, or simply one or more reed stalks twisted into a rope. If we want to be consistent in our desire for environmentally friendly construction, then the choice between wire and bundle is obvious.
In Russia, such a tourniquet has long been called svyaslo or knitted.
A cord of reeds used to tie a sheaf was previously called a reed
To make the stems soft and durable, the stems are soaked in advance. The technology of tying sheaves with ties is quite simple.

Of course, it is much easier to tie sheaves with twine or wire.
I read in all the guides on reeds that the reeds cut for the roof need to be dried to 18% humidity. But in practice this is very difficult to measure. Therefore, the degree of drying is determined exclusively by the organoleptic method - by eye and touch. Moreover, when laying reeds on the roof, it must be sprayed with water to restore its plasticity.
There are absolutely precisely verified figures for the consumption of sheaves when installing a roof made from them. If the sheaves have a circumference of about 600 millimeters and a length of up to two meters (sheaves with these parameters for some reason are popularly called “Eurosheaves”), then at least eight such sheaves will be needed per square meter of roof. And, of course, you need to factor in a margin for defects and errors - usually 20%. Accordingly, we came to the figure: 10 sheaves per square meter of roof.
A simpler method - constructing a roof from reed mats - is especially often used for outbuildings. For the roof of the house you need to make mats 30–35 centimeters thick, and for a gazebo a thickness of 15–20 centimeters will be sufficient.
Assembling mats
Mats are collected in three ways:
- from sheaves, stitching them with wire. In this case, the sheaves are often placed “jack” through one so that the mat is even, but this depends on the task;
When making a mat, the sheaves can be placed in one direction - it all depends on the architectural solution
- from bunches of loose reeds on the ground, laying several rows of wire under the reeds, repeating the same on top and stitching the top wire with the bottom wire through the reeds with another wire or staples;
The mat sewn together with wire and staples is very smooth.
- from loose reeds on an industrial machine;
Large size reed mats can be made on an industrial machine.
- from loose reeds on a homemade machine.
Let's look at the last method in a little more detail.
The machine can be made permanent - put together a strong frame, place limiters corresponding to the thickness of the mat, stretch wire onto the frame, come up with shuttles. Or you can make it from scrap materials, spending a minimum of time.
An improvised machine for mats can be made even from a horizontal tree limb
You need a horizontal bar or even a horizontal tree branch. Ropes or pieces of flexible wire are tied to it and to the hooks driven into the ground (by the way, you can do without them - after laying the first bunch of reeds, it will tend to the ground). Improvised “shuttles” are attached to the other ends of the wire - sharpened slats or something else pointed - with which we will intertwine the stacked bundles of reeds. With the help of an assistant, the bundle is laid down on the rope and wrapped with the free end with a shuttle. Then the operation is repeated and a finished mat is obtained.
A finished mat of the required size can be obtained using a homemade machine
Of course, it is much easier to make a roof from mats than from sheaves, although the mats are heavier and difficult to lift to a greater height. Moreover, products of greater thickness should be used for the roof of the house. Therefore, mats are more often used to insulate walls and to cover small and low outbuildings such as gazebos.
Since the gazebo is a small building, when making the mats, we can set their size to completely cover one roof slope, thereby avoiding the need to lay the mats overlapping.
Laying mats overlapping does not provide a visually beautiful surface
How to install the roof of a gazebo from reed mats
There is a simple list of rules that are valid for both sheaves and mats when working with the roofs of houses and gazebos:
- the roof should not be flat in any case - the slope should exceed 35 o, because with a small slope the chances of moisture stagnation zones increasing, which greatly reduce the service life of the roof;
- the reed covering is very heavy - with a thickness of 30 centimeters, the weight will be from 30 to 40 kilograms per square meter, so the sheathing and rafters must be carefully calculated for strength;
- a special design of the drainage layer is required, which is made from the edge around the perimeter so that water can seep into the drain;
- if it is difficult to make such a layer, then you need to take care of a well-thought-out storm drainage system in the blind area around the perimeter of the building;
- The pitch of the sheathing depends on the thickness (and therefore the severity) of the mats or sheaves and is usually about 30 centimeters. The sheathing itself is made of small-section timber (50x50 mm);
- the house should be in an open area so that there are no trees around it shading it, and the roof should “breathe” and dry out in time to avoid rotting.
Roofs differ in the structure of the ridge. He can hide:

Video: installation of a reed ridge
Roofs also differ in the type of ceiling:

The roof, open from the inside out, is used in decorative buildings, in the design of restaurants and hotels, and, of course, in gazebos.
A reed roof open at the bottom can be found, for example, in a restaurant
Covering a closed-type roof with reeds is ultimately faster and more convenient, despite the more complex preparation - sewing on a continuous layer. In this case, there is no need to guess where to attach the sheaves; their length does not matter.
It is much more convenient to attach sheaves to a continuous sheathing
Let's assume that we already have a small gazebo with rafters and sheathing and mats made exactly to the size of the slope. In theory, laying reeds in all cases should be done on a base made of solid plywood sheathing, vapor barrier, ridge tiles and reinforcing mesh.
In the theoretical scheme, the reeds are laid on a continuous sheathing covered with a layer of vapor barrier
But in practice, for a small gazebo, they don’t even make a thick sheathing, and the ridge is covered with a mat, but a narrow one, laid across. A strip of roofing material is placed under it, secured with self-tapping screws and large washers.
The ridge is covered with a narrow mat laid on a strip of roofing felt
The inside of the gazebo is usually not hemmed, leaving a beautiful reed ceiling.
The gazebo looks very cozy from the inside, which is greatly facilitated by the beautiful reed ceiling
Reed laying technologies
It is necessary to talk about several technologies for laying reed roofing, which received their names after the names of countries. Of course, in basic features they are similar to each other - reeds and a closed type of roof appear everywhere. But there are also differences.
- In the so-called Old Russian method, horizontal beams are laid on the rafters. This is not the usual lathing, but long thin logs or thick branches. Sheaves of reeds are placed on top of them, which are fixed on top with poles called mulberry trees or prutugs and made of willow, although alder and aspen are suitable. Once upon a time, clamps were secured with soaked willow and birch rods - vitsa. Now they have been replaced by wire and hemp string. The sheaves are laid in steps, then the reeds are tapped with one of the special tools for such roofs - a comb. The strings are passed under the rafters, the two ends on the outside are pulled tight and tied, tucked under the reeds and covered with the next layer of reeds. On the ridge, the sheaves are simply bent over the edge and secured with “chains” - poles and pins made of wood.
- In the “Polish” technology, the reeds are not compacted, the structure is looser. The ridge is also made from reeds, which is what we used in our gazebo.
- The “Danish” method regulates the standards for the size of reed stems in sheaves: length no more than a meter, diameter 4–5 millimeters. This option allows you to cover roofs with very complex geometries, but it greatly complicates the procedure and requires a small sheathing pitch.
- The “Dutch” method is more democratic: the length of the stems is from 110 to 180 centimeters, the diameter is up to 6 millimeters. Unlike the “Polish” technology, the ridge is covered with other materials. Previously it was flexible heather, now it is ridge tiles.
Most often, the “Dutch” method is used in the construction of reed roofs.
Let's take a closer look at the correct algorithm for laying sheaves and the principles of fastening the wire. Self-tapping screws for wire (35 millimeters long enough) are screwed into the sheathing. The sheaves are stacked from bottom to top and secured with wire. Then they are trimmed and combed with special tools.
First, the sheaves are laid from bottom to top and secured with wire, and then combed with a special tool
To determine the thickness of the roof, there is data verified by experience and time.
Table: thickness of reed covering depending on roof characteristics
Required Tools
The set of tools has not changed for centuries:

Nowadays, the tools have become more effective, but the principle of their operation remains unchanged.
Step-by-step instruction
If we are working on a gable roof, then we need to install wind boards with a width equal to the thickness of the future reed layer. A steel mounting wire, usually galvanized, with a diameter of about five millimeters is attached to them. It ensures that the sheaves are pressed against the roof. The sheaves, as mentioned above, must be sprinkled with water before climbing onto the roof. If the house has a fireplace and/or stoves, it is necessary to provide methods for organizing the space around the chimneys that are accepted for any flammable roofs.
The wind board should have a width equal to the thickness of the reed mat
The work must be carried out in the absence of wind - especially if we have overdried the material, which is what most often happens.
- The first wire is laid twenty centimeters from the edge of the roof, the subsequent ones - every 12–15 centimeters.
- The first sheaves, regular or double, form the edge of the roof - the eaves, which hang slightly over the edge. We must try to ensure that the eaves are even and the same thickness everywhere, otherwise the aesthetics of the roof will suffer.
Eaves are usually stacked in double sheaves
- Each subsequent row of sheaves is laid with an overlap of 30 centimeters relative to the previous one. It is convenient to fix them with special movable brackets, and then with wire secured with self-tapping screws and screwed into the sheathing.
The sheaves are fixed with movable staples and then with wire
- In parallel with the installation, the top layer of the roof is tapped and leveled. The ends of the reeds are simultaneously combed and tucked until a smooth transition between layers is achieved. The roof becomes velvety and soft in appearance, similar to a carpet.
Tamping and leveling is done in parallel with laying
- After we reach the ridge, the reeds bend over it and are fixed.
When reaching the ridge, the reed bends to another slope
- The ridge is made from reed stems or from tiles and roofing felt.
Features of using a reed roof
The scope of care for a reed roof is incomparable with similar needs for any other type of roof.
- Within a year, all the flaws in the construction usually become visible or noticeable. Next year, the roof must be carefully inspected, compacted again, combed, and if necessary, add reeds in some places.
- The fire retardant penetrates the roof shallowly, just a few centimeters, and is washed off over time by precipitation. Therefore, impregnation must be repeated every three to four years to prevent the roof from catching fire, for example, from sparks from a chimney.
- If the house is still located under trees, then the roof must be thoroughly cleaned annually of fallen leaves, twigs, soil, and debris. In this nutrient medium, moss, lichens or grass can grow on the reeds, which should not be allowed.
Insulation of a reed roof
It was said above that a reed roof does not need insulation. To dispel possible doubts, we present several arguments to support this opinion.
- Reed, with its thermal insulation properties, provides coolness in summer and warmth in winter. In addition, it promotes natural ventilation of the attic and under-roof space, eliminating the need to make additional heat, hydro and vapor insulation there - most often not at all environmentally friendly, releasing substances harmful to health (from foam, expanded clay, glass wool, membranes, etc. .).
- The thermal insulation properties of a reed roof with a traditional thickness of 30 centimeters are identical to the properties of synthetic insulation for a conventional roof of the same thickness. That is, reeds are two in one: a roof and insulation.
I saw - step by step, starting with the construction of rafters and sheathing - the process of erecting a reed roof, and then I visited this house several times. Of course, the owners did not provide for insulation and were not mistaken. In winter, even in the attic it was exceptionally warm with conventional heating means, and under the July sun it was remarkably comfortable. It is worth mentioning the atmosphere in the house (especially in the attic, where you can feel the proximity of the roof): pleasant, moderately dry, with a woody aroma, without man-made odors.
So insulating a reed roof is completely unnecessary.
Creating a reed roof is a difficult task and a real art. And if you have walked this path, starting with a gazebo and ending with a house, then you can deservedly be proud of yourself.
Unique technical characteristics, as well as very good aesthetic properties, have recently attracted more and more attention to this type of roofing, such as a reed roof.
This technology has become most widespread recently in the countries of the Western world; it can often be found in the USA.
Probably, since the times of the primitive communal system, people used branches and leaves of various plants to protect their homes from adverse weather conditions when constructing roofs. Therefore, it is not surprising that reed roofing still remains very popular and is, perhaps, one of the oldest.
We can say that currently this method of roofing is receiving a rebirth. Why is this happening? People strive to surround themselves with natural materials, environmentally friendly products and safe things. And such desires are fully satisfied by a do-it-yourself reed roof.
A reed roof is, of course, not the most common type of roofing material. This material belongs to elite types of roofing. Protecting the house from adverse weather influences, a reed roof is nothing more than a way of self-expression for the owner and his household.
The main material for reed roofing

To create such a roof, ordinary reed stems are used. You might think that since this is reed, the material should be quite light. In fact, this is far from true; just one square meter of this coating weighs approximately 40 kilograms. And this is only if the reed roof is dry enough, otherwise, with a wet roof, the weight of such a square increases by another 10 kilograms.
Such roofing material is installed on fairly simple roof shapes, where the angle of inclination should not be higher than 45 degrees.
As a rule, reeds alone are not enough to cover the roof, so very often additional elements are added, which consist of tiles, and sometimes wood is added to the overall design of the roof. Shingles and wood are used to protect the ridge portion of the roof.
DIY reed roof, main advantages
Of course, it is necessary to talk about the advantages of this material, and they undoubtedly exist. These are like:
- 100% attractiveness and aesthetics;
- the coating is environmentally friendly and natural;
- good ability of this type of roofing to maintain a constant temperature in the house;
- there is no need to install ventilation in the attic.
At the same time, reed roofing allows you to fully comply with generally accepted thermal insulation standards, because if the roof is covered with such a material with a thickness of 30 centimeters, then all thermal insulation parameters will be fully satisfied.
If installed correctly, a reed roof will 100% protect the house well from a variety of atmospheric influences, such as strong gusts of wind or heavy precipitation.
As for service life, manufacturers claim that such a reed roof can last for decades. Although, given the fragility of this material, this statement is highly doubtful.
High fire resistance is also inherent in such a roof, of course, if the material is pre-treated with special fire-retardant impregnations.
They also use some tricks to protect their home from fire. Install higher pipes through which smoke should escape. In this case, the spark, even if it flies out, will go out very quickly, without having time to touch the roof.
Features of technologies when installing this type of roofing
Construction companies, thanks to very strong competition, are always ready to offer a wide variety of different types of reeds that can be used to cover the roof.
In order to make a reed roof with your own hands suitable for the owner, you can use technologies that were already tested hundreds of years ago.
Let's consider the main ones:
- Dutch technology;
- Danish;
- English;
- American

Whatever laying method you use during installation, all bundles of reeds must be overlapped. To secure them most firmly, you can use wire, but it must be made of stainless steel. A clamp is installed in the middle of the entire bundle.
The differences in the technologies described above are that the length of the stems when laying is different in each country.
For example, laying using Dutch technology involves the use of bundles of reeds from 1 to 2 meters long. The thickness of the stems must also be of a certain size (from 0.2 to 6 centimeters).
Danish technology uses stems whose thickness is 0.4 centimeters, and the length must also be at least 1 meter.
If the roof is more homogeneous in composition and lies densely enough, then it will look more attractive. And the practical value of this product will increase significantly.
Depending on the padding of the roofing material, its reliability increases or decreases, as well as such a parameter as looseness. For example, a reed roof made using Polish technology will be much looser than, for example, a reed roof made using English technology.
In other words, in general, all installation technologies are fundamentally very similar to each other. Their only difference is the length and width of the reed material, as well as its covering on the roof ridge.
There are also other covering options - open and closed reed roofing. If we take the first option, then the bundles of material need to be placed on the sheathing in such a way that the inner surface of the covering would be the ceiling for the room that will be located under the roof.
This option can be seen quite often in the design of some fashionable restaurants, as a decorative element. In this case, of course, some inconveniences cannot be avoided. For example, fluff from reeds can get on your face, and the entire structure will require a lot of effort in installation.
If you cover the roof like a closed roof, then the installation will be much easier, since the roofing material itself will be laid on solid wooden sheets of wood, which can also serve as an excellent waterproofing material. And, of course, installation of the second type can be done much faster.
Reed roof using Dutch technology
First there is a solid base, and only then the sheaves are attached to this solid base using self-tapping screws or self-tapping screws. As a base, most often they use sheets that consist of plywood in several layers (chipboard or fiberboard).
A prerequisite for proper installation is that the base sheets must be absolutely flat, dry, and also meet all tightness parameters. If, during the construction of a roof, windows or other elements are planned in the project, then they need to be covered with insulating material first and special attention should be paid to these structures.
Important points during installation

Particular attention must be paid to the quality of the reed material. After all, how long such a reed roof will last will depend on this.
The work should use exclusively the stem of freshwater reed, but it should be without leaves. Reed stems should not appear burnt or moldy, and should not be mixed with other plants.
In those places where the reed extends far beyond the boundaries at the base of the roof, it must be compressed. But the compression must be carried out in such a way that there are no gaps left.
For the most successful compression, you need to use wire clamps that contain a zinc coating. The first clamps are made at a length of 20 centimeters from the pressure panel. The second one is already done a little closer, around 12 centimeters, all the rest are done at a distance of about 30 centimeters from each other.
To ensure the reliability of the entire roof, the beams must be very well secured. In those places where the corner beam goes, you need to use the fastening method using thin wire.
If the distance from the pressure strip to the ridge part of the roof is less than 7 meters and the angle of inclination of the reed roof is approximately 40 degrees, then the thickness of the roofing material should be no less than 25 centimeters at the very bottom of the roof, and in the upper part - approximately 22 centimeters at the ridge part.
By the appearance of the roof you can immediately see how correct the installation of the roof was. The roofing material must lie flat. But you should not pay special attention to the difference in the color and shape of the leaves themselves, because reed is a natural material, and therefore it can have different color shades.
The difference in color can be very clearly seen on newly assembled roofs. But this cannot in any way be considered a defect. Over time, such a contrast will practically not be noticeable.
What you need to consider in order to correctly align the bundles of reed roofing
Various techniques can be used to permanently secure the sheaves.
Here are just the most used:
- The first method is flashing using wire. It is most suitable for those roof options that are of the open type. The fastening work can be easily done by two people. One works directly on the roof surface itself, while the other helps indoors.
- For the fastest fastening, it is better to prepare screws with wire loops in advance.
- You can stitch it using nails, this option is almost identical to the previous one, the only difference here is that nails are used rather than screws.
- Another common method is stitching using constrictions. In this version, the wire, in fact, is the constriction. With its help, pieces of reeds are attached to the base of the roof.

In order to give even greater density to the layer of reeds, padding is often used when leveling it; it is done using a shovel-bat. This tool is very helpful in leveling reed flooring.
The final stage, after laying the entire roof and leveling it, is the final trimming and giving the roof a finished look. Here, of course, a lot depends on the wishes of the client who ordered this type of roofing. You can make a trim so that everything is neat, or you can leave a certain kind of “creative disorder”, as you like.
All layers of reeds must be very firmly fixed; only the very top layer can be left loose, otherwise the roof will not perform well as protection against adverse weather conditions.
Reed roofing is an excellent choice for decorating the look of a private home or adding originality and uniqueness to your outbuildings. But it is worth remembering that the installation of such a roof is quite labor-intensive, and, of course, it requires considerable professionalism and experience when constructing such roofs.