The Great Roman Empire left humanity a legacy not only of an aqueduct and baths. Great aesthetes and masters of landscape design, the Hellenes were proud of their decorative places - topia, topiaries, or skillfully trimmed tree and shrub compositions.
Modern topiary is a miniature that imitates a neatly trimmed tree. The compositions decorate the interior, formed in absolutely any style. They create a miniature topiary with their own hands from paper, fresh flowers, bird feathers, beads, rhinestones, coins, and even coffee beans.
The meaning of the European floristic tree of happiness, as topiary is called, is not only decorative. The miniature symbolizes wealth, fertility and strong spirit, pouring out the energy of happiness. A small tree tends to enhance the energy potential of the entire house, no matter in which room it is installed.
Manufacturing technique
In European countries, it is customary to give topiaries for any occasion - for weddings and name days, housewarming and New Year. Friends are given a miniature tree for no reason at all, but from the bottom of their hearts, when paying another visit. Moreover, all crafts are made by hand.

Topiaries are quite simple to make. Mini-trees consist of three parts - a crown and a trunk, fastened together and installed in a container. Pots, stands or baskets of various shapes are used as a base.
The crown can be round, oval, heart-shaped, letters or numbers. But most often they make topiary with a spherical crown.
The trunk is a strong thick wire or branch entwined with twine, bright floral ribbons or colored plastic. In some cases, a thicker branch is used as a trunk. The bark is removed from it, etched with stain and varnished.
Themed decor
Ideas for topiary can be varied and fantastically beautiful, reflecting all kinds of artistic ideas of the author, and most importantly, created with your own hands. For example, when setting a festive table, paper mini-trees decorated with sweets, fresh flowers or fruits are used. Themed topiaries are made for the New Year's table. Their crown consists of cones, organza, satin ribbons, and artificial flowers.
Contrasting shades of blue, green and red in the decorative elements of topiary are perfectly emphasized by silver and gold threads. And flowers or figures in pastel colors will wonderfully set off the shiny elements in the topiary crown.
It is important to come up with a theme and choose beautiful material. The miniature should reflect its purpose and express the idea that prompted its creation. Shells, feathers, strings of beads and small coins allow you to create delicate, love-filled mini topiaries. Coffee and cereal beans, artificial flowers, lace and organza are suitable for creating compositions designed to decorate the kitchen space.
For classical If the interior of the house is designed in gray tones, a topiary created from satin ribbons in blue or cool blue shades is perfect. For rooms decorated with sunny tones, compositions in dark colors are made.
Details and elements
The trunk of a mini-tree plays not only a load-bearing role. In general terms of the composition, the trunk should be kept in the same spirit, both with the base and emphasize the splendor of the crown. Therefore, the trunk must be given appropriate attention - the material for its finishing must be carefully selected. If a bitch is chosen, then the tone of the stain with which it will be impregnated and matte or glossy varnish is selected. The coverage depends entirely on the type of composition.
The base can be of various shapes and made from any material - a small ceramic flowerpot or a fancy-shaped glass cup. In some cases, topiaries are placed in baskets, such as decorations for the Easter table.
All parts are firmly attached to each other. The crown is glued, and the trunk is fixed in the vessel with pieces of foam plastic and filled with alabaster for strength. It should be remembered that alabaster hardens very quickly. Therefore, the consistency of the gypsum solution should resemble liquid sour cream. Then it will be easier to work with the material.
The crown is fixed to the trunk only after the gypsum solution has completely dried. During this time, the crown is made. To form the crown, use hot glue to secure the flowers, pins and skewers. After which the topiary is finally assembled.
Festive topiary
Topiaries are made for the holiday and as a decorative decoration for the interior of rooms. For example, interesting ideas for decorating a children's room for a child's birthday. Sweet large topiary in the form of a candy tree with funny souvenirs. In addition to the pleasure received, each child will be able to take home a small gift:

The autumn holiday Halloween spoils us with bountiful harvests. The symbol of the holiday is a pumpkin. This pumpkin topiary, created from pumpkin seeds, leaves, candy and ribbon, mounted in a tea tin, makes a stunning addition to your kitchen space for the holidays. The lower part is decorated with canvas fabric, and the witch figurine is located in the upper part of the topiary, recalling the mysticism of the holiday:

Christmas topiaries are formed from pine cones, holly berries, organza, pine needles and silk ribbons. They decorate mantelpieces and coffee tables in living rooms, as well as bedside tables in bedrooms:

On Valentine's Day, lovers prepare gifts for each other. A topiary in the shape of a quivering white and pink heart, decorated with valentines, feathers and satin ribbons, will add a touch of romance to your relationship:

In anticipation of Easter week, you can create an Easter tree decorated with colored eggs, artificial flowers and satin ribbons. It can become the main decoration of the Easter table. And miniature topiaries, mounted in pots in the shape of eggshells, will be wonderful gifts for guests invited to the holiday:

Topiary in the interior
A fragrant coffee topiary, decorated with straw, pieces of canvas and thick twine will find its place in the kitchen. A mini tree made from napkins is also great for the kitchen:

Unusual in their beauty, topiary made from fresh flowers will decorate the festive table in the living room. Elegant miniatures in bright colors, made in accordance with the style theme of the room, will help you create a unique style for your guest room:

For the bedroom, original decorative compositions are created, as tender as feelings, from ribbons and beads, lace and organza in light pastel colors, reminiscent of spring haze. The basis for the composition is usually small transparent containers of unusual shapes:

In a girl's bedroom you can install a fabulous mini-tree created from corrugated paper. A boy who is a football fan will be pleased to see in his room a topiary photo from a nursery, where a mini-tree is made in the shape of a large soccer ball. For decorative decoration of topiary, butterflies, colored and mother-of-pearl beads, decorative bugs and ladybugs are used. The base is usually covered with floral mesh or artificial colored fabric:

For new residents, a pleasant gift will be a tree made from hazelnuts and walnuts, large pumpkin seeds, beans and peas, symbolizing prosperity. This topiary is decorated with twine, pieces of canvas, and buttons:

For a gift to a close friend, a composition of delicate real roses is formed. Decorate with satin ribbons to match the inflorescences, silk fabric, corrugated paper:

Wedding topiaries are real works of art. Traditionally created from large pearl beads, decorated with satin ribbons, lace and sisal, fairy-tale compositions keep memories of the most important day in life for a long time:

Decorative trees are considered a worthy decoration for a home. They are appropriate in any interior; you just need to think in advance about the color scheme that fits into the finished design project. Ornamental trees do not require special conditions of maintenance and care. They do not need to be watered as they are artificial plants. These decorative items are freely sold in stores, but it is better to make topiary with your own hands. It will take some time to make it, but in the end you will get a unique decorative tree that fits perfectly into the existing interior of the room. And it’s better to build a topiary yourself, because according to the ancient Chinese teachings of Feng Shui, this tree brings joy to the house. By making a decorative tree, a person charges it. According to legend, topiary can only bring happiness to its creator.
Topiary: history of appearance and significance in modern interiors
The word topiary or topiary comes from the term “topia” - a decorative garden plot. The concept came from Ancient Rome and meant various figures carved from the crowns of trees or bushes. Ancient Roman civilization disappeared, but the idea of beautifully decorating gardens was picked up by the Catholic Church. Then topiary entered social life. Their heyday came in the 17th century: it was then that decorative trees appeared in the residences of state rulers, incl. and in the Russian Empire. Then they were forgotten, but in the 20th century topiaries became popular again. Now they were no longer used to decorate gardens and palace walls, but were planted in pots. Today, topiaries are no longer planted. They can be made from any materials. Topiaries are made in the most bizarre shapes and colors, often combining materials in quite controversial ways. They are otherwise called trees of happiness, believing that they bring joy to the house. They can be made from:
- coffee beans;
- walnuts;
- fir cones;
- straw;
- sweets;
- napkins;
- silk ribbons;
- plastic bags, etc.
Where to start assembling wood
Assembling a topiary must begin with planning the appearance of the future tree of happiness and finding the necessary parts. The appearance of topiary is determined by the style of the interior for which it is made. First, find the materials necessary to construct the base of the tree. In any case, you will need tape, glue, colored paper, polystyrene foam, polyurethane foam, etc. The list of parts is limited only by the imagination of the creator. After collecting the necessary things, you can start creating a topiary. First, the barrel is assembled, because it is the basis of topiary. Moreover, it must not only be strengthened, but also covered with varnish or paint. Then one end of the trunk is attached to a pot, stone or shell, and a ball is hung on the other, which will later become the crown of the tree of happiness. It is best to use glue to hold all the parts of the topiary together.
The basis
To construct the basis of the tree of happiness, whatever is at hand at that moment will do. To make a base from newspapers, you first need to crumple them thoroughly, and only then form a sphere according to the given parameters. Newspapers are crumpled and pressed tightly, after which they are wrapped with tape. The base can also be made from newspaper clippings, but in this case they should be placed in a plastic bag. If you need to make a small base from padding polyester, you first need to compact it into a sock or stocking, then give it the required shape and wind it tightly with sewing thread. It’s even better to make this base from polystyrene foam, using ordinary packaging from household appliances. But polystyrene foam crumbles and is inconvenient to roll into a ball, so this base is not very popular. In addition to those mentioned above, the following materials can become the basis of topiary:
- polyurethane foam;
- Knitting thread;
- papier-mâché, etc.
Trunk
The trunk of the tree of happiness connects the base with the crown, so it must be strong and stable. Its role can be ordinary wire, secured with artistic tape, twine or plastic. To make the product more realistic, this trunk can be made from a wooden branch or wood chips. But first this branch must be cleared of bark, covered with varnish and stain. If you are making a low topiary, then as a trunk you can take a popsicle stick, sushi sticks or wooden skewers fastened together. The color and type of trunk depends on the material of the base and crown. For topiary with coffee beans, white or brown colors are suitable. A curved trunk for a European tree can only be made from wire. You can also take any material that is approximately suitable for the trunk of a topiary, shape it and fill it with plaster.
Crown
To make a topiary crown, absolutely any materials that are currently at hand are suitable. To do this, you can take paper napkins, corrugated paper, folded origami, nylon tapes, etc. Then the crown needs to be decorated. To do this, take fir cones, real seashells, coffee beans, artificial flowers, etc. The crown is the main accent of the tree of happiness, so its design must be approached very seriously. The trunk and stand only emphasize the overall theme of the topiary, so it is advisable to first decide on the material for the crown, and only then design the remaining parts of the tree. But the topiary trunk may not be able to withstand a crown that is too large, so it should not be overloaded. Only the stand of the tree of happiness can be decorated with some elements.
Stand
As a stand for topiary, you can take an ordinary flower pot, a large flat stone or an iron bucket, decorate them beautifully and place them under the crown. The decor of the tree of happiness stand can be anything. It is decorated using the decoupage technique, decorated with lace or bright unusual shreds. You can stick stones, shells and artificial flowers on the stand. This topiary element is a semantic continuation of the crown, so its design must be based on the existing elements of the decorative product. If the tree is decorated in a marine style, then shells and multi-colored pebbles will be appropriate, and for a topiary in a romantic style you will need lace and hearts made of colored paper. The size of the tree's crown should be larger than its stand in order for the composition to look harmonious.
Wood making workshops
Making topiary with your own hands is easy. To do this, you do not need to have artistic taste or designer education. The ideal tree of happiness is decorated intuitively from available materials. There are many master classes on this topic on the Internet, some of them are presented below, but you should not follow these instructions step by step. According to Feng Shui, topiary quickly and effectively activates any sector of an apartment or house, instantly filling it with the necessary energy. But for it to work properly, it must be decorated with the necessary elements. To normalize family relationships, jasper or amazonite should be glued to the topiary stand. A tree with a tiger's eye, charoite or turquoise will help you climb the career ladder. And to improve your overall financial situation, you need to decorate your topiary with jet or a hawk’s eye.
From coffee beans
For this topiary, you need to take high-quality large coffee beans and stick them on the base for the crown, laying them out with the central strip down. The ball is completely covered. To do this, it is better to take a glue gun, although you can do without it, using regular glue from a tube. When the ball is completely sealed, take a plastic tube, which is sealed along the entire length with double-sided tape, departing 2-3 cm from both edges. Satin ribbon, fabric or corrugated paper of the desired color is glued to the tape. Then you need to dilute the alabaster and pour the resulting mixture into a pot or iron bucket. Then they insert the barrel into this mixture and wait for the alabaster to harden. After the mixture has hardened, its surface is spread with coffee beans in 2-3 layers. The finished crown is glued to the top of the trunk itself.
The resulting topiary can be decorated with an elegant bow or jewelry.
From the cones
Do-it-yourself topiary from cones is made according to a similar scheme. Small half-opened pine cones are glued onto the foam ball at small intervals from each other. If the gaps are too large, they can be filled with acorns or chestnuts. For additional fixation of elements, you can use golden or brown threads. To make a trunk, you need to put together several (up to 10) bamboo skewers, wrap them with thick white or brown thread, leaving open areas along the edges of the sticks. Then you need to dilute the alabaster with water or take a ready-made cement mixture, pour it into a flower pot and insert the tree trunk into the base. When the mixture hardens, it is decorated with pine needles or sisal, a fully formed crown of the tree of happiness is attached to the trunk, and the pot is decorated with a satin or openwork ribbon.
From satin ribbons and other fabrics
As a base for satin ribbon topiary, you can take a foam sphere or a ball of crumpled newspapers, secured with thick threads dipped in PVA glue. Then you need to take satin ribbons of any color, roll them into small rolls, first bending the ribbons at a right angle. You need to bend the satin ribbon several times until it runs out of length. The result of these actions should be a rose bud. Upon completion of production, it is necessary to sew all the petals with a thin silk thread at the base. The number of such roses is determined by the size of the base. Usually 20-30 flowers are required. Then they decorate the crown of the topiary. You can take an ordinary twig as a trunk for such a tree, and use a clay flower pot for the stand. The stand and tree trunk should be decorated with elegant green leaves made of satin ribbons or silk.
Corrugated paper
First you need to take a round foam ball. Then you need to make roses from corrugated paper. If they are very large, then there will be a lot of free space between the flowers that will need to be covered with something, so it is better to make these roses medium-sized. For one small topiary you will need 35-45 roses. To do this, it is better to take paper of different colors in order to alternate the shades of roses on the topiary in the future. The trunk for the tree of happiness can be made from traditional sushi sticks, and ordinary polystyrene can be used as soil. Alabaster is difficult to make, but foam is easy to find. Only the barrel needs to be inserted into the foam base the first time. At the same time, you need to decorate the crown by gluing roses in a chaotic manner. Then the crown is attached to the trunk and the topiary is considered ready. If desired, the soil in the pot is covered with artificial grass, and the trunk of the tree is decorated with a bright bow.
The sea tree of happiness can be made from materials brought from the sea: pebbles, shells, dried crabs and pearls. They should be used to cover the base for the topiary crown. If there are only a few shells and pebbles, the space between them can be decorated with sisal, artificial starfish and marine-themed salt dough crafts. When making a topiary trunk, it is better to take sushi sticks decorated with satin ribbons of white, blue or sand color. As a stand for the tree of happiness, you should take a white flower pot, which can be decorated with artificial pearls, lace and small figures made of salt dough. Inside this pot you need to fill it with alabaster and insert the topiary trunk into this alabaster mixture. You can put sisal fibers, sea pebbles and shells on top of the frozen filling.
Money topiary made of coins and bills
This topiary is usually made from fake banknotes, but for decoration, you can attach real coins to the crown of a tree or stand. Of course, it is better to use rare, antique or foreign coins rather than ordinary ones. To begin with, each bill needs to be folded in half, slightly moving the edges, and then folded into an envelope, securing the uneven edges with double-sided tape. The number of bills depends on the size of the base ball, but traditionally about 20-25 bills are required. The trunk of the money tree can be made from twigs or sushi sticks, and a flowerpot can be used as a stand. The outside of the flowerpot can be decorated with special self-adhesive paper with images of money or lace. Alabaster is poured into the pot itself, the trunk is placed in it and wait for it to dry. After this, the topiary soil is laid out with coins, wood sawdust or decorative stones.
From dried flowers and fresh flowers
Making a tree from dried flowers is quite simple. You can decorate the base for the topiary crown with dried flowers and yellowed leaves, but the flowers and leaves taken for these purposes must be strong and dense, otherwise they will simply fall apart during work. Dried flowers are attached directly to the foam ball. A curved branch from the street is taken as a trunk, and an ordinary clay pot is turned into a stand. The inside of the pot is filled with alabaster, first fixing the trunk of the topiary. This trunk is inserted into the finished tree crown, and the dried alabaster is decorated with dry leaves and flowers. Topiary from fresh flowers is usually created by professional florists, but you can try making it at home yourself. To do this, you need to take rose buds, chamomile flowers, lilies or chrysanthemums, correctly and carefully cut off their stems and attach them to the base of the crown. Otherwise, the technique for producing a tree of happiness and decorating a topiary pot is similar to making it from dried flowers.
Initially, topiary was a name given to a beautifully trimmed bush or tree. Gradually, the concept began to be applied to decorative, beautifully decorated trees used to decorate the interior. There is an opinion that the presence of topiary in the house brings joy and good luck, and if it is decorated with coins or banknotes, then also prosperity. Therefore, it is often called the “tree of happiness.”
Topiaries have gained popularity as a decorative element. Almost every housewife wants to get such a tree for her home. This desire is possible, and you don’t need to go to the store to fulfill it, since anyone can make topiary with their own hands.
You can create “trees of happiness” from different materials. Their crowns can be decorated with artificial flowers made of paper, organza or ribbons, coffee beans, pebbles, shells, dried flowers and candies. Topiary can resemble a real plant or take on bizarre shapes. The appearance of the tree will depend only on your tastes and imagination.
Making topiary
Topiary consists of three elements, on the basis of which different types of trees are created - the crown, trunk and pot.
Crown
Most often the crown for topiary is made round, but it can also be of other shapes, for example, in the form of a heart, cone and oval. To make it, you can use different methods, we will introduce you to the most popular ones:
- Crown base made from newspapers. You will need a lot of old newspapers. First, take one, unfold it and crumple it up. Then take the second one, wrap it around the first one, crumple it up again, then take the third one. Continue doing this until you get a tight ball of the required diameter. Now you need to fix the base. Cover it with a sock, stocking or any other fabric, sew the base, and cut off the excess. You can use another method. Wrap the cling film tightly around newspapers, forming a ball, then wrap threads around the top and cover with PVA.
- Crown base made of polyurethane foam. Using this method, the crown can be given different shapes and sizes, for example, a heart topiary. Squeeze out the required amount of polyurethane foam into a tight bag. Let it dry. Then get rid of the polyethylene. You will end up with a shapeless piece of foam. Using a utility knife, begin to trim away any excess bit by bit, giving the base the desired shape. This blank is convenient to work with; decorative elements will be glued to it and you can easily stick pins or skewers into it.
- Foam crown base. This base for topiary, like the previous one, is easy to work with. You will need a suitable size piece of polystyrene foam to pack the equipment. It is necessary to cut off all excess from it and give it the desired shape.
- Papier-mâché crown base. You can create a perfectly round topiary ball using the papier-mâché technique. You will need a balloon, toilet or other paper and PVA glue. Inflate the balloon to the desired diameter and tie. Pour PVA into any container, then, tearing off pieces of paper (scissors are not recommended), stick layer by layer onto the ball. To make the base strong, the layer of paper should be about 1 cm. After the glue has dried, you can pierce and pull out the balloon through the hole in the base of the crown.
- Other Basics. As a base for the crown, you can use ready-made balls sold in stores, foam or plastic balls and Christmas tree toys.
Pot
Any container can be used as a topiary pot. For example, flower pots, cups, small vases, jars and glasses are suitable. The main thing is that the diameter of the pot should not be larger than the diameter of the crown, but its color and decor may be different.
Decorating and assembling topiary
To make the topiary stable, you need to fill the pot with filler. Alabaster, polyurethane foam, gypsum, cement or liquid silicone are suitable for this. You can use polystyrene foam, foam rubber, cereals and sand.
To assemble the topiary, fill the pot to the middle with filler, insert the prepared decorated trunk into it and put the crown base on it, securing it securely with glue. Then you can start decorating the topiary. To attach elements to the crown, use a special glue gun; if you don’t have one, use super glue or PVA. At the final stage, place decorative elements, such as pebbles, beads or shells, in the pot on top of the filler.
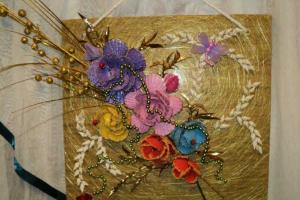
Master class: Flower arrangements “Flight of Fantasies”
Belashova Tatyana Anatolyevna teacher of the first junior group
Municipal preschool autonomous educational institution general developmental kindergarten No. 11 MO Korenovsky district
Description of work:
The master class is designed for parents and teachers, all creative people. I bring to your attention five compositions at once, I called the master class “Flight of Fantasies”, each flower tree is your fantasy and such trees also symbolize differently, when you make such an original gift, be sure to put “your whole soul” into your work and then the result will be 100%.
Not a lot of history, we all know that the art of topiary has a long history. Original small trees, for the production of which natural and artificial materials are used, your imagination and each tree will be original in its own way, it will be very nice to receive such a craft as a gift and decorate your home with it.
Purpose:
The flower tree is intended as a gift to friends, acquaintances, as well as for interior decoration. Learn to create a flower tree from improvised material: artificial flowers, ribbons, and beads.
develop creative imagination, fine motor skills, eye and of course patience.
Develop accuracy and perseverance when creating a flower tree. In this master class I will show you how to make five flower topiaries from artificial flowers at once.
This is the kind of beauty we will create:
To create our topiary we will need:
Materials:
1. Flower pots
2. Artificial flower heads
3. Gypsum, water
4. Artificial grass (lawn)
5. Glue gun
6. Various decor (ladybugs, butterflies, grapes)
7. Skewers
8. Plastic ball
9. Ball
10. Foam film
11. Tape
12. Toothpicks
13. Coffee beans


Step-by-step work:
Each master in the manufacture of topiary uses a base at his own discretion and according to his money. I tried many ways to make the base of a tree, the cheapest is to crumple up newspaper and wrap it in cling film to form a ball, flat paper or fabric flowers can easily be glued to this shape, foam balls or children's balls are used to insert flowers or fruits using toothpicks straight into the ball, using a glue gun; if you make a heart, you can use foam film (sold at any hardware store). To start making trees, you need the pots to be filled with plaster and, of course, have time to dry
And so we start by preparing to pour gypsum into pots, dilute the plaster with water, install the “trunk”, in this case I used 6-7 skewers

having previously wrapped the tape with tape,

you can add small seedlings to the pot for strength, pour the solution into the pots, insert the stem and let it dry well, usually one day is enough

There is no need to insert the trunk immediately; after 10 minutes, when the plaster turns into a thick “porridge”, you can insert the “trunks”

In my master class, I used coffee, poured it onto still wet plaster, when the plaster dries, the coffee beans will also hold tightly

Now put our pots aside and begin preparing the top base. In the first example I will show this base. I came across this unusual piece with spikes in the shape of a ball, on which you can put artificial grass in this case.

And we begin to string the grass step by step around the entire circle

This is the basis

I decided to make only such green and fluffy trees for my trees.

Once the plaster has thoroughly hardened, using a glue gun, we glue our fluffy green ball and begin to create

1.The first tree “Our Kuban Sun”
For this tree, I used sunflower heads, coffee beans

To begin with, we revive our sunflower, decorate the middle with coffee beans using PVA glue

Apply glue to the middle and glue the grains

and so are all the flowers, it should turn out like this

we begin to decorate the bottom while our flowers are drying, it’s your imagination, I used artificial lawn grass and ladybugs

I glued the sunflower flowers with hot glue, tied three leaves on the bottom of the trunk using tape, and on top there was a butterfly as a decoration and I got the first tree “Our Kuban Sun”


let's look from different angles


2. Second tree “Passion”
In this tree I decorated the bottom when the plaster had not yet hardened with the help of canapés and grass, inserted it into soft plaster


I added red flowers and decorative decorations and it turned out like this

Now the crown, I used red flowers beads and greenery, placed and glued with a glue gun at the top and bottom

Decorated with red beads

The result is a tree of passion

3. Third tree “Tenderness”
For this tree I used very delicate colored flowers, similar to jasmine flowers. I decorated the bottom with flowers and glued the butterflies with hot glue.

Now the top of the crown, I glued the flowers in a chaotic order, on the right for shade there is a delicate twig with white flowers

It turned out to be a very delicate tree

4. Fourth tree “Grapevine”
In making this tree, I used artificial grapes, artificial grape leaves, purple flowers, and various decor.

I decorated the bottom of my tree with artificial flowers and leaves.

Top, your flight of fancy, definitely a bunch of grapes, everything is glued with thermal glue, it holds up very well

And now the tree is in all its glory

5. Fifth tree “Breath of Summer”
This tree consists of a variety of wildflowers and you can arrange it at your discretion, the bottom can be decorated like this

The top will be so fun

In the end our tree will look like this