When a novice electrician watches a master work with a soldering iron, all the actions seem simple and understandable.
However, as soon as you pick up the tool yourself, troubles immediately begin: the solder does not hold, the contacts fall off, the insulation burns, the tip becomes covered with soot.
To prevent this from happening, certain rules must be followed.
The master knows them and fulfills them. For a beginner, I advise you to first understand how to solder correctly with a soldering iron. Only after that do you take on this work.
Features of workplace and tool preparation
3 main secrets: posture, light and air
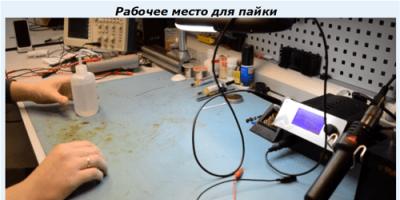
Even at home, to perform high-quality soldering, a comfortable worker position with good lighting is necessary. I recommend installing a desktop near a window that receives sunlight during the day and an artificial source of light in the evening.

Soldering involves heating substances and releasing fumes. Although heated rosin smells like pine needles, this smell is still harmful if inhaled frequently. And other fluxes and acids are even more dangerous. Entering the body through the respiratory system, they accumulate and cause chronic diseases.
Therefore, ventilation is important. Work with an open window, or even better, use forced exhaust.
Useful devices
A short tin with a paper lining is necessary for working with solder and rosin.

A special stand helps to store a heated soldering iron, and a sponge allows you to clean the hot tip from oxides.

It is convenient to remove excess melted solder with a desoldering pump.

Working with small objects is made easier by tweezers, small vices, and “third hand” devices. The simplest option: regular pliers with an elastic band.

You can make other simple designs with your own hands.

Selecting and preparing a soldering iron
The sale offers various models with voltage from 12 to 220 or 380 volts. Each soldering iron is created for a specific job, although it has universal capabilities.
They are assessed by the power consumption of electrical energy, which is spent on heating the tip of the tip.
It is convenient to solder radio components with a soldering iron with a power of 40÷60 watts, and for wires choose 80÷100.
For beginner soldering ironers, it is enough to use simple models of two soldering iron designs with:
- heating from nichrome wire and a copper rod;
- ceramic insert and copper tip with nickel coating.


The first type of soldering iron is cheaper, but it requires constant care of the tip, takes longer to heat up to the desired temperature, and wears out faster.
A soldering iron with a ceramic insert works better, but is more expensive. In addition, ceramics require careful handling. It can break due to mechanical shock.
Personal preferences
I have been using transformer soldering irons of the “Moment” type for more than 30 years.

Some people don't like it because of the extra weight. But for me this indicator is not critical. The industrial wattage of 65 is good for amateur radio soldering, but it is not enough for connecting electrical wires.
Therefore, I assembled a more powerful structure with my own hands.

About counterfeit brands
For a long time I could not understand why I like transformer soldering irons, but they are massively criticized on the Internet. Even in the above article, readers expressed a negative opinion about them, criticizing their fragility and poor quality.
I realized this only after a visitor to my site sent me a burnt-out soldering iron from the Chinese company Licota for experiments.

It looks very nice, is light in weight, fits comfortably in the hand and is originally packaged. Upon closer examination of it, I discovered many installation and design defects. I wrote them down in separate articles:
- and the need to refine its internal surfaces;
- old Soviet and modern from China.
When buying cheap soldering irons from dubious sellers, you can end up with low-quality products, lose money and time. Please pay attention to electrical performance and warranties.
There are other various . But it’s better to start learning soldering on the models described above.
About sharpening the tip
Cleanliness is not only a guarantee of our health, but also a guarantee of high-quality soldering. It must be observed during work.
The copper tip of the soldering iron heats up to such a state that oxides and carbon deposits form on it. When they penetrate the solder, you can forget about the quality of the soldering. Therefore, the tip of the tip should always be clean and well sharpened.
Its shape is created for a specific type of parts to be soldered:
- "flat screwdriver" transfers heat well. It is used to heat massive parts;
- "pyramid" or "sharp cone" allows you to more conveniently control the amount of heating. It is used to connect small radio elements or thin wires;
- "blunted cone" sharpened for soldering medium-section wires.
The first type of sharpening is more popular. It can be formed by hammer blows. Then the metal is better compacted and retains its properties longer.
By placing this tip on the part to be soldered with a plane or an acute angle, you can regulate the degree of its heating.
Modern ceramic soldering irons have a set of removable tips of the most necessary shapes. They are coated with a layer of nickel on top and do not require sharpening or preparatory treatment.
How to tin a copper tip
The tip of a new soldering iron without a protective nickel coating must be coated with a thin layer of solder, which will protect it from carbon deposits and premature wear. For this:
- the soldering iron is turned on under voltage, heating the tip to working condition;
- immerse it in a piece of rosin;
- melt the solder, distributing it over the surface of the tip tip. It is convenient to use a wooden object.
What are the soldering steps?
The main objective of this technology is to connect two metal parts, most often conductors, with a low-melting alloy so that they hold firmly and pass electric current with the minimum possible resistance.
To do this, you need to perform a series of actions sequentially. Let's look at them using the example of soldering wires. This:
- removing insulation from the connected ends of the wire;
- mechanical stripping of metal cores to an ideal state of oxides;
- heat treatment with flux - tinning the ends with a thin layer;
- heating the solder and applying it to the soldering area.

Removing insulation
The dielectric layer of the wire can be made of polyethylene, fabric, varnish or other similar material. It needs to be removed.
This work is best done with a sharp knife, placing its blade almost parallel to the axis of the metal core. This prevents cutting and deep scratches. They weaken mechanical strength and increase electrical resistance. This cannot be allowed.
Thin wires coated with varnish can simply be treated with an open flame of matches or a lighter. The same method is suitable for twisted pair and even thicker wires.

There are special pliers of various designs on sale for stripping insulation from the end of a wire of any diameter. They allow this work to be done professionally without damaging the core.

After removing the insulation, the condition of the metal surface is assessed. Pay attention to cleanliness, absence of dents and cuts.
Removing dirt and oxide film
Only pure metal can ensure a high-quality connection of parts when soldering. It is created by mechanical cleaning of the surface and chemical solutions.
First, they work with a knife blade, lightly pressing it against the contaminated metal at an obtuse angle. The core is pulled from the insulation layer to the bare end, rotating slightly in one direction. The metal will immediately lose its dullness and begin to shine.
Chemical cleaning involves treatment with solvents, alcohol, and FES flux.
Tinning of contact pads
The final cleaning of the metal surface of the conductor is carried out by heat treatment with flux, using a tinned soldering iron tip. The most popular and universal remedy is rosin. It is used in a solid state, dissolved in alcohol or jelly-like.
The sale allows you to purchase rosin in any form and provides a wide range of other fluxes.

The sequence of tinning a wire core with solid rosin:
- Heat the soldering iron to the desired temperature. It can range from 180 to 240 degrees and depends on the solder and the metal parts being connected. To control the heating, the tips are touched with a tip of solid rosin. If it begins to rapidly form steam, then heating is normal.
- The cleaned conductor is placed on the rosin and touched with the tip of the soldering iron. The wire is rotated to coat it evenly with molten flux.
- The tip of a soldering iron melts the solder and applies it to the rosin-treated wire, evenly distributing it over the surface.
A solution of rosin in alcohol is applied with a brush to the surface to be tinned or simply dripped through a dropper tube.

Jelly-like rosin is squeezed out of a special syringe, which is very convenient to do.
The conductor treated with liquid or jelly-like rosin is heated with a heated soldering iron tip with a drop of solder, accelerating it over the entire contact area.
Direct soldering
It is started after both contact pads are prepared for connection: cleaned of dirt and oxides, tinned.
The soldered ends are connected together. A piece of solder is placed on them with a heated soldering iron, ensuring that it spreads over both areas. After this, the tip is sharply retracted to the side, and the parts remain motionless until the tin completely hardens. This is judged by a slight darkening of its color.
Correctly performed soldering is distinguished by a strong connection of contacts and a smooth surface of the solidified solder, which is slightly shiny. Its quality is checked using a small mechanical tensile force.
If the surface of the solder has darkening and unevenness, then the soldering is unreliable and needs to be corrected.
These include:
- Warming up of the parts to be connected should be done not with the tip of the tip, but with its side surface. This provides greater contact and better temperature transfer. However, when working with a tip with a blunt tip or a transformer soldering iron, this advice will practically not help.
- To give increased strength to the connection being created, additional twisting of the wires is done.
- A mechanical device, the third hand, makes it easier to fix the stationary position of the parts being connected.
- New electronic components are manufactured with tinned contact surfaces. If they are not contaminated in any way, then flux and solder can be immediately applied to them without prior tinning. This speeds up the soldering process.
- The sale offers craftsmen tubular solder, inside of which there is a flux. Usually this is rosin. This combination is easier to work with: the number of intermediate operations is reduced due to the simultaneous supply of both components.
4 signs of high-quality soldering
The reliability of the connection is assessed by:
- the bright shine of the created surface layer;
- absence of excess solder on parts;
- tensile strength of control mechanical force;
- integrity of the insulation layer, absence of traces of melting.
If you still have questions about this topic, then ask them in the comments. I will definitely answer.
Soldering is a method of creating a permanent connection by introducing into the contact zone a molten material with a melting point lower than that of the materials of the parts being connected. You can learn how to solder correctly with a soldering iron by mastering the technology in practice.
Purpose of the device
The electric soldering iron is available with a supply voltage from 12 to 220V. It is difficult to manufacture a low-power design for high voltage, since this requires many layers of thin wire, which leads to an increase in size. In addition, it is chosen based on work safety conditions.
It is convenient to select the power of the soldering iron using a simple table:

The optimal tip temperature is maintained manually or automatically. For this purpose, thyristor regulators are used.
To increase service life, the end of the soldering iron can be forged. In this case, copper will dissolve less in the solder. Before using a soldering iron, the tip is given a certain shape with a file. The most common are corner and cut. The end is given a knife-like shape in order to simultaneously solder several contacts of a microcircuit or connector pins.

Tools
Before properly soldering with a soldering iron, the work area should be equipped with the necessary tools:
- Stand. The heated device is located on the stand. It also serves to place flux and is a platform for working with wires. A “crocodile” with a piece of foam rubber is additionally attached to it for cleaning the sting.
- Tripod. It includes clamps (“crocodiles”) that can be moved in height and rotated, a tray with rosin, and a holder for a soldering iron.
- Set of tools. It is needed to support parts, give wires desired shapes, and clean solder surfaces. Such tools include tweezers, pliers, wire cutters, round nose pliers, files, a knife, and sandpaper.
Soldering secrets

How to use a soldering iron?
Foreign substances are removed from the surfaces of parts by sanding with sandpaper and degreasing with acetone or gasoline.
The tip is cleaned of oxides and soot with a file, block or sandpaper.
The soldering iron is heated, its end is coated with rosin, and then tinned. To do this, the solder on the tip is rubbed with a wooden block. The entire working surface should acquire a characteristic silver color.
The solder heats up. A small part of it in the form of a drop is applied to the joint and leveled. If necessary, it is added to the required amount until the contact area is covered. The connection area warms up. How to solder wires correctly? The contact of the tip with the conductor should be over the largest possible area, and not with the tip, as inexperienced installers do. In this case, the rosin must still remain on the drop of solder so that its oxidation does not begin. The soldering process is carried out in one step. If you pull the tip back and press it back into the part several times, the solder will turn gray due to oxidation as the rosin evaporates sooner. During the cooling process, the parts must remain motionless. When the wires are displaced when the solder has not yet hardened, microcracks form in it, worsening the strength of the connection and creating additional electrical resistance.
Remains of rosin are removed with a brush moistened with alcohol.
Soldering wires
Let's figure out how to properly solder wires with a soldering iron. First of all, their ends intended for connection are freed from insulation. It is important to warm up the wires being connected properly. To do this, the dimensions of the tip must correspond to the dimensions of the parts. If the soldering iron is too large, then adjacent elements will be damaged during operation. With its small size, soldering will be unreliable, since the parts are difficult to heat up.
Preparing the wire involves removing the insulation from its end. It is removed with a knife or wire cutters. The stranded wire should be twisted so that individual parts do not stick out, and tinned. To do this, it is lowered into a bath of rosin, a drop of solder is taken with a soldering iron and passed several times along the copper wires. During the tinning process, the wire must be heated and rotated so that it is coated on all sides. To prepare for further work, the tinned end is dipped into molten rosin and thus “varnished”. The excess can then be easily removed by hand.
Solder is a weak alloy and will break under light loads. The wires to be connected are pre-stripped and twisted. To do this, they must have a common axis. Their centers should be aligned, after which one wire is twisted along the length of the other. A similar operation is performed with the second end. A melt of rosin is applied to the joint, and then solder. The twist should be heated for 2-3 seconds.

If the quantity is insufficient, solder must be added so that the coating is uniform and shiny. Many people do not understand why the connection does not warm up even with a powerful device. How should soldering be done with a soldering iron in this case? The fact is that heat spreads from bottom to top. Therefore, the twist must be heated from below. When overheated, the solder spreads, and when there is not enough heat, the coating becomes loose.
Single-core wires are cleaned to a shine and dipped in rosin. Then they are connected and heated for 3-5 seconds. and apply solder. A heat-shrinkable tube of a larger diameter is put on the exposed wire, which shrinks with increased temperature, after which reliable insulation is formed. If the solder cools down quickly, use a lighter to heat it up. Having mastered how to solder wires correctly, you can begin more complex operations.
Twisting copper and aluminum wires together is unacceptable due to heat generation in the contact resistance. They are fixed through an intermediate element, which can be a bolted connection separated by washers, a terminal clamp, or a layer of other metal. Tin-based aluminum solder is also suitable for copper wire and can be a reliable intermediate layer for them.
Soldering radio components
Soldering with a radio element is carried out by twisting or overlapping, using a heat sink, for example, with tweezers. The heating of many parts of electrical circuits should not exceed 70 ºС for a duration of more than 3 seconds.
On a printed circuit board, the mounting area around the perimeter of the hole is covered with a layer of solder. Then the tinned and rosin-coated end of the conductor is inserted into it. It is heated and moistened with an added drop of solder. The tip should touch the pin and the board track at the same time. Excess solder is easily removed with copper braiding. The work is done efficiently when all soldering points are similar to each other. The leads of the radio elements are bent and inserted into the holes of the board. The ends on the reverse side are bent slightly so that the part does not fall out.
The soldering iron cannot be kept dry for a long time in a heated state. It becomes covered with a layer of oxides, and the tip will have to be cleaned and tinned again. There should always be a layer of molten rosin at the end, and the soldering iron should be turned off during long intervals between work. Also, old solder is periodically removed from it with a sponge.
Elements of boards of various equipment can fail under the influence of static electricity. To prevent its occurrence, the soldering iron body should be grounded.
Working with microcircuits
Let's look at how to properly solder microcircuits. The process has some peculiarities. Microcircuits cannot withstand overheating. There should be no excess solder at the joints. To do this, use a soldering iron for microcircuits with temperature control.
Simultaneous heating of the contacts is carried out using a hair dryer with nozzles. The area on the board needs to be cleaned. Acetone or universal varnish solvent is suitable for this. Then the hair dryer is turned on and its temperature is set at 330-370 ºС. At the minimum blowing speed, the chip heats up and is immediately removed with tweezers after the contacts have melted. Then the soldering area is lubricated with flux, and a new microcircuit is installed in place of the faulty one. When heated with a hairdryer, it sags a little due to the melting of the contacts, which is a signal that the operation is complete. The soldering area is wiped with acetone to remove any remaining flux. Sufficiently powerful contacts can be additionally heated with a soldering iron.
When simple ones are mastered, you can move on to complex compounds, for example, dissimilar metals using gas, furnace or pulse heating.

Soldering aluminum
Difficulties in soldering aluminum are associated with its low melting point (660 ºС) and strong oxide film. The parts are heated in an oven or with a gas flame burner. Their preparation consists of removing fats with a solvent and mechanical cleaning with sandpaper, an abrasive wheel or a stainless steel brush. In this case, the oxide film is formed again, but its thickness is much less than the previous one. Then flux is applied to the joint and heated to the melting temperature of the solder. The electrode rod is touched to the joint until it begins to melt.

Solder for soldering aluminum at temperatures of 150-400 ºС can be based on zinc, tin, cadmium (low-melting). It has poor corrosion resistance and requires additional coatings. Refractory solders, such as silumin (590-600 ºС), 34A (530-550 ºС) and others, are more reliable and are used more often. Aluminum alloys have a lower melting point. They are soldered with furnace heating, which is more precisely regulated.
Conclusion
How to properly solder wires and microcircuits with a soldering iron? The answer to this question implies, first of all, careful preparation of the tool and parts. During the process of creating a permanent connection, the layer of molten solder must always be protected with flux. For each operation, a soldering iron of appropriate power and the shape of the working surface of the tip is selected. When the parts are connected correctly and the temperature is maintained, the soldering is reliable and lasts a long time.
How to solder with tin? Soldering is the formation of mechanical contact between metal surfaces. Tin often acts as solder - a “gasket” between the surfaces of parts that holds them together. To solder two parts, it is not enough to heat the surface with tin and attach the second part to it, like glue.
The temperature of the surfaces must be different. It's better to buy a soldering station. The price for it is about 1000 rubles and more. You can get the following benefits if you work not with a soldering iron, but with a soldering station:
- The heating temperature at the soldering station is regulated;
- the tip does not burn out, so the set temperature during operation is maintained constantly;
- The soldering station usually has a heat-resistant tip;
- There are antistatic soldering stations. This property is indispensable if you are going to solder field elements. An antistatic soldering station costs $150-200;
What you need to solder tin
In addition to a soldering iron, you will also need flux to remove oxides. Well, tin will be solder - the “glue” for joining metal parts.
Which flux should I choose? Previously, they soldered with rosin. But it’s difficult to wash off the remaining rosin, especially if the board is soldered. Especially if the gaps are small: dendrites grow.
On the modern market you can easily find a large selection of alternative fluxes to rosin. They are washed off with water and do not harm the soldering iron tip. For convenience, such fluxes are also packaged in syringes. And the price may vary - it’s quite possible to find inexpensive ones.
Pure tin solder is practically not used today. Multi-channel solder is sold in coils and reels. This means that there is already flux inside the tin wire!
And in small jars you can find a sting activator. Before starting soldering, it must be tinned. It is also necessary to do this after soldering.
Also, for soldering with tin you will need a knife and pliers. We begin to prepare the workplace. Take a disposable plate. It will serve for waste. Take care of the lighting. Tin the contact surfaces of the parts. You need to take flux and then apply tin using a soldering iron. The tin from the soldering iron will flow around the contact pad even with a light touch if the temperature has been selected correctly. Remove any remaining flux.
The ability to solder well is quite difficult to acquire. You'll have to practice, but the results are worth it.
We hope you now know how to solder with tin, or at least we helped with advice. If you have any questions, ask them in the comments.
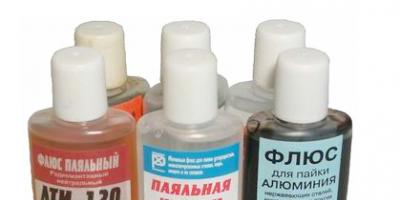
Most often, for soldering printed circuit boards in radio engineering products and household appliances, they prefer to use ordinary pine resin rosin, but it can be replaced with other components. When molten, it promotes the spreading of tin solder along the copper traces of the board. This allows you to reliably solder the legs of radio components and the ends of connecting wires. Rosin allows you to effectively solder copper, tin and silver products. In order to solder galvanized and stainless iron, radiators, buckets, pans, various alloys, brass and other metals, you can use acid solutions.
Bottle with acid solution for soldering metals
Acidic solutions
It is important to choose the right acid solution. It depends on the type of metal from which the parts are made. This could be an aluminum or copper radiator, a kettle that needs to be soldered, copper, brass or roofing iron:
- Galvanized iron. Places where it is necessary to solder are treated with an acid solution, correctly called (zinc chlorate). This composition can be bought in specialized stores; the easiest way is to prepare it yourself.
To do this, it is enough to throw pieces of zinc into 100 ml of hydrochloric acid, which can be removed from the body of AA batteries. After the chemical reaction is completed, the zinc will dissolve, releasing a large amount of hydrogen.
It is correct to carry out the process in a well-ventilated area, in the absence of open flame.
After the solution has cooled and settled, the upper transparent yellow part is poured into a clean glass container. The sediment is poured into the ground; it is not recommended to drain into sewers with metal pipes. Acid can damage pipes and seals. The remaining part of the solution is ready for processing galvanized iron roofing.

How to solder sheets of roofing iron
- Stainless steel. Before soldering, the surface is cleaned and treated with phosphoric acid, which contains the following elements:
- up to 50% zinc chloride;
- ammonia up to 0.5%;
- dissolves in water with a pH concentration of 2.9%.

Phosphoric acid is used for soldering as a flux and for cleaning metal from rust.
The solution can be transparent, light yellow or colorless; when heated to 213ºC, it is converted into H 4 P 2 O 7 (pyrophosphoric acid), which degreases the surface of metals. The composition dissolves the oxide film on various metals and alloys:
- stainless steel;
- brass;
- Nickel alloys;
- copper alloys;
- alloys of carbon metals and low-alloy steel.
Application of acids
To solder metal products (pipes, radiators, buckets, pans), the surface of the elements is thoroughly cleaned, using a file or sandpaper. An acid solution is applied to the cleaned areas with a brush, after which solder is melted to a liquid state on the surface with a soldering iron.
Liquid solder tins the cleaned areas; when boiling, the acid flux comes to the surface. When the solder hardens, the soldered elements are securely and hermetically fixed.
You can solder with a powerful soldering iron or an open flame from a gas burner. Various heat sources can be used depending on the surface area to be heated and the melting point of the solder.
Remains of acid flux are washed off with water, preferably a soapy, alkaline solution, this will prevent further corrosion of the metal.

Machined and brazed stainless steel elements
Acid can damage skin and muscle tissue, and inhaling vapors can damage the respiratory organs. When contacting air, hydrochloric acid enters into a chemical reaction, and smoke is visible above the open container. To work correctly in these conditions, wear safety glasses, rubber gloves, a gas mask, or a respirator.
If the solution gets on the skin, wash this area of the body with a 6% alkaline solution or plain soap. It is not recommended to solder radio circuit boards with fluxes containing acid. The acidic components are difficult to wash off and contribute to the breakdown of copper tracks. It is better to replace them; there is a special paste for this.
Soldering acid solutions should be stored correctly in containers made of the following materials:
- glass;
- ceramics;
- porcelain;
- fluoroplastic
Such dishes do not react with acid; the prepared composition can be stored in it for a long time.
Soldering without a soldering iron
At home, if you don’t have a soldering iron, you can solder copper wires with a diameter of up to 2 mm. For soldering radiators and utensils, special solder, blowtorches, and gas torches are used, since the copper rod of the soldering iron is not able to heat a large surface area. There are several ways:
- Tinning and soldering wires in molten solder. The wire is first heated, applied to a piece of rosin, it melts and spreads evenly over the surface of the connection. The wire is twisted and lowered into molten solder in a tin can over a fire; it can be heated with a blowtorch. In order to solder the twist, it is advisable to hold it in boiling tin for up to 1 minute. The copper wires will heat up and the alloy will fill all the gaps between the twisted wires. In this way you can solder small parts made of copper, brass and other alloys.

Tinned and soldered copper wire
- Soldering wires in the gutter. The stripped and twisted wires are laid in a 2-3 cm piece of aluminum tube, 0.5-1 cm in diameter, sawn lengthwise. The top is filled with a mixture of fine shavings of solder and rosin dust, and from the bottom this structure is heated with a lighter, candle or small blowtorch.

Heating the solder with a blowtorch (torch)
The mixture melts and thoroughly envelops all wire connections. After hardening, the aluminum gutter is removed and the joint is insulated.
Solder shavings can be sharpened with a coarse file.
- Thin copper wire up to 0.75 mm can be placed on aluminum foil, pour in a mixture of rosin and tin shavings, wrap tightly and heat for 3-4 minutes. The solder will evenly fill all the elements at the soldering site; after cooling, the foil can be removed and discarded.
How to prepare solder paste
Soldering paste is sold in radio parts stores, but you can prepare it yourself. To 32 ml of hydrochloric acid add 12 ml of ordinary water, then pieces of zinc - 8.1 g. For this, enamel dishes are used.
After the dissolution reaction is completed, tin – 8.7 g is added to the composition. When the second dissolution reaction is completed, the water is evaporated to a paste-like consistency of the solution. The paste is transferred to a porcelain container, where powder is poured, which contains:
- lead – 7.4 g;
- tin – 14.8 g;
- dry ammonia – 7.5 g;
- zinc – 29.6 g;
- rosin – 9.4 g.
This paste is mixed with 10 ml of glycerin, heated and stirred.
How to solder correctly, sequence of actions:
- The parts at the soldering site are cleaned, the wires are twisted;
- the paste is applied with a brush in a thin layer;
- the surface for soldering is heated with a plasma lighter, torch, candle or alcohol tablet, or even with matches or over a fire until the paste melts;
- After melting, the soldering elements are removed from the heat source, and the solder hardens.
The paste is very effective when it is necessary to solder copper wire, small parts made of alloys based on copper, brass, such as radiators, samovars and other products.
Soldering utensils
Buckets and pans with holes no more than 5-7 mm in diameter are recommended to be soldered without using a soldering iron with POS-60 solder. Leaky places on the dishes can be reliably soldered. To do this, the holes are carefully cleaned with sandpaper from the inside of the container. The hole along the edges is given a conical shape, the cleaned areas are treated with a solution of soldering acid with a brush.
In order to prevent solder leakage from the outside, all bottoms or individual places where holes need to be soldered are covered with thin tin plates. Powdered solder and rosin are poured into the cleaned holes from the inside. The soldering areas are heated over an open fire until the solder melts and fills all the cracks.
For radiators, stripping and soldering are carried out from the outside. To prevent solder from leaking inside, the hole is covered with a plate of tin, galvanized iron, or can be replaced with copper or brass. The choice depends on the material from which the radiator is made. Homogeneous metals and alloys that are similar in composition are easier to solder.
After completing the soldering process of radiators, the internal and external surfaces are thoroughly washed with an alkaline, soapy solution in order to prevent the effect of acidic components on the metal.

Bottle with flux for soldering aluminum
When it is necessary to solder aluminum parts, special solders are used:
- 4:1 mixture of tin and zinc;
- 30:1 mixture of tin and bismuth;
- 99:1 tin and aluminum powder.
The sequence of surface treatment is the same as for preparing iron utensils. In order to properly solder aluminum, rosin is added to the powder, but the melting point must be above 500ºC. It is recommended to stir the solder in the hole, using a thin copper soldering iron tip.
PCB soldering paste
The composition is not much different from the paste that is used to solder without a soldering iron; the powder includes the following components:
- tin – 14.8 g;
- rosin – 4 g;
- zinc dust – 738 g;
- lead powder – 7.4 g.
For a paste-like consistency, add diethyl ether - 10 ml, it can be replaced, use glycerin - 14 ml.
Soldering sequence:
- the legs and tracks of the printed circuit board are cleaned;
- in order to solder, the legs of the parts are inserted into the holes of the board;
- places where it is necessary to solder on the board are lubricated with paste;
- the paste is heated with a soldering iron until it melts;
- The solder spreads and hardens, providing reliable electrical contact between the parts and the traces of the printed circuit boards.
Soldering lessons. Video
You can learn how to solder correctly by watching this video.
How to solder with tin? Soldering is the formation of mechanical contact between metal surfaces. Tin often acts as solder - a “gasket” between the surfaces of parts that holds them together. To solder two parts, it is not enough to heat the surface with tin and attach the second part to it, like glue.
The temperature of the surfaces must be different. It's better to buy a soldering station. The price for it is about 1000 rubles and more. You can get the following benefits if you work not with a soldering iron, but with a soldering station:
- The heating temperature at the soldering station is regulated;
- the tip does not burn out, so the set temperature during operation is maintained constantly;
- The soldering station usually has a heat-resistant tip;
- There are antistatic soldering stations. This property is indispensable if you are going to solder field elements. An antistatic soldering station costs $150-200;
What you need to solder tin
In addition to a soldering iron, you will also need flux to remove oxides. Well, tin will be solder - the “glue” for joining metal parts.
Which flux should I choose? Previously, they soldered with rosin. But it’s difficult to wash off the remaining rosin, especially if the board is soldered. Especially if the gaps are small: dendrites grow.
On the modern market you can easily find a large selection of alternative fluxes to rosin. They are washed off with water and do not harm the soldering iron tip. For convenience, such fluxes are also packaged in syringes. And the price may vary - it’s quite possible to find inexpensive ones. Pure tin solder is practically not used today. Multi-channel solder is sold in coils and reels. This means that there is already flux inside the tin wire!
And in small jars you can find a sting activator. Before starting soldering, it must be tinned. It is also necessary to do this after soldering.
Also, for soldering with tin you will need a knife and pliers. We begin to prepare the workplace. Take a disposable plate. It will serve for waste. Take care of the lighting. Tin the contact surfaces of the parts. You need to take flux and then apply tin using a soldering iron. The tin from the soldering iron will flow around the contact pad even with a light touch if the temperature has been selected correctly. Remove any remaining flux.
The ability to solder well is quite difficult to acquire. You'll have to practice, but the results are worth it.
We hope you now know how to solder with tin, or at least we helped with advice. If you have any questions, ask them in the comments.
olovorona.ru
remontoni.guru > Tools and equipment > How to solder correctly with a soldering iron with rosin: instructions and recommendations
Nowadays, almost every person needs to be able to solder using a soldering iron with rosin. Since no repair of various electrical appliances can do without this. You can learn how to properly solder any object by reading this article.
- Work process
- Useful tips for beginners
What should a soldering kit consist of?
In order to solder anything, you need to acquire the following tools: pliers, Phillips screwdrivers of various sizes, files, wire cutters, and, of course, the soldering iron itself, solder for soldering and flux.
There are many types of soldering iron, but their operating principle is the same, so choose the tool that you like best.
The best option for an inexperienced person would be an electric soldering iron operating on a 220-volt network with a power of 40 watts. In the future, as soon as you master all the intricacies of this work, you can purchase a power regulator for more complex work.
Solder is a metal alloy, which can be made of tin or lead, and is necessary in the soldering process, as it helps connect metal elements together. In the store it is sold as wire, but you can also buy solder in the form of a tube with rosin.
Flux is a product of processing wood resin. There are several types of flux, but the most common and effective for the job is rosin flux. Help you get rid of acid on the soldering tool tip.
Work process
Before starting work, it is necessary to clean the surface of the soldering iron from acid. Since during previous work a film of oxidizing agents or other debris released during melting appeared on it, which will interfere with the work process.
To clean, you need to perform the following steps: heat up the soldering iron, then take sandpaper and use it to clean the tip. After this you can get to work.
Main stages:
- To begin with, it is recommended to open the window in the room, since the room should be well ventilated so as not to harm your body during work.
- Now plug the soldering iron into a power outlet. As soon as smoke stops coming from the tip, you can begin the soldering process.
- Touch the tip of the soldering iron to the rosin, then wait a few minutes and tin the latches of the parts you need, to do this, just lean the soldering iron against them for a few seconds.
- After this, place the soldering iron on the board. After ten seconds, you can repeat the process.
- Once you've done a few passes, the job is complete, although if you need to solder copper wire, just one tinning is all it takes.
- After tinning the copper wire, it must be coated with tin; to do this, touch the tip of the soldering iron to the tin alloy, and then transfer it to the wire. If you did everything correctly, the wire should change its color to silver.
- To achieve the most effective result, it is recommended to use solder with rosin. The best solder is considered to be tin in its pure form, but it has a significant drawback: it is too expensive. So, it is recommended to replace tin and use a lead-tin alloy as solder.
- During the melting process, the most important factor is the cleanliness of the joined surfaces from acid or other debris. So you need to do some cleaning before starting work; clean the surface as thoroughly as possible using a knife or sandpaper. As a result, the surface should become lighter.
- After this, it is also recommended to clean the surface with rosin.
- If you are soldering an object with a large surface and you do not have enough solder, then simply wait for the first part of the solder to cool, and then apply more nearby. The main thing is to ensure that the alloy is distributed evenly over the entire surface.
- There are times when you can solder something without using a soldering iron. To do this, you just need to take rosin and dissolve it in an alcohol solution, then apply it to the surface using tweezers or a screwdriver.
By the way, this method does not cause any harm to the human body, since no harmful substances are released during operation, unlike conventional soldering. So it’s up to you to choose the soldering method.
Safety precautions when working with a soldering iron
During work, solder and rosin, when certain temperatures are reached, will release various chemical elements that have an extremely negative effect on the human body, so it is necessary to work in a well-ventilated area, such a workplace will be able to reduce the content of harmful substances in the air.
You can also harm yourself when using a soldering iron from a low-quality outlet. Therefore, before starting work, it is recommended to make sure that your workplace will be as safe as possible and that the outlet is in working order.
If you do not operate it correctly, you may experience a fire, since the soldering iron has a high temperature when heated. To prevent this from happening, use special soldering iron stands that will not catch fire from high temperatures.
After reading this article, you know what rosin, flux and solder are, and now you are familiar with the main points of working with a soldering iron. So you can start repairing electrical household appliances yourself using a soldering iron, most importantly, do not forget to follow the tips described in the article, and you will succeed.
remontoni.guru
How to solder aluminum with a soldering iron

- Aluminum soldering technique
- Using flux for soldering aluminum
- Video
Aluminum is widely used as a material for a wide variety of structures. It is only slightly inferior to steel in terms of strength. Aluminum is much easier to process and has very high electrical and thermal conductivity.
However, there is a serious problem when deciding how to solder aluminum with a soldering iron, since there are specific features and difficulties here. The fact is that conventional methods are not suitable for aluminum.
Aluminum soldering technique
Difficulties in soldering aluminum are due to its ability to form oxide films literally in a split second. Therefore, for this operation, soldering irons require special replacement tips or mercury-based fluxes.
While aluminum wires are relatively easy to solder, awkward flat surfaces pose many problems. To solve them, it is necessary to carry out thorough preparation for the work.
The soldering procedure can be performed with an ordinary soldering iron with ordinary solder and rosin. Due to the high thermal conductivity of aluminum, the soldering iron must have increased power from 60 to 100 watts. If the available soldering iron is not able to heat large parts, it is additionally heated on an electric or gas stove.

Before soldering begins, the joint is thoroughly cleaned with a file, crumbling brick or sandpaper. After the thick oxide film has been removed from the surface, degreasing is carried out using gasoline or any organic solvent. After this, the soldering area is lubricated with flux. At the same time, the soldering iron is immersed in rosin. The appearance of a slight haze indicates readiness for work. Instead of rosin, ammonia can be used. Thus, the soldering iron tip is cleaned of metal oxides.
The further procedure is practically no different from working with conventional metals. The cleaned soldering iron tip is lowered into the solder and held there until it is completely covered with a film. After this, a small amount of solder is captured by the tip, transferred to the soldering site and leveled over the entire surface, having previously tinned it. A major amount of solder is then applied to ensure a strong aluminum connection. You need to wait until the solder cools down and then wipe the joint with a damp cloth. Final cleaning is done using a file or sandpaper.
Flux for soldering aluminum
Flux plays a special role in the process of soldering aluminum parts. It allows you to effectively remove oxide films formed in air and grease stains. In addition, the flux protects surfaces from oxidation during soldering.

Flux for soldering aluminum is sold ready-made, but it is quite possible to prepare it yourself. To prepare the flux: take 30 g of zinc chloride, 10 g of ammonium chloride and dissolve in 60 milliliters of water.
Often, instead of flux, so-called soldering liquid or soldering acid is used. It is obtained by reacting centered hydrochloric acid with zinc metal. For this purpose, the acid is poured into glass or porcelain containers. This action should not be performed near an open flame due to the explosiveness of the hydrogen released. Zinc is added to the acid in small portions. As a result of a chemical reaction, zinc chloride is formed. After hydrogen ceases to be released, the container with the resulting substance is placed in warm water. The finished liquid is mixed with ammonia.
If the technology is followed normally, the strength of the connection is higher than that of many metals.
How to solder aluminum with tin yourself
Soldering wire connections with solder is considered the most reliable method of connecting wires and cable cores. It’s good if you only need to solder copper wires, which are easily tinned with solder. It’s not for nothing that in electronics all terminals of elements are copper and tinned.
Soldering aluminum at home
Once solid wires and stranded cable strands are tinned, they are fairly easy to connect by soldering. How to solder aluminum with tin if the solder is rejected by aluminum oxide. As you know, aluminum is coated with a thin layer of oxide, which instantly forms on aluminum upon contact with oxygen. In order for the solder to adhere well to the aluminum wire, you need to remove the aluminum oxide and then tin it.
For this purpose, the following fluxes exist: soldering acid, special fluxes for aluminum, and a mixture of rosin and acetone. All these advantages destroy or hinder the formation of an oxide film on aluminum. After using this type of flux, the process of tinning aluminum is simplified.
The necessary tools for soldering aluminum with tin are: an electric soldering iron, a sharp knife, pliers for twisting wires, a small file for preparing the soldering iron tip. The materials you will need are: POS 61 or POS 50 solder, flux for soldering aluminum F-64 or similar, sponge.
Soldering aluminum with tin and flux F 64
Flux F 64 is intended for soldering aluminum. The soldering technique is not complicated. First of all, you need to remove 5 cm of insulation from the wires. The insulation is removed with a sharp knife at an angle to the wire so as not to cut it. Notched aluminum breaks off easily.
Tools and materials for soldering aluminum wire
Next, you need to thoroughly clean the wire with fine sandpaper or a sharp knife. Having stripped the wire, it is moistened with a brush with a plus and with a sharp knife they continue to strip the wire, but now under flux. In this way, the oxide film of the aluminum wire is removed, preventing it from oxidizing again in air. Next, using a heated soldering iron with solder, begin tinning the wire from its end.
If you start tinning the wire near the insulation, then you can burn it. In this case, the insulating properties of the wire will be lost. The wire is tinned with a soldering iron, moving back and forth, while the oxide film is removed from the aluminum. It is not possible to tin the wire straight away. Therefore, flux is again applied to the non-tinned sections of the wire and sections of the remaining oxide film are removed with a hot soldering iron with solder and movements back and forth and serviced.
In this way, the aluminum wire is completely covered with solder. After tinning, the aluminum wire is dipped in a soda solution (5 tablespoons per 200 grams of water) and the remaining flux is washed off with a toothbrush. The flux contains active acids that not only corrode the film, but also the wire itself. Therefore, the remaining flux must be washed off. It will not be possible to wash it off completely, since it partially remains under the solder and eats into the wire.
But at least partially it needs to be washed off. Copper wire is not treated with F 64 flux; it is better to use a solution of rosin and alcohol (50% to 50%). Using a brush, apply liquid rosin to the copper wire (having previously stripped it) and use a hot soldering iron to service the wire, starting from the end. The soldering iron tip should be smooth and clean. The shells at the end of the soldering iron tip are removed with a fine file.
And the remains of burnt solder (slag) are wiped off with a sponge or rag. Once the aluminum and copper wires are tinned, they are twisted with pliers, liquid rosin is applied with a brush and the connection is soldered, also starting from the end. If you connect aluminum without tinning with solder, the connection may break down over time. The aluminum-copper connection is a galvanic couple, and when current passes through it, it heats up and destroys the connection.
Table of temperature conditions of solder brands
As a result, the twisted area becomes very hot and charred, which increases the fire hazard. Tin solder is neutral to aluminum, so aluminum wires must be tinned before connecting to copper. POS 61 and POS 50 solders with a low melting point of 190 - 210C are well suited for soldering aluminum wires.
Soldering aluminum with copper, tin and rosin
Soldering electrical wires using soldering acid is prohibited in the PUE. This is due to the fact that this acid does not burn completely during soldering. As a result, the junction of the wires is corroded by acid over time, oxides are formed, which heat up when current passes and can cause the insulation to catch fire. These acid-containing fluxes include special fluxes for soldering aluminum, including F 64.
So how to solder aluminum with copper so that the connection is high-quality and durable. In terms of complexity, the method of tinning aluminum with tin and rosin is even easier than tinning aluminum with F 64 flux. But the quality and reliability when tinning with rosin will be high. When tinning aluminum in rosin, you need to make or select a low bath for liquid rosin (rosin 60% and alcohol 40%).
Fluxes for aluminum soldering
Fill the bath with liquid rosin so that the wire is buried in it with 5-10 mm of insulation. The wire, stripped of insulation, is placed in rosin and with a sharp knife (conveniently a scalpel) the oxide film is removed from the aluminum wire without removing it from the bath. That is, under rosin they protect the wire along its entire length from all sides. Under the rosin, a film does not form on the cleaned areas of the aluminum wire, since there is no contact with oxygen.
Now take a heated soldering iron with solder with a power of at least 60 W and lower it onto the bare and free of oxide wire, right at the surface of the rosin, little by little scroll and pull out the already tinned sections of the wire. The essence of the method is that the wire is tinned at the very surface of the liquid rosin. So that the stripped sections of the wire from oxide cannot come into contact with air.
The soldering iron can be immersed 2-3 mm in rosin at times. After tinning the wire a little, lift the soldering iron so that it heats up again. Yes, at the beginning, there will be a lot of smoke, so it is better to learn to solder outdoors or in a room with good ventilation. After several attempts, you will develop your own tinning technique and gain a little experience.
You will decide on the position of the soldering iron, the speed of tinning the wire will increase, that is, skill will appear, and the amount of smoke will decrease. But the wire will be perfectly tinned. Next, as usual, twist the wires and solder them with a small amount of solder.
The remaining rosin on the soldered twisted wires is washed off with a brush and alcohol. The disadvantage of this method is the impossibility of soldering in hard-to-reach places. For such cases, it is better to use other methods for safely connecting aluminum to copper.
Electrical panel assembly
Wiring Requirements
Electrical wiring diagram in a private house
How to solder aluminum
Craftsmen have no difficulty soldering copper, brass and steel wires and parts, but if they have to deal with aluminum surfaces, the solder does not even stick to the product, and soldering turns into torture. The difficulties are caused by the fact that a thin but very strong film of Al2O3 oxide forms on the surface of this metal. You can remove this film mechanically - for example, by cleaning the product with a file, but upon contact with air or water, the metal will immediately become covered with a film again.
Despite the difficulties that arise, it is possible to solder aluminum products. There are several ways to solder aluminum.
Soldering aluminum alloys
Excellent results can be obtained using the following alloys:
- two parts zinc and eight parts tin
- one part copper and 99 parts tin
- one part bismuth and 30 parts tin
Before soldering, both the alloy and the part itself must be well heated. It should also be remembered that soldering acid must be used with this soldering method.
Soldering aluminum using special fluxes
 Standardly used fluxes do not dissolve the oxide film on the surface of aluminum, so special active fluxes must be used.
Flux for soldering aluminum is used to work with tin-lead solders at an operating temperature of 250-360 degrees. This flux, both during soldering and tinning, removes the oxide film well, cleans the metal surface and, as a result, the solder spreads better over the surface. All this leads to the creation of a more dense and durable connection of the fused parts. Excess of this flux is easily removed with solvents, alcohol or special liquids.
Other methods of soldering aluminum
There are also non-standard ways to solve this problem, for example:
- The soldering area on the aluminum product is thoroughly cleaned and a couple of drops of concentrated copper sulfate are applied. A small piece of copper wire is stripped, rolled into a circle with a diameter equal to the soldering area, and the free end of the wire is connected to the “plus” terminal of the 4.5 volt battery. A piece of wire with a folded circle is dipped in a small amount of copper sulfate. The negative of the battery must be connected to a part on which, after some time, a certain layer of copper will settle. After drying, you can weld the necessary parts or wires to this place in the usual way.
- In this case, abrasive powder is used, mixed with a small amount of transformer oil to form a liquid paste. This paste is applied to cleaned soldering products. Next, the soldering iron is well tinned and rubbed in these places until a layer of tin is released on the surface. Then the parts are washed and then soldered using the usual method.
- For this method you will need a transformer. Its minus is connected to the product, and a large-section copper wire consisting of smaller conductors is connected to the plus. If you connect this wire to the future soldering site for a short time, micro-soldering of copper and aluminum will be performed, which will subsequently allow soldering of wires using the usual method. To simplify the process, you can use soldering acid.
Soldering aluminum utensils (without a soldering iron)
Aluminum cookware is in definite demand among housewives, but sometimes it breaks down, and in order not to buy a new one (which costs a lot), you can repair such products by soldering without a soldering iron. The method below is suitable for sealing small holes (up to 7 mm in diameter).
- It is necessary to clean the soldering area to a metallic shine using sandpaper or a file. If the dishes are enameled, then the enamel must be removed within a radius of 5 millimeters around the hole to be sealed. To do this, the enamel is removed from the dishes by lightly tapping with a hammer. Then the metal must be cleaned.
- The soldering area is lubricated with soldering acid or covered with crushed rosin. A piece of tin is placed on the inside of the hole, and then the container is heated over the fire of the stove. If the dishes are enameled, then it is better to heat them over an alcohol lamp - this gives more targeted heating, and therefore the rest of the enamel will not crack from the high temperature.
- When heated, the tin melts and tightly closes the hole in the dish. In this case, the help of a soldering iron is not required.
Evaluate the manufacturing method:
Soldering aluminum at home is a simple and safe activity
Home craftsmen quite often have to deal with the problem of repairs, as well as the manufacture of aluminum products. If there are no problems with mechanical processing (metal is easily sawed, turned and bent), then the process of connecting parts together causes difficulties.
We are not talking about welding, these are issues of large-scale repairs. Most often you have to solder parts in the traditional way.
- The most common problem is leaky dishes, or parts of household aluminum utensils that have fallen off. Bonding is not always suitable due to low heat resistance and poor aesthetics of the seam. Rivets cannot provide a tight seal. All that remains is soldering aluminum with tin.
- Another need for quality connections is electrical appliances. Quite often it is necessary to connect aluminum conductors to terminals, or simply to the surface of electrical equipment. Splicing wires will also be more reliable if there is a strong solder instead of twisting.
Like any metal, aluminum can and should be soldered. It has good ductility and thermal conductivity. But there is a problem with adhesion. In the open air, the metal is instantly covered with a durable film of oxides, which not only acts as a heat insulator, but it is almost impossible to apply solder to it.
Therefore, high-quality flux for soldering aluminum is the first assistant in your work. With its help, you can also solder aluminum to other metals.
General principles of soldering aluminum at home
- The surface must be thoroughly cleaned of paint, dirt and greasy liquids
- The soldering area is ground, it is advisable to level out all irregularities to the depth of the largest defect
Little secrets. If you don’t have a special flux on hand, you can use abrasive protection against immediate surface oxidation:
- Rub the soldering area vigorously with a piece of brick. The resulting dust does not need to be blown off. Place a large amount of regular rosin on the soldering iron tip and pour it over the soldering area directly on top of the brick dust. Then tin the surface by pressing the soldering iron tip firmly onto the metal.
Using a flat cut, you need to rub the dust into the aluminum. The abrasive will remove the thin layer of oxide and provide a bond to the solder. You can use sifted fine sand.
Use of transformer oil
Soldering aluminum at home is usually done with a soldering iron.
You can mix solder paste with transformer oil and apply it to the newly cleaned surface. Then rub the soldering iron vigorously until a stable layer of solder appears.
Important! Such work should be carried out with a hood or in a well-ventilated area. Overheated oil produces acrid smoke.
But there is an easier way. We process the future soldering area using fine sandpaper. Then, without delay, pour in the oil.
Once again, intensively rub the surface with sandpaper, after which we rub in the solder with force with a heated soldering iron.
We pry up the tin layer with a thin screwdriver to check the strength of the connection. If the edges of the solder come off the aluminum, repeat the procedure again. After obtaining stable tinning, both copper and aluminum wires can be soldered to this place.
What kind of solder is used for soldering aluminum?
The choice of solder is influenced by the method of joining aluminum parts.
- If you are using a regular soldering iron, you need a material with a low melting point. Electrical connections typically use traditional solder. These are the following types of alloys: zinc-tin, copper-tin and bismuth-tin. They are better known to us as amateur radio solders of the POS series.
These alloys melt easily, and little heat from the soldering iron is transferred to them (which is important, given the high thermal conductivity of aluminum). In addition, such material is easy to buy at an affordable price. However, connections using low-melting solder have low strength. This method is only suitable for electrical installation.
If you soldered the spout to an aluminum kettle, or repaired a burnt hole in a pan, the connection will quickly collapse under the influence of high temperatures.
As a last resort, you can use the common refractory solder TsOP-40, consisting of tin and zinc. This connection holds the temperature quite well, but has low tensile strength.
Aluminum dissolves well in the other components of the composition, and will provide a connection with the workpiece at the molecular level. Copper will add ductility, and silicon will make the connection strong. The favorite solder of home tinkers is domestic composition 34A.
More expensive (this does not mean an increase in quality) is the imported “Aluminum - 13”. The advantages of such solders are that they can be used to qualitatively weld parts, which then work under load.
Of course, these solders do not reach the strength of arc welding, but repairing dishes with their help gives a good result.
However, aluminum-based solders melt at a temperature of about 600° C. This result cannot be achieved using a soldering iron.
For mechanically strong and heat-resistant connections, aluminum is soldered with a gas torch.
Attention! Despite the external similarity and quality of the connection, soldering with a torch has nothing in common with welding. Only the solder melts; the base metal of the workpiece remains solid during the entire process.
Advantages of soldering with a torch over welding in an argon environment:
- There is no need to purchase expensive equipment. A hand-held gas torch is used for soldering. Such a tool can be purchased in tool stores, or even among tourist goods.
How to solder correctly using a torch
You cannot do without preparing the joint, just like when soldering with a soldering iron. The metal should be cleaned of dirt and sanded to obtain a smooth surface. Then you need to secure the parts using any jig - be it clamps or a vice.
When working with a burner, aluminum blanks will heat up over the entire surface. And given the high thermal conductivity of metal, there will simply be no place on the parts that you can grab with your hand, even with protective gloves.
The work area must be cleared of flammable objects and liquids. Provide intensive ventilation - even without caustic emissions, heated fluxes emit an unpleasant odor. Take care of fire extinguishing equipment.
It is necessary to prepare solder wire with a margin of length. You won't be able to use every single rod; 10% of the length is left to hold the solder. But stopping heating and going for new packaging is irrational.
Important! A better quality seam is obtained with continuous soldering. If you interrupt the process (forced), before continuing work, completely warm up the entire soldering area, including the already solidified solder. The same should be done when applying several layers. First, we warm up the frozen layer, then add the next one.
The burner flame is always directed away from you. There should be no objects in its path.
It is allowed to change the color of the aluminum billet to bright orange. The metal will not melt, and when heated to the maximum temperature, the solder will lie more evenly.
Be sure to use flux. There are proven compositions based on lithium and potassium chlorides, as well as zinc chloride. These are brands such as F-59A, F-61A, F-64A. For higher temperature soldering it is better to use F-34A. It contains sodium fluoride.
You can prepare flux for soldering aluminum yourself. However, this is not recommended, since it necessarily contains caustic substances. It is better to purchase a ready-made composition in the store.
Important! Inhaling flux vapor while soldering is very harmful. Use a respirator or portable hood.
We solder aluminum
There are situations when it is necessary to solder aluminum products. But due to the fact that the oxide film covers the surface of the aluminum, the solder simply does not stick to it. Solders and fluxes have now been developed specifically for this purpose. But we will try to cope with this task in the old fashioned way. Attention! The work should be done in a well-ventilated room, preferably equipped with active ventilation, or outside. To solder aluminum, we need machine oil (used to lubricate sewing machines), a small piece of sandpaper, rosin and regular solder for soldering radio components.

You need a soldering iron that is as powerful as possible. For example, this one. Its power is 65 W.

We will solder the bottom of an aluminum beer can. Before work, the soldering iron tip must be leveled with a file (remove all shells) and tinned.


Use a piece of sandpaper to clean the soldering area until it shines.

Pour some oil on this place.


By doing this, we remove the oxide film, and the oil prevents the formation of a new film. By this time, the soldering iron must be heated to operating temperature.
We dip the soldering iron tip into rosin, pick up as much solder as possible, dip it into rosin again and begin to quickly rub the future soldering area with little effort. At the same time, the oil begins to burn out profusely. Therefore, we do not regret rosin. If everything was done correctly, then a layer of tin should cover the surface of the aluminum.
linochek.ru
Home > Electrician's Tips > How to solder correctly with a soldering iron with acid
Most often, for soldering printed circuit boards in radio engineering products and household appliances, they prefer to use ordinary pine resin rosin, but it can be replaced with other components. When molten, it promotes the spreading of tin solder along the copper traces of the board. This allows you to reliably solder the legs of radio components and the ends of connecting wires. Rosin allows you to effectively solder copper, tin and silver products. In order to solder galvanized and stainless iron, radiators, buckets, pans, various alloys, brass and other metals, you can use acid solutions.

Bottle with acid solution for soldering metals
Acidic solutions
It is important to choose the right acid solution. It depends on the type of metal from which the parts are made. This could be an aluminum or copper radiator, a kettle that needs to be soldered, copper, brass or roofing iron:
- Galvanized iron. Places where it is necessary to solder are treated with an acid solution, correctly called (zinc chlorate). This composition can be bought in specialized stores; the easiest way is to prepare it yourself.
To do this, it is enough to throw pieces of zinc into 100 ml of hydrochloric acid, which can be removed from the body of AA batteries. After the chemical reaction is completed, the zinc will dissolve, releasing a large amount of hydrogen.
It is correct to carry out the process in a well-ventilated area, in the absence of open flame.
After the solution has cooled and settled, the upper transparent yellow part is poured into a clean glass container. The sediment is poured into the ground; it is not recommended to drain into sewers with metal pipes. Acid can damage pipes and seals. The remaining part of the solution is ready for processing galvanized iron roofing.

How to solder sheets of roofing iron
- Stainless steel. Before soldering, the surface is cleaned and treated with phosphoric acid, which contains the following elements:
- up to 50% zinc chloride;
- ammonia up to 0.5%;
- dissolves in water with a pH concentration of 2.9%.

Phosphoric acid is used for soldering as a flux and for cleaning metal from rust.
The solution can be transparent, light yellow or colorless; when heated to 213ºC, it is converted into h5P2O7 (pyrophosphoric acid), which degreases the surface of metals. The composition dissolves the oxide film on various metals and alloys:
- stainless steel;
- brass;
- Nickel alloys;
- copper alloys;
- alloys of carbon metals and low-alloy steel.
Application of acids
To solder metal products (pipes, radiators, buckets, pans), the surface of the elements is thoroughly cleaned, using a file or sandpaper. An acid solution is applied to the cleaned areas with a brush, after which solder is melted to a liquid state on the surface with a soldering iron.
Liquid solder tins the cleaned areas; when boiling, the acid flux comes to the surface. When the solder hardens, the soldered elements are securely and hermetically fixed.
You can solder with a powerful soldering iron or an open flame from a gas burner. Various heat sources can be used depending on the surface area to be heated and the melting point of the solder.
Remains of acid flux are washed off with water, preferably a soapy, alkaline solution, this will prevent further corrosion of the metal.

Machined and brazed stainless steel elements
Acid can damage skin and muscle tissue, and inhaling vapors can damage the respiratory organs. When contacting air, hydrochloric acid enters into a chemical reaction, and smoke is visible above the open container. To work correctly in these conditions, wear safety glasses, rubber gloves, a gas mask, or a respirator.
If the solution gets on the skin, wash this area of the body with a 6% alkaline solution or plain soap. It is not recommended to solder radio circuit boards with fluxes containing acid. The acidic components are difficult to wash off and contribute to the breakdown of copper tracks. It is better to replace them; there is a special paste for this.
Soldering acid solutions should be stored correctly in containers made of the following materials:
- glass;
- ceramics;
- porcelain;
- fluoroplastic
Such dishes do not react with acid; the prepared composition can be stored in it for a long time.
Soldering without a soldering iron
At home, if you don’t have a soldering iron, you can solder copper wires with a diameter of up to 2 mm. For soldering radiators and utensils, special solder, blowtorches, and gas torches are used, since the copper rod of the soldering iron is not able to heat a large surface area. There are several ways:
- Tinning and soldering wires in molten solder. The wire is first heated, applied to a piece of rosin, it melts and spreads evenly over the surface of the connection. The wire is twisted and lowered into molten solder in a tin can over a fire; it can be heated with a blowtorch. In order to solder the twist, it is advisable to hold it in boiling tin for up to 1 minute. The copper wires will heat up and the alloy will fill all the gaps between the twisted wires. In this way you can solder small parts made of copper, brass and other alloys.

Tinned and soldered copper wire
- Soldering wires in the gutter. The stripped and twisted wires are laid in a 2-3 cm piece of aluminum tube, 0.5-1 cm in diameter, sawn lengthwise. The top is filled with a mixture of fine shavings of solder and rosin dust, and from the bottom this structure is heated with a lighter, candle or small blowtorch.

Heating the solder with a blowtorch (torch)
The mixture melts and thoroughly envelops all wire connections. After hardening, the aluminum gutter is removed and the joint is insulated.
Solder shavings can be sharpened with a coarse file.
- A thin copper wire up to 0.75 mm can be laid on aluminum foil, sprinkled with a mixture of rosin and tin shavings, wrapped tightly and heated for 3-4 minutes. The solder will evenly fill all the elements at the soldering site; after cooling, the foil can be removed and discarded.
How to prepare solder paste
Soldering paste is sold in radio parts stores, but you can prepare it yourself. To 32 ml of hydrochloric acid add 12 ml of ordinary water, then pieces of zinc - 8.1 g. For this, enamel dishes are used.
After the dissolution reaction is completed, tin – 8.7 g is added to the composition. When the second dissolution reaction is completed, the water is evaporated to a paste-like consistency of the solution. The paste is transferred to a porcelain container, where powder is poured, which contains:
- lead – 7.4 g;
- tin – 14.8 g;
- dry ammonia – 7.5 g;
- zinc – 29.6 g;
- rosin – 9.4 g.
This paste is mixed with 10 ml of glycerin, heated and stirred.
How to solder correctly, sequence of actions:
- The parts at the soldering site are cleaned, the wires are twisted;
- the paste is applied with a brush in a thin layer;
- the surface for soldering is heated with a plasma lighter, torch, candle or alcohol tablet, or even with matches or over a fire until the paste melts;
- After melting, the soldering elements are removed from the heat source, and the solder hardens.
The paste is very effective when it is necessary to solder copper wire, small parts made of alloys based on copper, brass, such as radiators, samovars and other products.
Soldering utensils
Buckets and pans with holes no more than 5-7 mm in diameter are recommended to be soldered without using a soldering iron with POS-60 solder. Leaky places on the dishes can be reliably soldered. To do this, the holes are carefully cleaned with sandpaper from the inside of the container. The hole along the edges is given a conical shape, the cleaned areas are treated with a solution of soldering acid with a brush.
In order to prevent solder leakage from the outside, all bottoms or individual places where holes need to be soldered are covered with thin tin plates. Powdered solder and rosin are poured into the cleaned holes from the inside. The soldering areas are heated over an open fire until the solder melts and fills all the cracks.
For radiators, stripping and soldering are carried out from the outside. To prevent solder from leaking inside, the hole is covered with a plate of tin, galvanized iron, or can be replaced with copper or brass. The choice depends on the material from which the radiator is made. Homogeneous metals and alloys that are similar in composition are easier to solder.
After completing the soldering process of radiators, the internal and external surfaces are thoroughly washed with an alkaline, soapy solution in order to prevent the effect of acidic components on the metal.

Bottle with flux for soldering aluminum
When it is necessary to solder aluminum parts, special solders are used:
- 4:1 mixture of tin and zinc;
- 30:1 mixture of tin and bismuth;
- 99:1 tin and aluminum powder.
The sequence of surface treatment is the same as for preparing iron utensils. In order to properly solder aluminum, rosin is added to the powder, but the melting point must be above 500ºC. It is recommended to stir the solder in the hole, using a thin copper soldering iron tip.
PCB soldering paste
The composition is not much different from the paste that is used to solder without a soldering iron; the powder includes the following components:
- tin – 14.8 g;
- rosin – 4 g;
- zinc dust – 738 g;
- lead powder – 7.4 g.
For a paste-like consistency, add diethyl ether - 10 ml, it can be replaced, use glycerin - 14 ml.
Soldering sequence:
- the legs and tracks of the printed circuit board are cleaned;
- in order to solder, the legs of the parts are inserted into the holes of the board;
- places where it is necessary to solder on the board are lubricated with paste;
- the paste is heated with a soldering iron until it melts;
- The solder spreads and hardens, providing reliable electrical contact between the parts and the traces of the printed circuit boards.
Soldering lessons. Video
You can learn how to solder correctly by watching this video.
From the above information it follows that, if desired, and if certain materials are available at home, you can solder in various ways, achieving high-quality fastening of parts and tightness of containers.

Soldering copper pipes using a torch
You can solder with or without a soldering iron almost all metals, alloys, aluminum, brass, copper, electrical circuit wires for various purposes, metal utensils, radiator housings and other pieces of equipment.