The attitude towards household appliances for washing dishes is still quite critical. But many still decide to take such a step, so before purchasing it you need to clearly understand how to connect the dishwasher to the sewer and water supply.
But if we remember the not so distant past, a similar attitude existed towards other household appliances - automatic washing machines or food processors.
Today it is difficult to imagine an apartment or house without these attributes of modern life. A person quickly gets used to comfort and is reluctant to part with it.
The same process happens today with dishwashers. But unlike other types of household equipment, the dishwasher cannot be delivered home, after removing the packaging and immediately connecting it to an electrical outlet.
Functionally, the dishwasher is also a piece of plumbing equipment. with a complex control system filling.
Naturally, dishes cannot be washed without water, so they need to be connected to the water supply network and properly connected to the sewer system.
Connecting dishwashers to communications
Household appliances cannot work without water, drainage of used water and electricity. How to provide it with the necessary resources?
Watch the video
Connecting to the water supply, determining the installation location, necessary materials and tools
There are several ways to do this work. First one of them is developed and used when the installation of household appliances is carried out at the stage of building a house during major renovations in the premises.
Under these conditions, there are no restrictions on wall gating, which makes it possible to arrange hidden connections.
Second way used when installing a dishwasher in an already equipped kitchen with minimal changes to the interior.
Many owners of dishwashers strive to connect not only cold but also hot water to their unit. The reason for making this decision is the desire to reduce water heating costs. The position is clear, but its implementation must be approached very carefully.
Not all dishwasher control software is designed to handle mixed flows.
You should carefully study the operating instructions for a particular unit to find out whether it is intended for such a connection. The electronic hardware may simply not understand the signal and the device will not work in the desired mode.
Even if the possibility of such a connection is available and specified in technical documents, experienced people recommend abandoning it. There are several reasons for this:
- The quality of water from the hot water supply system leaves much to be desired.
- There may be cases where the hot water from the pipework is at a temperature higher than that permitted for use with this device. This is only at first glance insignificant - the control unit may not work correctly.
- Problems with water supply from a hot water supply system occur much more regularly than with cold water. And during the hot period, a month-long interruption in the operation of the hot water supply due to scheduled repairs is inevitable. Thus, long downtime of expensive equipment and washing dishes by hand are inevitable. An alternative is an urgent transition to operating a dishwashing machine from a cold water supply.
- The issue of saving resources is also controversial. Modern “A” class dishwashers for dishes consume energy very economically, and if the home is equipped with water consumption meters, then in the calculation they will be used according to the tariff for hot water.
It's up to you to decide, of course. but expert opinion is in favor of cold water.
The first way to connect the dishwasher to the water supply
The most obvious solution is to connect the dishwasher to the outlet to which the flexible hose from the faucet is connected. To do this, their length from the unit sales kit should be sufficient.
Watch the video
For such a connection you will need a through tee, a wrench of the appropriate size and a sealing winding for threaded connections.
In such a situation, it is preferable to use a manifold - this is a metal or plastic tube with 5 or 6 threaded outlets on the side. You can connect all the necessary devices to it one by one, and mute the free outputs, considering them backup.
Then you can connect new additional equipment at any time. In addition, since each outlet is equipped with a ball valve, you can temporarily turn off any device without affecting the functioning of the entire system.
The second way to connect dishwashers to the water supply
It is used in cases where the length of the hoses included in the sales kit is not enough to use the nearest water supply point. In this case, you need to use a water pipe.
Watch the video
The method consists of inserting a side branch tee into the existing pipe. The procedure is as follows:
- Turn off the cold water supply circuit by turning off the tap on the riser.
- Mark the cutting location on the pipeline.
- Cut a piece of pipe to the required size, leaving the possibility of placing a standard tee with a side outlet.
- Install the tee.
- Connect the machine hose to the side outlet.
Depending on the type of pipeline material, installation technology may be different. The easiest way is to make an insert on a metal-plastic pipe. For this, standard press fittings are used.
The main thing when performing this operation is the correct marking of the length of the cut section and accurate cutting perpendicular to the axis of the pipe. This is achieved by using a special tool designed for this operation.
It is somewhat more difficult to insert into a polypropylene water supply. . If your apartment has a water supply system made of this material, you most likely have a soldering iron on hand. And if you don’t have it, you don’t have to buy it at all. A soldering iron can be rented for a few days for a small fee.
However, soldering the insert into a finished water supply is not at all easy - the place of action is limited in space, and it is almost impossible to bring the connected ends together. , which are alternately soldered to the ends of the pipe being connected.
Using this method is the easiest way to connect the dishwasher to the water supply. The tee is installed on the pipe using a rubber seal, securely tightened with screws, after which a hole of the required diameter is drilled in the pipe wall.
But it is worth noting that such a connection is not reliable enough and leaks more often than other methods.
The third way to connect to the water supply
One of them is to use kitchen siphons equipped with special outlets for connecting drainage pipes of household equipment. This makes it possible to connect several units. In this case, it is better not to combine the draining operation in these units. But this is the user's concern.
The outlet pipe ends with a nozzle that ensures the tightness of the connection when the screw clamp is tightened.
This connection method is very reliable, answering all the possible problems listed above:
- the device of the siphon itself structurally ensures the formation of a water barrier that prevents the penetration of “odors” from the sewer;
- the requirement for the height of the sewage system for dishwashers is met, the upper bend is obtained by itself during installation;
- The drain outlet is not connected directly to the sewer pipe, but is connected through an opening in the sink for drainage, which prevents the siphon effect from occurring.
Watch the video
The proposed connection method is good for everyone, but it is not always possible to implement it. For example, if the drainage hole is located at a distance from the installation site of the sink or sink. In such a situation, you will have to arrange a drain for dishwashers directly into the sewer pipe.
Sewage connections - method two
Watch the video
Many dishwasher owners prefer not to deal directly with the sewer system, discharging waste water directly into the sink.
The main motive for this decision is the assertion that a car is needed only after a large feast, for example, receiving a large number of guests. In such cases, the unit is needed periodically. Probably, with this approach, it is necessary to think about whether such household appliances are needed at all.
The optimal diagram for connecting a dishwasher to the sewer may look like this.
When connecting the dishwasher drain directly to the sewer pipe, you need to install an adapter on it, which is an angled branch from the drain pipe.
Other options for connecting a dishwasher to the sewer, if they exist, can be considered exotic. The choice of connection method depends on the relative position of the unit and the drain point.
Both of the above options are workable and reliable if executed correctly and can easily be done with your own hands.
Connecting the dishwasher to the electrical outlet
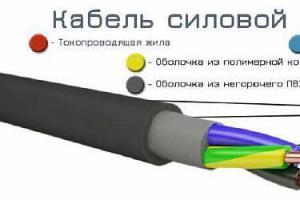
Household appliances of this type are not very powerful - most often it does not exceed 2.5 kilowatts. To connect a device of this power, a wire with a cross-section of 2.5 millimeters square is enough.
A conductor of this design (double insulation) is most suitable for use in internal electrical wiring.
For safer operation, it is better to lay it in a groove.
The power cable with plug, which is installed on the dishwasher, is 1.3-1.5 meters long, so the socket should be installed on the wall as close as possible to its permanent location. For connection, you should use fittings with a high degree of protection.
A mandatory requirement is the presence of a grounding contact. This requirement is fully met by 16 ampere Chicot type sockets.

The dishwasher socket is located on the wall. The installation height is no higher than 90 centimeters from the floor, and it is necessary that it is not located behind the device, but on either side.
Checking correct installation and connection
The reason for checking is a trivial situation - the machine, turned on according to all the rules, does not work. To determine the cause, you need to perform a few simple steps:
- You need to make sure that the power is supplied to the dishwasher and its value does not deviate from the required one. It is necessary to make sure that the socket, plug and connecting wire are in good working order. Most dishwashers are connected directly to the network, so you need to make sure that voltage is present at the input contact of the machine.
- When controlling an outlet with a switch (automatic), it is necessary to check its functionality with a tester. To do this, you need to remove its cover and close the circuit with the probes of the device. If the device shows that the circuit is closed, the machine is operational. Otherwise, it must be replaced with a new one.
- You must make sure that the unit door is closed, otherwise the machine will not turn on. To do this, with the door open, you must manually press the locking device lever, and then press the ON button. If the car does not start, you need to replace the latch with a new one.
- You need to check the operation of the control buttons on the panel, making sure that they are all installed in the correct position.
- The dishwasher may not sit level on the floor. In this case, the automation can also block the start of work. It must be leveled using the adjusting screws in the legs on which it is installed.
Watch the video
If all the measures taken are not effective, you need to invite a specialist from the warranty workshop. It is not recommended to disassemble the machine yourself - the right to repair under warranty will be lost.
Typical mistakes when installing a dishwasher
Almost all household appliances used in the home involve the use of electricity and water. Therefore, it is a source of increased danger. For safe operation you must:
- When connecting a dishwasher, it is necessary to use the appropriate power automatic and RCD, or differential circuit breaker. You cannot use a modular machine, much less safety plugs.
- Installing the dishwasher close to the wall. In this case, the hoses may become deformed, the machine’s automation may malfunction, or the room may flood.
- The machine must be positioned strictly horizontally, the slope tolerance is no more than 2 degrees. The installation is adjusted by turning/turning the legs. In some models, the position of the rear supports is adjusted with a special screw facing the front side.
- Using flax tow to seal threaded joints can be dangerous if you don't know how to use it. Excessive amounts of this material can tear the thin plastic union nut due to the die swelling when wet. Use FUM tape.
Watch the video
The happy owners of a brand new dishwasher, immediately after delivering their purchase home, are puzzled by the question of how to connect the dishwasher. There are two ways to solve the problem: call a specialist or try to cope on your own. If you decide to take the second, more complicated path, our article will help solve the problem.
Main stages
The main steps for connecting a dishwasher are:
- installation of a separate outlet and supply of power to it;
- organization of separate water supply;
- device for draining water into the sewer;
- Checking the performance of the dishwasher.
This dishwasher wiring diagram shows mandatory and necessary work that can be carried out in any order convenient for you. Let's look at each stage of the work in more detail.

Connecting to networks
Power supply
The simplest solution for connecting a dishwasher to electricity is to plug it into an outlet specially prepared for this during repairs. If there is no such outlet, you will have to spend some additional effort to provide the new machine with energy.

Connecting a dishwasher with your own hands is possible subject to certain safety requirements listed below:
- Since the power consumed by the dishwasher is quite high, the use of tees and extension cords for connection can cause damage to the dishwasher and even lead to a fire.
- The machine must not be connected to an outlet intended for an electric stove.
- For the device, a wire with a diameter of at least 2 mm should be connected from the electrical panel to the required location of the socket. A 16 A safety switch is installed in the electrical panel, which will automatically turn off the power supply if the maximum permissible network load level is exceeded.

Connecting the wires: connect black to black (“phase”), white to white (“zero”) and green (“ground”) to green.
- When connecting the dishwasher yourself, you should remember that to ensure the machine is truly grounded, the cable connected to the outlet must be three-wire.
Pro tip: Never “ground” electrical appliances to heating or gas pipes, or to water supply pipes! It is very dangerous!
Water supply
Water is supplied to the dishwasher through a special outlet installed for this purpose.

The connection is made as follows:
- A filter is installed on the outlet for supplying water to the dishwasher to retain sand and rust.
- If the machine does not provide protection against accidental leaks, when connecting the dishwasher to water, you should install a shut-off valve directly in front of the filter. It will prevent water from getting into the dishwasher from the water supply, which can lead to flooding not only of your apartment, but also of your neighbors on the lower floors.
Pro tip: In order to save yourself from the need to close the shut-off valve after each dishwashing, you can install additional protection for the machine: Aqua-Control, Aqua Stop or another similar device.
- If the hoses included with the dishwasher are not long enough to connect to the water supply system, they can be extended.
- Some dishwasher models provide the ability to connect it to hot water. This allows you to save energy on heating water while the machine is operating.
Pro tip: For Russian conditions, connecting to hot water in multi-storey buildings with a centralized water supply is undesirable, since it contains special additives that prevent the formation of rust in pipes. This may adversely affect the operation of the dishwasher.
Organization of water drainage (connection to sewerage)

Connecting the dishwasher drain to the sewer system is a process that requires no less care than the water supply device. Let's look at it in more detail:
- The simplest way is to drain the water through a siphon equipped with an additional outlet and a special valve that prevents water from entering the dishwasher from the sewer or sink.
- Additional protection against sewer water entering the dishwasher can be provided by the correct location of the drain hose:
- the hose leaving the machine should be secured to the wall or kitchen furniture at a height of up to 60 cm above the point where it enters the sewer;
- then bend the hose so that water from the machine flows by gravity into the siphon.
- Before connecting the dishwasher drain, make sure that the standard hose (1.5 m) is long enough. If necessary, the length of the hose can be increased, but not more than twice. A longer water path will affect the operation of the water pump, creating additional stress.

Functionality check
After installing the outlet for connecting the dishwasher and connecting it to the water supply and sewerage system, you need to conduct a dry test of your new item. You should check:
- the speed of pouring water into the machine;
- heating the incoming water;
- operation of the dish drying mode.
The operation of all modes of the machine should be checked without dishes, but using detergent and reducing salt in accordance with its operating instructions. You should also carefully check all connections of pipes and hoses for leaks again.
After you have succeeded in connecting the dishwasher yourself, following all the recommendations in the installation manual, you can install the kitchen furniture that was moved during operation into its place, and attach the closing panel to the new machine.
The dishwasher not only eliminates the eternal cause for family troubles: “duty”; “kitchen outfit”, simply put – who should wash the dishes today. With the current dynamics of growth in utility tariffs for water, a dishwasher in a family with two schoolchildren pays for itself in 2-2.5 years, and if there is a third, small one, in a year and a half. Soon, a dishwasher will probably become a must-have household item, especially since installing a dishwasher with your own hands is not difficult, and saves a lot of money.
Let's consider in order how to install a dishwasher yourself so that it does not break until it pays for itself, and lasts for a long time after that. Each specific model of dishwasher, of course, comes with instructions, but it is designed for a master for whom some technical subtleties are taken for granted. And the instructions say nothing, or say in passing, what you need to know or do before buying a car.
Dishwasher space
In modern kitchen sets, designers provide a niche for a dishwasher with fasteners. The fastening is standard, but there are very good models of dishwashers with non-standard fastening. The type of fastening, and for which manufacturers’ cars it is suitable, is indicated in the furniture passport. If not, you need to measure the mount, and do the same on the car before purchasing. If they don’t match, it doesn’t matter; a Phillips screwdriver is enough to rearrange the fastening strips in the niche of the kitchen cabinet.
It’s worse if the dishwasher is larger than the niche for it. There's nothing you can do about it: you'll have to look for another one. For a skilled craftsman, the option is to remake the furniture, but this is difficult and difficult. Another great option is a dishwasher on the table. More on this at the end of the article.
Wiring
The dishwasher can only be connected to the power supply through a Euro socket with reliable grounding. If you replace the Euro plug with a “Soviet” one yourself, then, in addition to instantly losing the warranty (branded sockets are cast and cannot be disassembled), you will also risk your life in the kitchen all the time, even if the dishwasher is turned off.
In apartment buildings, instead of protective grounding, protective grounding is done: the grounding wire is connected to a solid neutral. If the sockets in the apartment are not yet grounded, it is better to agree on this work with a DEZ electrician: for a specialist this is not a difficult matter, but it is categorically not recommended for amateurs. Without resuscitation, the matter may be resolved, but if the energy service discovers a “self-made” zero, then they won’t give a damn about the fine.

In addition, you cannot simply plug the dishwasher into a power outlet, for the same electrical safety reasons. That is why their electrical cords are made short so that they cannot reach a regular outlet.
The dishwasher is connected to the electrical network through an additional socket located 25-35 cm above the floor. And the additional socket, in turn, is powered by a tap from the main one through a 16 A circuit breaker (circled in yellow in the figure). An additional socket must, of course, be installed by an electrician. Only when the power supply for the dishwasher is installed can you take on the rest yourself.
Tools, consumables and fittings
Before you begin installing a dishwasher, you need to stock up on tools, consumables and water fittings. Most likely, there will be no problems with the tool: you just need pliers and a screwdriver. There will also probably be some electrical tape on hand; vinyl or cotton – it doesn’t matter. Electrical tape is needed to wrap metal threaded parts before tightening with pliers to prevent scratching. If you have adjustable wrench No. 1 (small) at home, then electrical tape is not needed.
As consumables, you will have to buy FUM waterproofing tape (fumka). It’s also not a question – the price is cheap. But you can’t try to use PVC electrical tape instead of a fumigator: it’s too thick and will dry out over time. Even if you manage to tighten the PVC thread, it will still leak soon.
The following water supply and water shut-off fittings will be needed:
- Drain siphon with a fitting or two (see picture on the right). If your home already has an automatic washing machine, then you only need one fitting. If not, the washing machine drain will be connected to the second one over time, but for now it can be plugged with the supplied plug or rubber stopper.
- Tee with 3/4 inch thread. ONLY brass, bronze or metal-plastic. Due to intergranular corrosion, silumin parts of water fittings tend to suddenly disintegrate without any warning signs. With everything that implies.
- A coarse water filter, the same as the one in front of the water meter. The dishwasher will be fine without it if it fulfills the warranty. And if not, then the case is not guaranteed. Abroad, by the way, too: the quality of domestic water is one of the serious world problems.
- Ball valve. Just like a tee - anything except silumin.
- If the dishwasher is far from the sink, and the standard connecting tube for water - the henka - is not enough, then a metal-plastic henka of the required length.
Dishwasher connection
Connecting a dishwasher with your own hands is carried out in the following sequence: drain, water, power supply. The recommendations - well, it doesn't matter what - are untenable simply because the fittings and inputs on the machine itself are located with the expectation of just such a safe connection order. Those who want to do it their own way will have to work hard and probably redo it.
Stock
To connect the dishwasher to the drain, you simply pull the drain hose onto the fitting. But two conditions must be met:

- The drain hose may slip out of the sink and drain from the sink onto the floor.
- In order to pump the drain high, the machine's drain pump will have to work with overload, and it will quickly fail.
Water
For any type of washing machine, it is strongly recommended not to connect to a hot water supply. Firstly, the savings on heating water here are apparent: hot water costs more than electricity. If you already have an electric boiler, then you know this yourself.
Secondly, the quality of hot water is inevitably worse than cold water: its path from the water intake to you
longer and more complex - through the boiler room, where it comes into contact with the metal of the water heating system, and through additional pipes. All over the world, in contracts with subscribers, water supply organizations write that hot water cannot be used for cooking.
This has a very specific and unpleasant effect on the dishwasher: the non-return valve fails. If the drain is installed correctly, there will be no leakage on the floor, but an unpleasant smell from washed dishes may appear.
Note: when the dishwasher is supplied with hot water from a domestic boiler, in which the magnesium protector is regularly changed, the problem of water quality disappears; it may even be higher than the incoming cold one. But the electricity consumption will be greater: every time the sink is started, 5-10 liters of water will be wasted to warm up the supply pipe.
Actually connecting the dishwasher to the water supply is done like this:
- We turn off the water in the apartment.
- Disconnect the cold connection of the kitchen faucet from the pipe; We remove the old waterproofing and throw it away.
- We attach a tee to the pipe, connect the mixer to it again and, in series, the filter (circled in blue in the figure), the ball valve and the dishwasher hook. Do not forget to insulate all threaded joints with foam.
- Check to see if the ball valve is closed.

Note: The fumka needs to be wound in 10-15 layers along the thread. If, when screwing, the connection is tight, and the fumka gets into clumps and sticks out, you need to rewind it in the opposite direction.
Electricity
Since the additional outlet is already installed, we simply plug the dishwasher into it.
Checking for leaks
We open the water in the apartment. Then, without turning on the dishwasher, open its shut-off valve. We check to see if there is a leak somewhere. We turn on the dishwasher, run the test mode, or simply add a portion of dishes and wash them. So nothing leaked anywhere - we left the shut-off valve open, the automatic machine turned on, and used it.
Note: If all the adults leave the house, then the last one needs to remember to turn off the shut-off valve of the dishwasher and turn off its automatic machine.
Video: example of installing a dishwasher
"Tips" of famous brands
Almost all manufacturers of Henki dishwashers do not make them themselves, but purchase them from suppliers. On sale you may find a complete henka with a “non-Russian” thread that is too short. In this case, to connect the water, you have to throw away the complete gasket and insulate the joint with foam. All the above recommendations are given precisely for such a case. Besides:
- Bosch– even if the standard gasket fits, it must be installed exactly according to the instructions. An inverted gasket leaks, not when tested, but after a day or two. If the Bosch leaks quickly, first try turning off the shut-off valve and turning the gasket over. In addition, the Bosch check valve is terribly picky about water quality. A Bosch filter is a must, even if you live in an environmentally friendly area and use artesian water. But Bosch fits into almost any kitchen set without any problems.
- Siemens– “does not like” standard fastenings and niches of standard sizes. You can count a ton of models who clearly ignore the specifications of furniture makers. But he is unpretentious.
- Electrolux– for these dishwashers to work well and for a long time, their tilt in any direction should not exceed 2 degrees. Therefore, when choosing Electrolux, do not forget to purchase or borrow a good short level for installation.
In order for the dishwasher to function flawlessly in the long term, it must be properly connected. Dishwashers are available in a built-in version (for example, in a kitchen unit) or in a separate version.
Rice. 1. Appearance of the Bosch SRV55T13EU dishwasher
Using the example of a Bosch dishwasher model SRV55T13EU (Fig. 1), we will consider a simple connection method that can be used universally - in the city and the countryside, taking into account some of the features of a particular connection discussed in the article.
You can connect the machines yourself, following the recommended path; performing work operations in the following sequence:
- control of appearance upon receipt (delivery);
- installing the dishwasher in a selected location (not far from the water supply and drainage points);
- connecting to the sewerage system (drainage) using a drain hose;
- connection to the hydraulic circuit of a centralized water supply (in the village to the water supply circuit);
- connection from a 220 V lighting network (with a ground loop) and a separate automatic fuse 10-13 A. The automatic fuse-switch (see Fig. 2) must operate when a leakage current appears and have a corresponding designation on the body.

Since the power of the dishwasher consumed from the network during operation is high - up to 2.3 kW, the electrical connection is made to a specially grounded outlet (see Fig. 3 and 4).

Rice. 3. Correct (left) and incorrect (right) connection of the dishwasher to the 220 V lighting network

Rice. 4. Practical connection to an outlet

Rice. 5. If your apartment does not have such sockets, the grounding wire (according to electrical safety rules, it must be yellow-green in color and with a cross-section of at least 2.5 mm²) is installed independently. An option for wiring in a house under construction is presented.

Rice. 6. Additional wiring of ground wire
Bosch SRV55T13EU has an automatic solenoid valve, which is programmatically controlled by the central processor of the machine, passing water from the water supply into the working chamber and to the heating element (heating element).

Rice. 7. Aqua-Stop Bitron solenoid valve

Rice. 8. Illustration of connecting the incoming water hose to the solenoid valve
The counter part to it must have an external thread with a diameter of 26.4 mm (see Fig. 8).
This valve has its own characteristics: inside the supply hose (2.5 m behind the dishwasher) there are connecting wires.
As a rule, an underwater hose with a solenoid valve is connected to a cold water supply. However, it is useful to know that this solenoid valve is designed for a water temperature of +25...+70º C, and at an input temperature of +60º C, the operating time of the washing machine will be less (per wash) - due to the fact that there are no costs time for heating water with a heating element in the working chamber, and at a temperature less than +60º C - more (see Table 1 at the end of the article).
The internal heater (heater) of the dishwasher ensures the water temperature in the working chamber up to +65º C (depending on the set program).
The dishwasher can also operate in semi-automatic mode if it is not equipped with an Aqua-Stop solenoid valve, if the pressure in the hydraulic circuit is low (less than 0.5 bar), if water enters the machine by gravity (country version). In the last case considered, the water supply is controlled manually by opening/closing the water tap.
If the water pressure is insufficient or does not flow at all, the “Check water supply” segment lights up on the indicator. This may be in the following cases:
- the water tap is closed;
- they turned off the water to the apartment;
- the flexible inlet hose of the hydraulic circuit is severely bent;
- the filter in the solenoid valve is clogged (Fig. 9).

Rice. 9. View of the built-in filter in the solenoid valve
To localize the malfunction, you will need to turn off the power supply to the dishwasher, stop the water supply, unscrew the solenoid valve at the junction with the water supply hose from the apartment (house) hydraulic circuit, remove the filter from the Aqua-Stop solenoid valve and clean it. Then put everything back in the reverse order, connect the water and power to the dishwasher.
Attention, important!
Never cut this hose or immerse the plastic solenoid valve housing in water.
To avoid an electrical accident and leaks, lay the inlet and drain lines so that the hoses do not bend and are not adjacent to the heating elements. It is best to mask these technical communications with hard plastic “false panels” to prevent even the unlikely impact of children or pets.
If the dishwasher is installed in a country house and operates in conditions of temperature changes, make sure that after use there is no water left inside the working chamber and in the hoses (both inlet and drain) (so that it does not freeze in winter).
To drain the remaining water, close the water tap (turn off the inlet circuit), disconnect the supply hose and let the water drain. This way you will protect yourself and your dishwasher for a long time.
Some technical specifications and installation requirements
- supply voltage of the solenoid valve 220-240 V, 50/60 Hz;
- power consumption 2.3 kW;
- minimum water pressure in the inlet circuit 0.5 bar (0.05 MPa);
- maximum water pressure 10 bar (1 MPa);
- in case of increased hydraulic pressure, an additional pressure reducing valve is installed in front of the tap or solenoid valve;
- The minimum volume of supplied water is 10 l/min.
We will sequentially consider connecting the underwater (input) and outlet (drain) hoses to the dishwasher.
Dishwasher installation
Connecting the underwater (incoming) hose to the sewer lines
On the water pipe side, the connection is threaded, using an adapter hose; it is shown in Fig. 10.

Rice. 10. Threaded connection of the inlet hydraulic circuit using an adapter hose

In Fig. 11 illustrates the types of connections and dimensions of some connecting elements for underwater and drain hoses.
Using the supplied parts, connect and secure the supply hose to the water tap; Make sure that the fresh water supply hose is not kinked or pinched.
Connecting the drain hose to the sewer lines
The drain valve (adapter connected with a compression clamp) has an outer diameter of 22 mm (see Fig. 11); Dimensions are similar to the output of all types of dishwashers and automatic washing machines manufactured after 2000.
To connect the water outlet from the dishwasher, install a standard siphon with a drain pipe and outlet under the sink (see Fig. 12 and 13).

Rice. 12. Siphon with drain pipe and outlet to the dishwasher

Rice. 13. Technological illustration of connecting a siphon with an outlet indicating dimensions

Rice. 14. Illustration of the correct outlet and connection of the dishwasher drain
Attention, important!
To find out the duration (in time - in minutes) of the selected program, press the dishwasher on/off button once.
Turn it off in the same way after “0” appears on the display. There is one more important nuance of program management.
If, during program management, you simultaneously press both buttons labeled Reset and hold for 3 seconds, the washing program stops, the “0” symbol will appear on the information display, and another minute after pausing the program, you can completely turn off the dishwasher.
This method is suitable for emergency stop of the program, adding dishes, in case of power failures and the need to change program parameters.
The table knows everything
There is a certain consumption of detergent and electricity, established experimentally and recommended by the manufacturer, depending on the installed (programmed) dishwashing program. This information is included in the table. 1.
Table 1. Relationship between program type, water and electricity consumption
Despite the apparent complexity of the description, all these sequential steps can be performed by any zealous owner - in order to bring pleasure from operating the dishwasher to his loved ones.
The dishwasher, like the washing machine, has long been transformed from a curiosity into a very important piece of home appliances. Correct technological connection of the dishwasher drain to the sewer network means long-term operation of the device itself and especially the drain pump.
Options for connecting the dishwasher to the sewer
The connection must begin with the drain hose. Such an event is quite within the capabilities of a home handyman. You just need to figure out how to properly connect the dishwasher to the sewer. Another question may arise: is it necessary to connect the dishwasher to the general sewer drain?
The easiest way
What is the easiest way to connect a dishwasher to the drain? The solution discussed below cannot even be called a connection. This involves taking a corrugated dishwasher drain hose and installing it on the edge of the kitchen sink using a plastic holder. Washing machines have a similar device.
This option turns out to be far from always acceptable. If the dishwasher is floor-standing, then running the hose into the sink can only be recommended as a very short-term measure. The main reason is that the dishwasher drain is low and the sink is high. The pump will be overloaded and may soon break down. There is also a small chance that the drain hose will accidentally fall off the edge of the sink and end up on the floor. It is not difficult to imagine the consequences.
This option is only suitable for compact dishwashers - those that stand on the table next to the sink. In this case, no serious load is expected on the drain pump. Plus, you can come up with ways to additionally secure the drain hose.
Connecting to the kitchen sink siphon
This connection of the dishwasher to the sewer is recommended for everyone who is not suitable for the previous option. Connecting the drain hose to the sink siphon can be considered the best option.

What you will need for this:
- Special siphon with fitting. If you plan to subsequently connect a washing machine to the siphon, then there should be two fittings. The one that will not be used immediately can be closed with a standard plug.
- FUM tape for sealing joints.
- Small adjustable wrench (No. 1).
- Dishwasher drain hose of the required length, if the supplied one is not enough. It is important to take into account here that it is undesirable to place the dishwasher at a distance of more than two meters from the place where dirty water is discharged, since the pump will be overloaded.
Fittings can move away from siphons in different ways. If this outlet is located perpendicular to the siphon container, the dishwasher hose must be raised to a level above the fitting.
If this is not done, the drainage from the sink will inevitably penetrate into the dishwasher drain hose and stagnate there. In this case, you are guaranteed unpleasant odors inside the car!

This measure is not necessary if the fitting enters the siphon container at an acute angle. In this case, the drain hose at the point of connection to the fitting is already above the level of the sink drain.
Outlet of the drain hose into the sewer pipe
Is it possible and how to connect the dishwasher directly to the sewer? There is such a possibility. The method is recommended only if the sewer pipe already has a branch (tee) designed specifically for connecting drain hoses of household appliances. If there is no outlet, its installation can be very troublesome and not necessarily successful.

This method requires that the dishwasher drain be at least 0.4 m above the sewer pipe. If the drain hose simply lies on the floor, the contents of the sewer will overflow into it, which is completely unacceptable.
Connecting a dishwasher to a sewer system, the options for which are discussed above, requires a careful approach using any method. To avoid home accidents, it is recommended to monitor the operating machine for the first few days: for leaks, interruptions, and unwanted vibrations. If everything works as it should, you can be sure that the dishwasher will work for a long time and without problems.