labor intensive to use
aesthetic appearance
ease of manufacture
environmental friendliness
price
final grade
More than a hundred years ago, humanity discovered an inexpensive, fast and convenient way to erect buildings using cinder blocks. The material consists of ordinary slag, pressed into molds, the standard size of which is 390/190/188. Water, some sand and a binding element – cement – must be added. Despite the fact that cinder block cannot be called environmentally friendly, it is used in almost any construction. Both industrial, military and civilian.
The strongest cinder block is one made from sand, crushed stone or pebbles.
This material is of high density, durable and has the ability to retain heat well, and at the same time cool. It is advisable to use it in the construction of external walls of a residential building.
At the same time, solid cinder block is used in the construction of external load-bearing walls in houses with more than one floor, but most often cinder block is used to build so-called country garden houses.
This is what a cinder block house without cladding looks like in the photo:

Cinder block for a bath
Many experts prefer not to use the word “cinder block” in everyday life, but to say “a type of silicate laying material.” Its versatility is recognized by everyone.
Cinder block is not susceptible to the destructive influence of fungus and has good contact with moisture. It is not susceptible to mold. It also has high fire safety. Therefore, cinder block is ideal for building a bathhouse. Most often, in this case, hollow blocks with voids up to 40% are chosen. But! If the bathhouse is, of course, lined.
Before building a bathhouse, it is advisable to plan how it will look when finished.
As an example, you can look at the photos that show: a project for a bathhouse made of cinder blocks and a finished bathhouse made of cinder blocks:


Building a garage from cinder blocks
To build a permanent garage, you don’t need to look for a better material than cinder block. Considering its impressive size, laying the walls of the garage, however, as in any other construction, will take place quite quickly.
Recommendations regarding which cinder block to choose—hollow or solid—should be based on where the garage will be located. The higher the percentage of voids, the colder the building will be, so this cinder block is suitable for a garage in a temperate climate zone.
A pre-prepared project will tell you how to build a garage from cinder blocks, in which all the nuances and wishes will be taken into account. To compile it, you can contact specialists, or you can use special computer programs.
Cinder block garage

Cinder block fence
For a fence that is supposed to be built for a long time, you need a cinder block, possibly hollow, but with good frost resistance and strength. Again, these data should fluctuate depending on the climate zone where the fence will be built.
Now we offer cinder block, or rather its subtype, decorative. In this case, one of the parties has a special texture. Decorative blocks are also called torn blocks. They can be painted in different colors. But more importantly, they must contain pebbles or metal slag. Then this material will be more resistant to atmospheric conditions.
Cinder block fences can be very diverse; their appearance depends on your imagination and capabilities.
Several photo examples of fences built from cinder block:
Cinder block foundation
The strength of the foundation directly depends not only on the soil characteristics of the area, but also on the number of storeys of the building. Therefore, if it is planned to build a private house with three or more floors, and if all of them, as well as the internal partitions, are made of cinder block, the foundation must be made of concrete, but not of cinder block.
A cinder block foundation is appropriate only in stationary and dry soils in houses with a light load. An important condition is that groundwater must be located below the freezing level of the soil.
Wall masonry
On the one hand, laying a cinder block is much easier (it alone replaces 6 - 7 bricks), on the other hand it is heavier - the weight of each block is about 20 kilograms. Experts advise using solid blocks or those with 30% voids for external walls.
You can pour sawdust into the voids; this will somewhat reduce the thermal conductivity of the cinder block and make the house warmer. Every third row needs to be reinforced, which will strengthen the masonry. For internal partitions it is better to use semi-blocks, their sizes are 390/120/188 mm and 390/90/188 mm. Considering that cinder blocks retain heat poorly, after laying, it is better to insulate the walls from the outside.
The video shows the process of laying walls during the construction of a cinder block garage:
Cinder block shed
If the aesthetic beauty of the barn is not important, then any cinder block is quite suitable for its construction, even one containing coal ash or expanded clay. This material is relatively light in weight, but a shed whose walls are lined with cinder block, given that it allows moisture to pass through, is still better to be clad.
The question of how to build a barn can be answered in the same way as any other cinder block building, since the work process is not much different from building, for example, a garage or a bathhouse.
Cinder block gazebo
The gazebo is a rather elegant design in itself. There are, of course, varieties of closed gazebos with a barbecue inside, where the presence of permanent walls is assumed, but, probably, few people will risk laying them out of cinder block.
If there are people who want to have such a gazebo, then a cinder block even with a hollowness of 40% is suitable for them.
Cinder block and basement
Basements and cinder block are simply made for each other. The basement should be cool; the walls will still be plastered. Therefore, the basement most often comes from cinder block.
Considering that the basement must be dry, and if there is periodic water in it, for example, during spring floods, then cinder block is a material that is not susceptible to rotting or damage by fungus.
The basement will then just need to be dried. For basement walls, a standard cinder block with a hollowness of up to 30% is suitable.
Cinder block extensions
The attached premises to a residential building can be made from cinder block, since this is the most affordable building material today. In addition, if you wish, you can make it yourself.
It should be remembered that if these parts of the building are residential, then it is better to lay them out of solid cinder block, but if they are used as utility rooms, then cinder block with a high percentage of voids is suitable.
Quite often used when constructing partitions in an existing room. This step is resorted to as a result of the redevelopment of rooms.
Due to the large size of the block, the construction process of such a partition wall can be completed within a few hours. Subsequently, the finished partition must be plastered and any finishing coating or finishing applied.
Building a plinth from cinder block
The base part of the building should take into account the overall design of the house, so you can lay out a rough base from a cinder block, and then decorate it with stone or veneer it with plaster.
The base is made from half a meter to 70 centimeters high across the entire width of the foundation. It is better to use a solid cinder block during its construction.
Cinder block porch
If there is a large difference between the plane of the yard and the threshold of the house, it would be appropriate to lay out a porch made of cinder block, which can level out this difference. The sub-porch will then need to be covered with tiles or possibly deck boards.
A cinder block for a porch must withstand quite heavy loads, so it is better to choose one that is solid with a maximum frost resistance cycle and high strength.
Cinder block for toilet
A regular outdoor toilet can be built from any building material, cinder block is no exception. Most likely, the structure will be insulated, so for such a small building any cinder block will be suitable, even one with the highest percentage of voids and a small strength index.
Cinder block pool
It is better to fill the pool bowl with concrete. Cinder block is highly permeable to moisture, so it can only be used as formwork. For these purposes, you should opt for a cinder block with the highest strength and, of course, solid body.
Cinder block grill
A stationary barbecue with a foundation may well be made of cinder block. Especially its lower part. And the place for making a fire, of course, needs to be made of refractory bricks.
Cinder block cesspool
Used cinder blocks are sometimes more expensive than new ones. Then, apparently, every second person did not make it, and the technology was followed very precisely. In general, such a cinder block can be used in the construction of cesspools (drainage pits).
Another plus in the construction of pit walls from cinder blocks, not even necessarily second-hand ones, the fact is that porous blocks will allow liquid to pass through themselves for some time, so a pit built in dry soil will not become full so quickly.
DIY cinder block construction
Cinder block is not a material that requires special skills when working, regardless of what you are going to build from cinder block: a bathhouse, a house, a garage, a fence, or to build a foundation. Its masonry is no different from brick. Reinforcement should be carried out every 2 - 4 rows, using a regular solution: either concrete or cement-sand.
It is advisable to have a project for the future construction, at least drawn up independently (which is absolutely not difficult to do in special programs posted on the Internet). If you have a project, you can easily calculate the required number of blocks.
It is also worth remembering that there is no need to work at Stakhanov’s pace when erecting the walls of any building. You need to lay no more than 3 to 5 blocks on top of each other per day, otherwise the wall may collapse under its own weight.
Summarizing all of the above, we can summarize the following: cinder block is a universal material, it is suitable for any construction. But! External walls made of it cannot be left without cladding, as it absorbs moisture very well. But it is better to lay out the internal partitions from another, more environmentally friendly material.
The video will tell you in detail how to build from cinder blocks (using the example of building a bathhouse):
Cinder block calculator
Even when construction is carried out by professionals, it is still worth knowing how to correctly calculate how much materials are needed. The simplest and most reliable way to calculate the required amount of building material for masonry.
Calculation of a cinder block for a house or garage:
- Multiply the length of the walls by their height.
- Subtract the area of the doorways from the amount.
- Now you need to calculate how many cinder blocks will be needed for one square meter of masonry:
- We multiply the length of the block by its width: 390 * 190 = 74,100 mm2.
- We convert the resulting figure to m2. This turns out to be 0.074 m2.
- We divide 1 m2 by the result obtained: 1: 0.074 = 13.5.
- After rounding, it turns out that 14 cinder blocks are needed per 1 m2.
- Multiply the square of the house by 14.
- If the house is 200 m2, then 200 * 14 = 2,800 cinder blocks are needed for its construction.
House projects
A good cinder block house design must take into account:
- foundation depth (minimum 70 centimeters for a one-story house),
- base height,
- arrangement of a ventilation system,
- heating, what coolant will be used, what kind of wiring is appropriate: upper or lower, will there be a heated floor,
- insulation of house walls,
- cinder block cladding,
- installation of the roof taking into account vapor and waterproofing to avoid the formation of condensation during operation.
Using various computer programs, you can prepare any project for a residential building. An example is the following photo:
Layout project for a one-story house made of cinder blocks

A cinder block house can and should be erected in stages, with simultaneous laying of external walls and internal partitions. And when laying the foundation, you can, for example, dig a basement and line it with cinder blocks.
In order for the shed to “not lie on the ground”, a good foundation is necessary. It will allow the building to be raised and provide external ventilation in the lower part of the building. In addition, small additional rooms may be located inside the foundation, which will always find a use.
Since the barn and most outbuildings are lightweight buildings, a shallow foundation is sufficient, which can be formed quite quickly and spending very little money. Although in some cases more effort is required to create a foundation due to the high viscosity of the soil (you will have to penetrate deeper into the ground to ensure the stability of the future shed and prevent it from sliding).

Different types of foundations have their pros and cons. All of them are quite simple if you follow the recommendations of professionals.
The following are noted to be approximately equally popular:
- tape;
- screw (pile);
- columnar foundation.
And yet, where to stop? There are two main determining factors to consider:
- soil features;
- the expected massiveness of the outbuilding (shed).
If the soil is fairly stable, strip and column structures are ideal. They don't require much depth. On more viscous soil, you will have to use screw piles and install them to a depth of about 1.5 meters.

Step one. We mark the territory with wooden stakes and stretch twine or rope to mark straight lines. The marks should run along a line coinciding with the outer and inner walls of the future foundation (the trench will be wider than these lines).
Please note that large outbuildings require a sectional layout. That is, the foundation pouring will take place not only along the edges of the structure, but also under it - this is necessary so that the “bottom” of the barn does not sag, but lies on the concrete.
Step two. Now it's time to dig the trench. It’s easy to get by with a shovel and physical labor, without the use of excavator equipment. The width of the trench channel is recommended ~45-70 cm with the net width of the foundation (without formwork) ~30-40 cm, respectively.

As for depth, make it slightly lower than freezing point. It is useful to determine this nuance in advance. And if you started construction unexpectedly, ask your neighbors or relatives. Surely among your friends there will be those who have already built foundations in this area and will advise you.
Step three. At the bottom of the trench, pour crushed stone in a layer of 8-10 cm, then sand in a layer of about 4-5 cm. The pillow provides the necessary “skid”, although it is not visible to the naked eye, but in fact it exists and arises due to temperature changes in the soil, from changes humidity levels, from minimal seismic impulses.
Step four. Wooden formwork is constructed from boards and plywood. There is no point in installing a shed on a foundation whose top edge coincides with the ground level. After all, you need to protect the lower part of the shed from rotting. In addition, the terrain on the site is not always even - the difference can be “distributed” by properly deepening the strip foundation so that at the highest point of the ground the concrete looks out at least 20 cm (or better yet, even all 30 cm).

Step five. Reinforcing elements are placed inside the formwork - metal mesh, rods, etc. The elements are connected to each other by wire, but without welding. At this stage, do not forget about ventilation. Without it, excess moisture will form inside the foundation, which will inevitably lead to destruction of not only the concrete, but also the barn.
Vents (vents) are made from scraps of plastic or metal pipes; they can also have a square cross-section. The main thing is that the holes are placed in several places and create an air flow.

Step six. Prepare the concrete solution in quantities sufficient for complete consumption - there should be nothing left in the concrete mixer “for tomorrow.” Pour the mixture into the formwork evenly through the pipe, using a shovel to manually help the concrete to be distributed in an even layer.
It is recommended to first make a thin layer, let it harden a little, and only then fill the foundation to the top. This way you will be able to avoid loss of water and cement laitance. That is, the lowest layer will be a kind of insulation from the sand and crushed stone cushion.
The period for complete hardening of a concrete foundation is 24-27 days, but construction of a shed can begin within one and a half to two weeks, when ~70% of the strength has already been achieved.

Find out the nature of the soil on your site. If it is unreliable, contains a lot of water, or has high viscosity, you will need piles. These are special parts that are sold in hardware stores. There are driven ones and with screw threads along the barrel. The piles are driven (screwed) into the ground to the depth specified in the instructions upon purchase. The main task is to maintain verticality. Use a building level, plumb lines and any other methods in your work.
Video - Foundation on screw piles

As life has shown, a columnar foundation provides the widest possible range for amateur experimentation. In principle, it is allowed to use any material, but usually rural residents or summer residents always accumulate all kinds of construction “jewels”:
- a couple of pallets of bricks inherited from the previous owner;
- concrete blocks quarried by chance, languishing in anticipation of successful use;
- asbestos pipe scraps and other suitable materials.
Operating procedure
Step one. We determine the placement points of the pillars. 1 piece each they must be under each corner element. Plus on runs between corners, if the length of such a run is more than 1.8-2 meters.
Video - Columnar foundation
Step two.
- square pits - if we have square (cubic) elements at our disposal;
- rectangular - with a shallow depth of the planned foundation and if our elements have the shape of a parallelepiped;
- vertical wells - if we use brick columns or asbestos (or other) pipes.

Step three. We cover the bottom with a shock-absorbing layer. As a rule, this is 4-6 cm of sand. Sometimes crushed stone, sometimes a combination of both. The layer is needed so that the load-bearing element does not “merge” with the ground, but exists as if independently. And during periods of increased humidity, such a foundation will not “dissolve” in different directions.
Step four. We place the pillars in the prepared holes. When working with pipes, keep in mind that they should not remain hollow inside. Even if it is iron, it will begin to rust over time, and the emptiness inside the columns supporting your barn will not lead to anything good.

Asbestos walls are also quite fragile by definition - it is hardly forward-thinking to rely on their durability if there is emptiness inside. Mix a concrete mixture that contains both sand and some pebbles and/or crushed stone. Don't forget to put reinforcing elements into the pipe barrel. Pour the solution into the pipes after installing them and checking the vertical level.

Step five. The column method does not require a long wait for the concrete to harden (as is the case with tape pouring). At most, when manually laying pillars made of bricks or blocks, it makes sense to wait 3-5 days until the concrete in the connecting seams sets well and completely hardens. After this, you can safely begin building the barn or outbuilding itself.
In practice, any private owner involved in construction easily gets carried away in the process. His appetites grow, there is a desire to redraw the layout, increase the size of the foundation and the entire barn. Experts recommend being consistent. Calculate all dimensions in advance, prepare recesses, and decide on the number of pillars.
Otherwise, unexpected surprises are possible. For example, undiggable rubble nodes in the ground, encountering unknown current-carrying underground utilities, and so on. Planning and a smart approach will lead you to undeniable success.

Comments: 0
Any construction process, especially of a capital nature, requires the construction of an additional structure that performs a diverse role. Storing materials and tools, protecting them from external influences and the prying eyes of others - these are the main reasons why so-called temporary sheds are built.
But it is worth approaching the issue creatively and organizing the construction of a structure, which in the future, after the completion of the main work, can be used for various needs. A do-it-yourself cinder block shed will not only satisfy all the required conditions, but will also significantly save money spent on construction. A country house, dacha, or ordinary plot of land cannot do without this element, the presence of which is sometimes simply necessary.
A shed made of such material has many advantages
lack of special construction skills required for its construction;
cheap material;
good sound insulation and high thermal conductivity;
strength and fire resistance;
Some disadvantages, expressed in the presence of harmful emissions when combustion products are used as an element of a cinder block, will absolutely not affect the functioning of a structure of this type. Taking into account all the positive characteristics, such a barn can be used not only for storing various items, but also for breeding domestic animals, which will feel comfortable and cozy in it.
Also, one of the significant advantages of using cinder block is the ability to make it yourself. This process is quite simple and least expensive. Cement of normal consistency is used as a base. Construction waste and other materials can act as filler. Broken brick, combustion products of wood and coal, as well as expanded clay will give the finished product various positive properties. Before starting work, it is necessary to make a form that determines the future dimensions of the blocks. 390 x 190 x 188 are the standard parameters of this product, which are not a standard, and may vary depending on desire and other factors that determine the future nature of the work.
Most often, the mold is made of wood and collapsible; this approach increases the simplicity of the manufacturing process and makes it easier to remove the finished block. Well-thought-out shapes and pipe elements in the design will increase the density of the poured material, reduce the number of voids and the weight of the finished block, which overall will save a significant portion of the filler during the manufacturing process. The role of such technological elements for producing holes in a cinder block can be ordinary bottles vertically installed at the bottom of the workpiece. Before pouring cement, it is recommended to cover the form with film. When drying the blocks, you should avoid direct sunlight and take care of additional moisture. Regularly sprinkling them with water will help avoid the process of cracking. By fulfilling all the requirements for the production of this building material, you can make a cinder block shed with your own hands quickly and efficiently.

The process of building a barn itself also does not present any difficulties. Before starting work, it is necessary to mark the area using stakes and cord. When choosing the area and configuration of the future structure, you need to take into account the size of the cinder blocks made, which will make their laying easier in the future. The basis of the future barn will be the foundation. A trench 50 cm deep is equipped with formwork and filled with cement. It is recommended to use iron reinforcement to strengthen the foundation. After the base of the building has hardened, walls can be erected. Laying with cinder blocks is no different from the technology that uses brick. As a result of the fact that the size of the blocks is 7 times larger than their brick counterpart, therefore, the process of building walls will also speed up. The layer of cement between the blocks should be 1-1.5 cm. To achieve a high-quality final result, you should accurately set the angles and monitor their position. This process is easily adjusted using a regular cord and a building level.
The roof structure does not require a complex configuration; for a barn it can be made pitched. Treated with a special solution that protects the wood from moisture and pests, the beams are installed at a slight angle. The roof construction process is completed by installing slate or corrugated sheets on a wooden frame. A do-it-yourself cinder block shed will surprise you with the simplicity of its construction and will delight you with the wide possibilities for further use. Don’t be afraid to open new horizons, try yourself in different roles, and then the surrounding objects will give you satisfaction and a sense of harmony.
Any construction process, especially of a capital nature, requires the construction of an additional structure that performs a diverse role. Storing materials and tools, protecting them from external influences and the prying eyes of others - these are the main reasons why so-called temporary sheds are built.
But it is worth approaching the issue creatively and organizing the construction of a structure, which in the future, after the completion of the main work, can be used for various needs. A do-it-yourself cinder block shed will not only satisfy all the required conditions, but will also significantly save money spent on construction. A country house, dacha, or ordinary plot of land cannot do without this element, the presence of which is sometimes simply necessary.
A shed made of such material has many advantages
lack of special construction skills required for its construction; low cost of material; good sound insulation and high thermal conductivity; strength and fire resistance;
Some disadvantages, expressed in the presence of harmful emissions when combustion products are used as an element of a cinder block, will absolutely not affect the functioning of a structure of this type. Taking into account all the positive characteristics, such a barn can be used not only for storing various items, but also for breeding domestic animals, which will feel comfortable and cozy in it.
Also, one of the significant advantages of using cinder block is the ability to make it yourself. This process is quite simple and least expensive. Cement of normal consistency is used as a base. Construction waste and other materials can act as filler. Broken brick, combustion products of wood and coal, as well as expanded clay will give the finished product various positive properties. Before starting work, it is necessary to make a form that determines the future dimensions of the blocks. 390 x 190 x 188 are the standard parameters of this product, which are not a standard, and may vary depending on desire and other factors that determine the future nature of the work.
Most often, the mold is made of wood and collapsible; this approach increases the simplicity of the manufacturing process and makes it easier to remove the finished block. Well-thought-out shapes and pipe elements in the design will increase the density of the poured material, reduce the number of voids and the weight of the finished block, which overall will save a significant portion of the filler during the manufacturing process. The role of such technological elements for producing holes in a cinder block can be ordinary bottles vertically installed at the bottom of the workpiece. Before pouring cement, it is recommended to cover the form with film. When drying the blocks, you should avoid direct sunlight and take care of additional moisture. Regularly sprinkling them with water will help avoid the process of cracking. By fulfilling all the requirements for the production of this building material, you can make a cinder block shed with your own hands quickly and efficiently.

The process of building a barn itself also does not present any difficulties. Before starting work, it is necessary to mark the area using stakes and cord. When choosing the area and configuration of the future structure, you need to take into account the size of the cinder blocks made, which will make their laying easier in the future. The basis of the future barn will be the foundation. A trench 50 cm deep is equipped with formwork and filled with cement. It is recommended to use iron reinforcement to strengthen the foundation. After the base of the building has hardened, walls can be erected. Laying with cinder blocks is no different from the technology that uses brick. As a result of the fact that the size of the blocks is 7 times larger than their brick counterpart, therefore, the process of building walls will also speed up. The layer of cement between the blocks should be 1-1.5 cm. To achieve a high-quality final result, you should accurately set the angles and monitor their position. This process is easily adjusted using a regular cord and a building level.
The roof structure does not require a complex configuration; for a barn it can be made pitched. Treated with a special solution that protects the wood from moisture and pests, the beams are installed at a slight angle. The roof construction process is completed by installing slate or corrugated sheets on a wooden frame. A do-it-yourself cinder block shed will surprise you with the simplicity of its construction and will delight you with the wide possibilities for further use. Don’t be afraid to open new horizons, try yourself in different roles, and then the surrounding objects will give you satisfaction and a sense of harmony.
In contact with
www.stroim-domik.net
Cinder block shed
Construction materials
2. construction of the foundation.
3. construction of walls.
4. roof installation.
5. plastering the walls.
Main stages of construction
Walling
semidelov.ru
Cinder block shed - construction
Cinder block shed
For every owner of a private building, sooner or later the question arises of building a shed for household needs. For the construction of sheds they usually use inexpensive
Construction materials
The most common budget option is a cinder block shed.
Let's take a closer look at how to build a cinder block shed.
Cinder block is an inexpensive building material, which is obtained by pressing a concrete solution with various inexpensive fillers (slag, ash, etc.), often to reduce costs, cinder blocks are made independently from scrap materials.
Features of cinder block masonry
Cinder block masonry is characterized by ease of installation and a fast pace of construction.
since the cinder block is quite large in size compared to a brick. Working with cinder blocks requires practically no special construction skills, so you can build a shed yourself. walls made of cinder block have good sound permeability, are quite durable and are not subject to combustion. True, walls made of cinder block always require plaster, since cinder block is susceptible to destruction when constantly exposed to moisture. When building a cinder block shed, you should think carefully about the construction in order to protect the structure from constant exposure to dampness.
To successfully build a cinder block shed, you must complete all of the following steps:
1. size planning and calculation of materials.
2. construction of the foundation.
3. construction of walls.
4. roof installation.
5. plastering the walls.
Main stages of construction
Before you start building a shed, you need to clearly understand the size
future structure, depending on what needs the barn will be used for.
Depending on the size, a calculation is made of the materials required for construction; usually, a square meter of cinder block wall contains 13 standard cinder blocks. Based on this, a calculation is made of the number of cinder blocks required for construction.
After all the necessary materials have been prepared, you can begin construction.
For a cinder block shed, it is necessary to build a foundation to protect it from absorbing moisture from the soil, in order to protect the walls from premature destruction. The foundation is usually made of a strip type, that is, they dig a trench about 50 cm deep, install formwork, fill it with concrete, while strengthening it with reinforcement, along the entire perimeter of the building. Allow the foundation to dry thoroughly, periodically watering it with water to prevent cracks from appearing in the foundation.
Walling
Once the foundation is well strengthened, you can begin building the walls. The plinth should be raised to a high enough height to avoid
rainwater on the walls of the building. Before you begin laying cinder block, you need to waterproof the foundation. The masonry itself takes a very short period of time, due to the large size of the bricks.
After the walls are erected, you can begin installing the roof. The roof can be made single-pitch or gable. You can cover it with materials such as slate or corrugated sheeting, the main thing is that the roof is waterproof.
After all the main stages of construction are completed, you can begin plastering the walls, which is designed to further protect the walls from exposure to atmospheric humidity.
In this article, we looked at how to build a cinder block shed step by step. Compliance with these simple rules will allow you to erect outbuildings in the shortest possible time, at minimal cost.
Based on materials from the site: http://semidelov.ru
fix-builder.ru
Using cinder block for building a house, bathhouse, garage, fence and foundation

Material rating
Labor intensive to use
Aesthetic appearance
Ease of production
Environmental friendliness
final grade
More than a hundred years ago, humanity discovered an inexpensive, fast and convenient way to erect buildings using cinder blocks. The material consists of ordinary slag, pressed into molds, the standard size of which is 390/190/188. During the manufacturing process, water, some sand and a binding element – cement – are necessarily added. Despite the fact that cinder block cannot be called environmentally friendly, it is used in almost any construction. Both industrial, military and civilian.
Cinder block for home
The strongest cinder block is one made from sand, crushed stone or pebbles.
This material is of high density, durable and has the ability to retain heat well, and at the same time cool. It is advisable to use it in the construction of external walls of a residential building.
At the same time, solid cinder block is used in the construction of external load-bearing walls in houses with more than one floor, but most often cinder block is used to build so-called country garden houses.
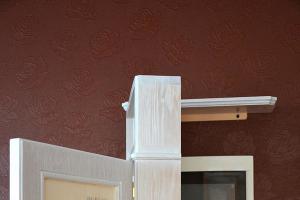
This is what a cinder block house without cladding looks like in the photo:

Cinder block for a bath
Many experts prefer not to use the word “cinder block” in everyday life, but to say “a type of silicate laying material.” Its versatility is recognized by everyone.
Cinder block is not susceptible to the destructive influence of fungus and has good contact with moisture. It is not susceptible to mold. It also has high fire safety. Therefore, cinder block is ideal for building a bathhouse. Most often, in this case, hollow blocks with voids up to 40% are chosen. But! If the bathhouse is insulated and, of course, lined.
Before building a bathhouse, it is advisable to plan how it will look when finished.
As an example, you can look at the photos that show: a project for a bathhouse made of cinder blocks and a finished bathhouse made of cinder blocks:


Building a garage from cinder blocks
To build a permanent garage, you don’t need to look for a better material than cinder block. Considering its impressive size, laying the walls of the garage, however, as in any other construction, will take place quite quickly.
Recommendations regarding which cinder block to choose—hollow or solid—should be based on where the garage will be located. The higher the percentage of voids, the colder the building will be, so this cinder block is suitable for a garage in a temperate climate zone.
A pre-prepared project will tell you how to build a garage from cinder blocks, in which all the nuances and wishes will be taken into account. To compile it, you can contact specialists, or you can use special computer programs.
Cinder block garage

Cinder block fence
For a fence that is supposed to be built for a long time, you need a cinder block, possibly hollow, but with good frost resistance and strength characteristics. Again, these data should fluctuate depending on the climate zone where the fence will be built.
Now we offer cinder block, or rather its subtype, decorative. In this case, one of the parties has a special texture. Decorative blocks are also called torn blocks. They can be painted in different colors. But more importantly, they must contain pebbles or metal slag. Then this material will be more resistant to atmospheric conditions.
Cinder block fences can be very diverse; their appearance depends on your imagination and capabilities.
Several photo examples of fences built from cinder block:
Cinder block foundation
The strength of the foundation directly depends not only on the soil characteristics of the area, but also on the number of storeys of the building. Therefore, if it is planned to build a private house with three or more floors, and if all of them, as well as the internal partitions, are made of cinder block, the foundation must be made of concrete, but not of cinder block.
A cinder block foundation is appropriate only in stationary and dry soils in houses with a light load. An important condition is that groundwater must be located below the freezing level of the soil.
Wall masonry
On the one hand, laying a cinder block is much easier (it alone replaces 6 - 7 bricks), on the other hand it is heavier - the weight of each block is about 20 kilograms. Experts advise using solid blocks or those with 30% voids for external walls.
You can pour sawdust into the voids; this will somewhat reduce the thermal conductivity of the cinder block and make the house warmer. Every third row needs to be reinforced, which will strengthen the masonry. For internal partitions it is better to use semi-blocks, their sizes are 390/120/188 mm and 390/90/188 mm. Considering that cinder blocks retain heat poorly, after laying, it is better to insulate the walls from the outside.
The video shows the process of laying walls during the construction of a cinder block garage:
Cinder block shed
If the aesthetic beauty of the barn is not important, then any cinder block is quite suitable for its construction, even one containing coal ash or expanded clay. This material is relatively light in weight, but a shed whose walls are lined with cinder block, given that it allows moisture to pass through, is still better to be clad.
The question of how to build a barn can be answered in the same way as any other cinder block building, since the work process is not much different from building, for example, a garage or a bathhouse.
Cinder block gazebo
The gazebo is a rather elegant design in itself. There are, of course, varieties of closed gazebos with a barbecue inside, where the presence of permanent walls is assumed, but, probably, few people will risk laying them out of cinder block.
If there are people who want to have such a gazebo, then a cinder block even with a hollowness of 40% is suitable for them.
Cinder block and basement
Basements and cinder block are simply made for each other. The basement should be cool; the walls will still be plastered. Therefore, the masonry of the basement most often occurs from cinder block.
Considering that the basement must be dry, and if there is periodic water in it, for example, during spring floods, then cinder block is a material that is not susceptible to rotting or damage by fungus.
The basement will then just need to be dried. For basement walls, a standard cinder block with a hollowness of up to 30% is suitable.
Cinder block extensions

The attached premises to a residential building can be made from cinder block, since this is the most affordable building material today. In addition, if you wish, you can make it yourself.
It should be remembered that if these parts of the building are residential, then it is better to lay them out of solid cinder block, but if they are used as utility rooms, then cinder block with a high percentage of voids is suitable.
Quite often, cinder blocks are used when constructing partitions in an existing room. This step is resorted to as a result of the redevelopment of rooms.
Due to the large size of the block, the construction process of such a partition wall can be completed within a few hours. Subsequently, the finished partition must be plastered and any finishing coating or finishing applied.
Building a plinth from cinder block
The base part of the building should take into account the overall design of the house, so you can lay out a rough base from a cinder block, and then decorate it with stone or veneer it with plaster.
The base is made from half a meter to 70 centimeters high across the entire width of the foundation. It is better to use a solid cinder block during its construction.
Cinder block porch
If there is a large difference between the plane of the yard and the threshold of the house, it would be appropriate to lay out a porch made of cinder block, which can level out this difference. The sub-porch will then need to be covered with tiles or possibly deck boards.
A cinder block for a porch must withstand quite heavy loads, so it is better to choose one that is solid with a maximum frost resistance cycle and high strength.
Cinder block for toilet
A regular outdoor toilet can be built from any building material, cinder block is no exception. Most likely, the structure will be insulated, so for such a small building any cinder block will be suitable, even one with the highest percentage of voids and a small strength index.
Cinder block pool
It is better to fill the pool bowl with concrete. Cinder block is highly permeable to moisture, so it can only be used as formwork. For these purposes, you should opt for a cinder block with the highest strength and, of course, solid body.
Cinder block grill
A stationary barbecue with a foundation may well be made of cinder block. Especially its lower part. And the place for making a fire, of course, needs to be made of refractory bricks.
Cinder block cesspool
Used cinder blocks are sometimes more expensive than new ones. Then, apparently, every second person did not make it, and the technology was followed very precisely. In general, such a cinder block can be used in the construction of cesspools (drainage pits).
Another advantage of building pit walls from cinder blocks, not even necessarily second-hand ones, is that the porous blocks will allow liquid to pass through them for some time, so a pit built in dry soil will not become full so quickly.
DIY cinder block construction
Cinder block is not a material that requires special skills when working, regardless of what you are going to build from cinder block: a bathhouse, a house, a garage, a fence, or to build a foundation. Its masonry is no different from brick. Reinforcement should be carried out every 2 - 4 rows, using a regular solution: either concrete or cement-sand.
It is advisable to have a project for the future construction, at least drawn up independently (which is absolutely not difficult to do in special programs posted on the Internet). If you have a project, you can easily calculate the required number of blocks.
It is also worth remembering that there is no need to work at Stakhanov’s pace when erecting the walls of any building. You need to lay no more than 3 to 5 blocks on top of each other per day, otherwise the wall may collapse under its own weight.
Summarizing all of the above, we can summarize the following: cinder block is a universal material, it is suitable for any construction. But! External walls made of it cannot be left without cladding, as it absorbs moisture very well. But it is better to lay out the internal partitions from another, more environmentally friendly material.
The video will tell you in detail how to build from cinder blocks (using the example of building a bathhouse):
Cinder block calculator
Even when construction is carried out by professionals, it is still worth knowing how to correctly calculate how much materials are needed. The simplest and most reliable way to calculate the required amount of building material for masonry.
Calculation of a cinder block for a house or garage:
- Multiply the length of the walls by their height.
- Subtract the area of the doorways from the amount.
- Now you need to calculate how many cinder blocks will be needed for one square meter of masonry:
- We multiply the length of the block by its width: 390 * 190 = 74,100 mm2.
- We convert the resulting figure to m2. This turns out to be 0.074 m2.
- We divide 1 m2 by the result obtained: 1: 0.074 = 13.5.
- After rounding, it turns out that 14 cinder blocks are needed per 1 m2.
- Multiply the square of the house by 14.
- If the house is 200 m2, then 200 * 14 = 2,800 cinder blocks are needed for its construction.
House projects
A good cinder block house design must take into account:
- foundation depth (minimum 70 centimeters for a one-story house),
- base height,
- arrangement of a ventilation system,
- heating, what coolant will be used, what kind of wiring is appropriate: upper or lower, will there be a heated floor,
- insulation of house walls,
- cinder block cladding,
- installation of the roof taking into account vapor and waterproofing to avoid the formation of condensation during operation.
Using various computer programs, you can prepare any project for a residential building. An example is the following photo:
Layout project for a one-story house made of cinder blocks
 A cinder block house can and should be erected in stages, with simultaneous laying of external walls and internal partitions. And when laying the foundation, you can, for example, dig a basement and line it with cinder blocks.
The diagram shows an approximate order of work:

To sum up all that has been said, it can be noted that owner reviews of cinder block buildings are most often positive. The material is quite cheap and easy to use.
Do not forget that cinder block, even the most durable, with a high degree of frost resistance, is a fairly porous material, so a cinder block house must be lined and, highly desirable, insulated before that.
In contact with
Classmates
And subscribe to site updates in Contact, Odnoklassniki, Facebook, Google Plus or Twitter.
stroyres.net
What do we mean by the word barn? Most often, when we talk about sheds, we can respect the crite of the non-living awakening, call without the ceiling barriers, the quiet room and about the place where we calmly feel that we do not need it! So this is the place where we can live as a domestic ruler! Just let us lie down with you, what kind of beautiful barn will it be?! Why are we going to vikorize him, but for whom we need to know how to build a shed of cinder blocks with our own hands.
Pochatkov's robots
To get started, we need to organize all the work, and first of all we need to start digging the foundation. Why do we rob the cinder block shed itself? Let's get to the core of cinder block?! This is a material that is obtained as a result of vibropressing of heavy and light concrete in forms. This name was taken from the origin of the distillation of household slag in the yakost of the same.
The thoughts of the rich fakhivts converge on the fact that it is much easier to work with him and much faster. Therefore, it is waterproof and easy to use.
Pouring the foundation
Ideal foundation: mix broken target and stone with broken cement. Pour the river for a few months, or even better, pour it into the rock. If the grapes are gone, add fresh ones and drain them from the ground.

Photo of the stitch foundation
It is important not to forget that the foundation is the basis of all life-changing work! Just lay low, as long as I can serve you.
Wall masonry
How to go about everyday life or repairs - start the headache that we have already made. Next to the finished foundation, we begin laying the cinder block.

Lay the roofing felt over the overlap, add rhubarb, and after you have determined the maximum high point, start working on the cut. Pull a thread between them to help prevent the wall from falling through. Remember, work on the reinforcing dressing of the skin 3 rows when placing. Block the window and door openings with wooden panels, then the balls will be placed on the cinder block, which will cause the stench to be reduced.
Insulation
As you planned to build a barn to house the critters there, it would be a good idea to insulate them. To do this, place the walls in a row, filling them with insulation: laminated or foam. The simplest option: cinder block - sklovata - tsegla, or tsegla - sklovata - tsegla. Having completed this stage, make sure that everything is set correctly.

In the future, it is important not to rush, but rather to focus on the core of the work.
Coverings
You can avoid any innovations here, if you want the barn to last for a long time, then work without compromising technology.

Preferred internal robots
A cinder block shed does not require plaster, but if you still want to, you can use original clay instead. The footings should be poured completely from the foundation. The most gentle option is to lay the beds with pallets and cover them with straw or lay linoleum.

Visnovok
Building a shed with a cinder block is not so difficult, but building a full-fledged shed is the same as building a cabin, only a smaller one. It is necessary to deprive your mother of the necessary material, knowledge and extremely important work to live a better life!
Away from waking life!
dovidkam.com
DIY cinder block house
The technology of cinder block construction has been known to us for a long time. It was loved by many for its simplicity of execution and small investments compared to the unforgettable brick classics and luxurious wooden frame. As for the actual construction from this wall material, you don’t have to turn to professional masons; it will be enough to study the technique of how to build a house from cinder blocks with your own hands, buy high-quality material, arm yourself with desire and plunge headlong into the work, dreaming of the comfort of your future nest .

Pros and cons of a cinder block building
Before you begin the process itself, you need to know some features that can affect the entire project.
So, in addition to their low price, cinder blocks are also attractive because they do not require an expensive foundation. This wall material is also not difficult to transport. Again, you can do without using heavy equipment, and most importantly, houses built from it are not inferior in their characteristics to brick buildings.

Please note that cinder blocks are very afraid of water, so construction should be carried out only in dry weather, and upon completion, do not delay plastering the walls and facing the facade. Particular attention should be paid to its insulation, because cinder blocks themselves do not have a good thermal conductivity. Therefore, the material for external work must be selected correctly, corresponding to a certain level of water, heat and sound insulation.

Standard sizes of cinder blocks
There are many varieties of cinder blocks. They are monolithic and hollow. The first ones are used mainly for arranging the foundation. If you build main walls from such massive products, the weight of the building will increase significantly. The second type is cheaper due to the saving of raw materials on technical voids, and, of course, lighter.

According to their intended purpose, they can be full - for main walls and semi-blocks - for interior partitions. They have dimensions of 39*12*18.8 cm. Standard blocks have dimensions of 39*19*18.8 cm. Less common are products with dimensions of 40*20*20 cm.
Hollow cinder blocks come with two or four square, two or three round or various shapes, arranged in three rows of technical cavities.

What to look for when choosing
Perhaps many people know that high-quality wall material makes up 50 percent of the success and reliability of the entire construction. Therefore, when purchasing blocks, pay attention to the following points:
- Be interested in the composition. The name of the cinder block speaks for itself. This material is made from recycled materials and industrial waste, so be careful, there is little that an unscrupulous manufacturer can mix into their wall products. The best fillers are shell rock, sawdust, crushed stone and expanded clay. So, for example, crushed stone and pebbles make the blocks heavier, but they provide a good coefficient of thermal conductivity and frost resistance, while expanded clay, perlite and shell rock, on the contrary, eat up weight and a high ability to retain heat;
- A reliable and durable block is not afraid of falling from a height of one and a half meters. Ask the seller to conduct a small experiment, lift the product above the ground about one and a half meters, and throw it without applying any force. A quality product should remain undamaged. Even small cracks and chips indicate a low-grade product;
- Take a close look at the products. All their faces must be of the correct shape without violating their integrity. Measure the sizes of random three sides, they should all match;
- Do not hesitate to ask the seller for test reports and quality certificates. From them you will learn about the true condition of the purchased products;
- Don't chase the lowest price. It is usually an indicator of poor quality. Before raiding construction sites in search of the perfect cinder blocks, do a little social work. a survey among your acquaintances and friends on the reputation of manufacturers of this wall material. Popular opinion is rarely wrong.

Construction technology from cinder blocks
Building a house with your own hands from this material is not so difficult. You just need to follow professional recommendations.
Laying the foundation
The most important thing for the foundation of a cinder block house is that it must be high enough so that moisture cannot interact with the blocks. Depending on the condition of the soil, a monolithic or strip foundation is installed under a cinder block house. The technology for pouring the latter is presented in the article “laying cinder blocks with your own hands.” Let's look at the slab base option.

Make markings for the future base of the building and install pre-prepared formwork above ground level no more than 60 cm, but not less than 50 cm. Make a sand and gravel layer and compact it thoroughly. Its height should be approximately 50 cm.

Then mount the reinforcement frame and fill it all with concrete. Its composition should be taken in the following proportions: for one part of Portland cement M 400, take three parts of sand and three parts of medium-sized crushed stone.

If you decide to make a brick base, then you can do it immediately after pouring the foundation. It will be strong enough for walls only after a month of exposure. Be sure to thoroughly waterproof the foundation with roofing felt or roofing felt.
Walling
The construction of the building box begins by setting the corners and leveling them. When this painstaking work is done, a rope is stretched between them, along which the next rows will be aligned. Pay special attention to the first three rows of masonry, the evenness of the walls will depend on them.

To make ordinary masonry mortar better and more viscous, you can add super plasticizers or red clay to it at the rate of one third of the clay to four parts of the mortar.
The thickness of the seams should not exceed one and a half centimeters. In this case, significant losses of precious heat will occur through them.

It is better to use monolithic reinforced concrete floors or non-reinforced wood, but if you still choose it, then you will save on additional work and lose in durability. Therefore, a stove is a more reliable option. To install it, it is necessary to strengthen the last row with iron or an armored belt.

After building the walls, immediately begin building the roof and facade work. Because getting cinder blocks wet can lead to their rapid destruction.
Video lesson on cinder block laying
Insulation
The most common materials for insulating a cinder block building are mineral wool, expanded polystyrene, fiberglass or extruded polystyrene foam.

It is better to insulate a house from the outside than from the inside. If you insulate the inside, the walls will constantly become damp and moldy, but in some cases it is necessary. For example, if you decide to insulate a long-constructed building with blocks in the initial stages of destruction. To eliminate such an oversight, the damaged areas are first repaired with a special solution, after which plaster or reinforcing mesh is applied to the patched wall. If desired, the façade can be additionally covered.

Inside, all walls are stitched with pyrazolone. Plasterboard sheets are installed on it, and decorative finishing is carried out.
The basement is also insulated from the inside. For this purpose, the walls and the upper part of the floor are also sheathed with pyrazolone, on which a thin layer of mineral wool is laid. If the building is new, then its insulation is enhanced only on the outside using any of the above materials.
Finally
In conclusion, I would like to note that by starting construction from cinder blocks on your own, you can easily build a warm and reliable building, the main thing is not to bypass all professional rules and tricks.
Happy construction!
oblokax.ru
How to build a barn with your own hands at the dacha (step by step) + photo, video

A shed is a necessary structure for a summer house or garden plot. In order to install it, there is no need to use the services of professionals; everything can be done by yourself. In the article we will tell you how to build a barn with your own hands at the dacha from various materials (boards, bricks, frame), we will give step-by-step instructions, as well as photo and video guidance.

A barn, like any other structure, needs a foundation. It serves as a support for the structure and ensures its durability. In the case of a barn, you need a monolithic strip foundation.
- First you need to remove the turf and make a trench around the perimeter of the future building. A layer of gravel is poured into the bottom of the trench. The foundation is poured with concrete.
- The lower trim is made with roofing felt. Then the parts of the strapping need to be attached to the walls of the structure with dowels.
- A waterproofing layer must be made between the bottom trim and the foundation. To do this, you can use bitumen mastic. The wall in the area of the foundation must also be treated.
- The frame stand is attached to the wall of the house.
- Next, the top beam and external racks are attached to the wall.

The entire frame of the shed is made using nails and screws. There is nothing complicated in such work. When the main frame (walls and roof) is assembled, you need to install all the necessary additional posts and supports.
The frame can be made not only from boards, but also from logs, bricks, or a combination.
In the case of a combined structure (brick and log), you first need to lay out the base of brick, and continue working with the logs. The brick is laid out in 4 rows on a concrete slab. Attaching a log or beam to a brick is done with anchor pins. A layer of waterproofing must be installed between the brick and the wood.
If the barn is built from planed boards, then it is better to install them vertically. The horizontal position is more popular, but it does not have the same advantages as the vertical row.
When constructing such a shed, you can fasten the boards together “overlapping” (when one board slightly overlaps the other). Building a barn with your own hands in this way takes about 30 hours of pure working time.

- To install a simple shed, you don’t even need to build a foundation. If something happens, it can be moved later. All that needs to be done is to raise the floor of the structure and the walls above the ground using blocks of wood.
- Having installed the bottom trim and floor boards, you need to thoroughly coat everything with an antiseptic. You can also use waterproofing agents. Before continuing work, you must wait until the composition dries.
- Now you can install the posts and supports for the posts, as well as the beams for the roof. The base for the frame is ready.
- In order to complete the construction, unedged boards will be required. They are stuffed with an overlap, usually horizontally, but also vertically. When covering the last wall, you need to take into account that there will also be a door here. Therefore, it is better to take measurements in advance.
- The roof is covered with roofing felt and nailed down with planks.
- The interior of the shed can be made more durable by lining it with a continuous metal strip around the perimeter.
- The door is installed last. It is not at all necessary to make a door yourself; you can find it among unnecessary things or purchase a used one.


A brick shed is more durable; it resists fire and moisture well. Such a shed will cost more, but will also last longer. If the structure is well insulated, then the temperature inside will always be above zero.

Sand-lime brick is well suited for work; it can withstand dampness well. You can also take used bricks. Boards and roofing felt are used for the roof.

A foundation for a brick building is necessary. A strip structure is also used here, which is preferably reinforced with reinforcement.
The standard dimensions of a brick country shed are 2 by 2.5 meters. Beginners who are interested in how to make a shed with their own hands often ask whether this structure will spoil the view on the site.

A stone building has one big advantage - it is easy to decorate.
And this can be done in several ways. One of them is to camouflage the shed with climbing plants. Another way is decorative decorations, corrugated sheets and siding. However, many will consider the latter too great a luxury for such a building.
Kinds

Sheds, in addition to the fact that they can be built from various materials, can also have a varied structure. For example, to store food in a country house or in a private house, it makes more sense to build a structure adjacent to the kitchen. Such an extension is made in the same way as a conventional building of this type.

The utility block is a shed that is directly adjacent to the kitchen. It is necessary for storing food. This construction is carried out in several stages.
To work you will need:
- boards for cladding;
- frame posts;
- slate or other roofing material;
- roofing slabs;
- concrete and sand.
Progress:
- It is necessary to dig four corner holes 1 meter deep. Racks for the future barn are installed in the holes. The columns are filled with concrete.
- Now we need to make the formwork and also fill it with concrete. As a result, after drying, you will get a single concrete monolith.
- The next stage is the lower and upper trim. The racks must be additionally secured with beams. Using vertical beams you can create a window and a door. The building is covered with boards.
- The roof of the barn, in addition to roofing slabs, is protected by slate.
- All that remains is to install the window and door.

If you have the means, you can buy a utility unit for a turnkey dacha.
Brick sheds are usually built for brick houses, and wooden sheds for wooden ones. Often a barn becomes a temporary house that was used as a temporary place to live during construction.

Barns are usually not given much importance during construction, and in vain. Of course, if the construction is being done for one to two years and is intended solely for storing equipment, then you can make a simple structure from boards. However, for long-term use it is better to make a brick shed, which, by the way, allows you to save money. Savings are achieved through thoroughness. The owner does not have to constantly waste time and money on the construction of fragile wooden structures.
Video
This video will show you a finished functional shed.
If you don’t have time to build a country shed, then you can buy a ready-made garden shed or a change house.
Photo


Scheme


Building a shed with your own hands is not such a difficult task, but you cannot do without such a building on a personal plot, especially if the plot is new and the construction of a house is just being planned. During this time, the barn will become a shelter for craftsmen, a storage for their tools, and later will be a workshop or a good warehouse for firewood and garden utensils. Therefore, you need to start equipping the fenced area with the installation of this utility structure.
Selecting a location
You cannot install a shed anywhere - first you need to carry out zoning, since you need to remember that the building will serve for more than one year and may become a hindrance to other buildings, or spoil the planned landscape design of the area. Therefore, it is necessary to allocate a place for it that will not be suitable for agricultural or decorative plantings, construction of a gazebo, garage, bathhouse, toilet and other buildings. If you install a shed in the far corner of the site, it will not only not interfere with the work process, but will also provide protection from prying eyes.

But if in the future you plan to build a woodshed in it, then you should not move the barn too far from the main building, since in winter it will be difficult to get to it, and firewood should always be at hand.
Having chosen a suitable area for installation, you can proceed to further actions.
Site preparation
The first thing to do after choosing a location is to mark the site. It is usually marked with pegs placed in the corners of the future structure. A string is pulled over the pegs - this will make it easier to control the level of the foundation being built.

The foundation for a shed can be made in different ways, and the choice will depend on what material the structure will be built from. Most often, a barn is built using a frame type, but some owners prefer to build such an outbuilding from brick.
A frame structure is much lighter than a brick one, so you can choose a monolithic, columnar or strip foundation for it, or you can install it on relatively large concrete blocks.
For a brick building, a strip and monolithic version of the foundation is well suited. You can, of course, adapt a columnar one to it by making jumpers between the pillars, but this is quite troublesome. To choose a suitable foundation for your intended structure, you need to know what they are.
Although the most expensive and labor-intensive to install, but it has several advantages over other types of bases.

- It is durable and strong, so even when a wooden structure becomes unusable, a new one can be built on the old foundation.
- Having arranged such a foundation, the owner receives not only a foundation for the walls, but also a finished barn floor.
- If concrete is strengthened with topping, then the floor will not require additional flooring. But if desired, you can put linoleum or tiles on it, i.e. the concrete base gives you complete freedom to choose its decoration.
The construction of such a foundation occurs as follows:
- A not too deep pit is dug on the marked area, since the barn is a light non-residential premises, does not require insulation basics. Therefore, its total thickness can be 300 ÷ 350 mm, i.e. its underground part will be 200 ÷-250 mm, and the above-ground part 100 ÷ 150. Even if the walls are built of brick, half a brick thick (and more is usually not required for a barn), this height of the base will be quite enough for it.
- In the prepared area, you need to loosen and remove the soil to a depth of 400 ÷ 550 mm.
- Then at the bottom of the pit you need to place a 100 mm sand cushion, which will waterproof foundation sn izu. The sand must be thoroughly compacted by pouring water.
- Crushed stone is laid on the sand in the same layer. It is also compacted to the maximum. Crushed stone will make the base more durable and will not allow it to sag.
- Formwork is installed around the pit, 100 ÷ 150 mm high above the soil level.
- Next, a coarse concrete solution is mixed, which is laid on crushed stone in a layer 7-10 cm thick and evenly distributed throughout the pit - this will be a rough screed.
- Then a reinforcing grid with cells 60 ÷ 100 mm is immediately laid. It can be fixed with wire staples by inserting them in several places into the rough screed.
- If the shed floor area is large enough, then after the rough screed has set, you need to install beacons flush with the height of the formwork. They will be necessary for the convenience of leveling the surface.
- Next, a thinner cement-sand mortar, made in proportions 1:3, is poured and leveled using the rule along the guides of the beacons.
- The structure should be given several hours to set, and then covered on top with plastic film to ensure even hardening.
- If it is planned to strengthen the surface with topping, then this process is carried out on a surface that has just set, but is still wet.
Strip foundation
It will require less costs, but having installed it, you will also have to make a floor from boards, plywood, or also pour a screed, but a thinner one, since this type of foundation is intended only for the base of wall structures. It can be made both under brick walls and under wooden frames.

- For a strip foundation, a trench is dug along the perimeter of the marked area, approximately 100 ÷ 120 mm wide than the thickness of the future walls. The depth of the trench, just like that of a monolithic foundation, should be 400 ÷ 550 mm.
- Laying the sand cushion and strengthening it with crushed stone is also done in the same way as when installing a monolith.
- Next, the trench is fenced from the outside and inside with formwork, which should be 200 ÷ 350 mm high.
- A welded structure made of reinforcement is installed on the crushed stone layer; it is desirable that it be 50 ÷ 70 mm high below the top edge of the formwork.
- Next, the concrete mixture is poured into it and tapped with a bayonet shovel to remove air, which can form cavities inside the concrete, which will weaken the structure.
- The top of the poured foundation is leveled along the top edge of the formwork, and the structure is left to harden.
- When the concrete hardens, the formwork is removed from the base.
- Inside the foundation, it is best to fill in fine expanded clay; it will insulate and waterproof the floor, and will also prevent rodents from getting in, since they simply do not live in it.
Columnar foundation

Used for the construction of frame structures. Install it as follows:
- The area allocated for the barn is marked specifically for a columnar foundation, since the supports must stand at a certain distance from each other, usually from one to one and a half meters.
- According to the markings, the required number of holes are dug with a depth of 350 ÷ 450 mm, width along the top approximately 400 × 400 mm.
- A layer of 100 mm of sand and the same amount of crushed stone is poured onto the bottom of the dug holes. Each layer is well compacted.
- The next step is to lay waterproofing from polyethylene film, it should line the hole and come out to the surface, to a height future columns, plus 70 ÷ 100 mm.

- Formwork is installed in each hole - a box without a bottom. The waterproofing film is spread out inside it and secured with staples along its top. The shed structure will be raised from the ground to the height of the box.
- A welded or wire-bound reinforcement structure is installed in each formwork box.
- After this, the concrete solution is poured. From above, along the formwork, it is leveled and left to harden.
- While the columns are hardening, if desired, you can carry out the following work, which will reduce the penetration of moisture into the barn room. To do this, 50–70 mm of the fertile layer is removed throughout the entire site, around the columns, and in its place sand is poured and compacted, and fine crushed stone is poured on top of it.
- After the concrete has hardened, the formwork is removed from the posts, and then it would be advisable to cover them with a waterproofing material, for example, bitumen mastic or liquid rubber.
Prices for bitumen mastic
Bitumen mastic
Video: barn on a columnar foundation
Concrete block foundation
This one is only suitable for frame construction, and its installation is the simplest of all those described above.
- First, the marked area is cleared, and the fertile soil layer is removed from it by 50 ÷ 70 mm.
- Instead of the extracted soil, a layer of sand is poured, watered and compacted.
- Placed on top of it a layer of fine crushed stone, which also needs to be compacted.
- Next, concrete blocks of the required height are laid on the prepared site along the perimeter. The distance between them should be no more than one and a half meters. The blocks must be leveled using a level.
After the foundation of any type is ready, waterproofing from roofing felt in 2-3 layers must be laid on its surface.
Video: building a shed on a base of concrete blocks
Installation of frame, roofing and wall covering

Since the most common The method of building a shed is a frame structure, it is worth considering this. This design is popular because its installation is quick and quite simple. The main thing is to keep under constant control the evenness of the installed and laid bars. A properly assembled and processed structure will reliably last 10 ÷ 15 years. The work is being carried out in stages.


- The support beams are fastened together at the corners using metal corners. Next, they need to be secured to the foundation with a through fastener or a metal corner.
- The construction of the wall frame can be carried out in two ways:
- each of the walls, taking into account windows and doors, is assembled in a horizontal position and installed vertically in finished form. But in this case you cannot do without assistants;

- in the second option, each of the bars is installed separately according to a pre-developed drawing, and then they are fastened together at the installation site. This method of connecting frame elements is much more complicated.
- The entire structure must be rigid, therefore, if necessary, perpendicular jumpers are installed in the frames of the walls, floor and ceiling.

- All parts are connected to each other with a quarter or half-wood sample, and are fastened with special metal corners.

It must be remembered that the front wall of the barn must be 200 ÷ 300 mm higher than the back wall in order for the roof to have a slope.

- After erecting the frame of the walls and connecting them together, the roof sheathing is installed.
- The sheathing bars are attached at a certain distance - it will depend on what material is chosen for the roof. For example, plywood sheets will have to be laid under a soft roof or tiles. But, basically, corrugated sheeting, metal tiles or slate are used to cover outbuildings. The sheets of these materials are wide enough, so they are attached directly to the roof sheathing. In this case, the step of laying parallel bars in a horizontal orientation (perpendicular to the direction of the slope) should be about 500 — 600 mm.

- When the frame structure is covered with a roof, you can begin covering the floor and walls. The floorboards (if a wooden floor is planned) are laid on the joists and attached to them with self-tapping screws.
- Walls can be sheathed in two ways: only from the outside or both from the outside and from the inside.
1. If you want the building to look neat and fit well into the landscape design, it is sheathed on top with modern vinyl clapboard. Inside, plywood is used for cladding.
Prices for lining, imitation timber, block house
Lining, imitation timber, block house

If the barn will serve as a workshop in which you plan to work until the coldest weather, the walls of the building can be additionally insulated with mineral wool. To do this, insulation mats are placed in the frame of the wall sheathing between the clapboard and plywood.
2. If it was not planned to sheath the inside of the shed, then the outside can be decorated with denser plywood or thick enough boards with grooves so that there are no gaps in the sheathing. However, cladding with boards with the upper elements overlapping the lower ones (like shingles) also looks quite original.
 A barn sheathed with boards using the shingle principle
 - When the building is sheathed, window frames are installed in it, if windows are provided, a door frame and the door itself.
- If the barn was installed on a columnar foundation or concrete slabs, the lower through part of the structure (subfloor) must also be sheathed. The sheathing is secured to poles or concrete slabs. Flat slate, ordinary boards or vinyl lining can be used as cladding.
- A gutter is fixed to the back of the roof to drain rainwater, otherwise water may leak under the shed, and this is undesirable for any building.
- Then you need to look through the entire room from the inside; if cracks are found somewhere, they are sealed with polyurethane foam.
- If the barn is raised on a high foundation, then it is necessary to make a staircase of several steps. It can be made of wood or made of brick and then plastered with cement mortar.
Video: erecting a wooden shed on a solid foundation
There are many different options for building a shed, and they use different materials. But if the building is being built for more than one year, and you want it to serve for a long time, you need to choose high-quality materials for the work, and also approach each stage of the process with care.
5 types of timber for construction
| Photo | Name | Rating | Price | |
|---|---|---|---|---|
| #1 |
|
⭐ 100 / 100 |
||
| #2 |
|
Solid profiled timber |
⭐ 99 / 100 |
|
| #3 |
|
Glued laminated timber |
⭐ 98 / 100 |
|
| #4 |
|
Non-profiled laminated timber |
⭐ 97 / 100 |
|
| #5 |
|
Thermobeam |
⭐ 96 / 100 |
|


This type of timber has the simplest manufacturing technology. To obtain it, four sides of the edge of the log are cut off. The most common cross-section of such timber is 150x150 mm or 150x200 mm. The production of solid timber does not require complex woodworking equipment, therefore, in terms of the number of offers on the market, this timber occupies a leading position.
- availability. Since the process of manufacturing solid timber is not complicated, it can be purchased almost anywhere, with minimal waiting time from order to delivery of products;
- the low cost of this material is due to the simplicity of its manufacture and the absence of costs for drying wood;
- environmental friendliness. This timber is able to regulate the level of humidity in the house, absorbing excess moisture that accumulates in the premises during human activity.
- complexity of laying a log frame;
- increase in construction time;
- cracking of non-profiled timber;
- significant costs for finishing and thermal insulation work;
- susceptibility to fungus.
Solid profiled timber
Profiled timber can be sold dry or naturally moist. It is best to use dry profiled timber for building a house, as it is less susceptible to shrinkage and deformation. Many companies produce ready-made house kits from profiled timber, which allows construction to be carried out in a very short time.